How to Create an AI Insurance Agent Product in Openkoda PAS
Describe an AI agent as insurable attributes - pinned model version, autonomy, spending authority, guardrails - then read the cover, rules and rating built on them.
Read one in-force home policy end to end - cover, billing, claims, documents - then put your own Email documents to client button on its toolbar.

A customer rings about their home policy. To answer them, someone has to know what the policy covers, what it costs, whether anything is owed, whether a claim is running, and what has already been sent out. In a lot of insurers that is four systems and a copied reference number, and the caller hears typing.
A policy 360 view is the answer to that: one page per policy, carrying everything the record knows and everything a person is likely to do next.
Three things are worth separating before you read one, because they are usually spoken of as if they were the same thing:
Keeping the third one separate is the part people miss. If the actions on a record are configuration rather than code, then “we always email the documents when a customer asks” stops being a feature request and becomes an afternoon’s work by the person who wants it.
The whole thing is on video as well, if you would rather watch someone do it than read the steps. It covers the same fourteen steps in one pass; the written version below is the one to keep open in another window while you build your own.
The walkthrough below reads one in-force home policy end to end, then extends the page: a new Email documents to client action goes onto the toolbar, backed by a three-step workflow, and gets clicked. The first seven steps are for anyone who answers the phone; the last seven are for whoever configures the product.
Before you start, you will need: a product with at least one in-force policy on it, an email template and a document template on that product, and an account that can reach both the policy list and the Product Builder.
Open Policies. The list is the book of business - every policy, with its insured, its product, its status, the term, the premium, the outstanding balance and whether a claim is open.
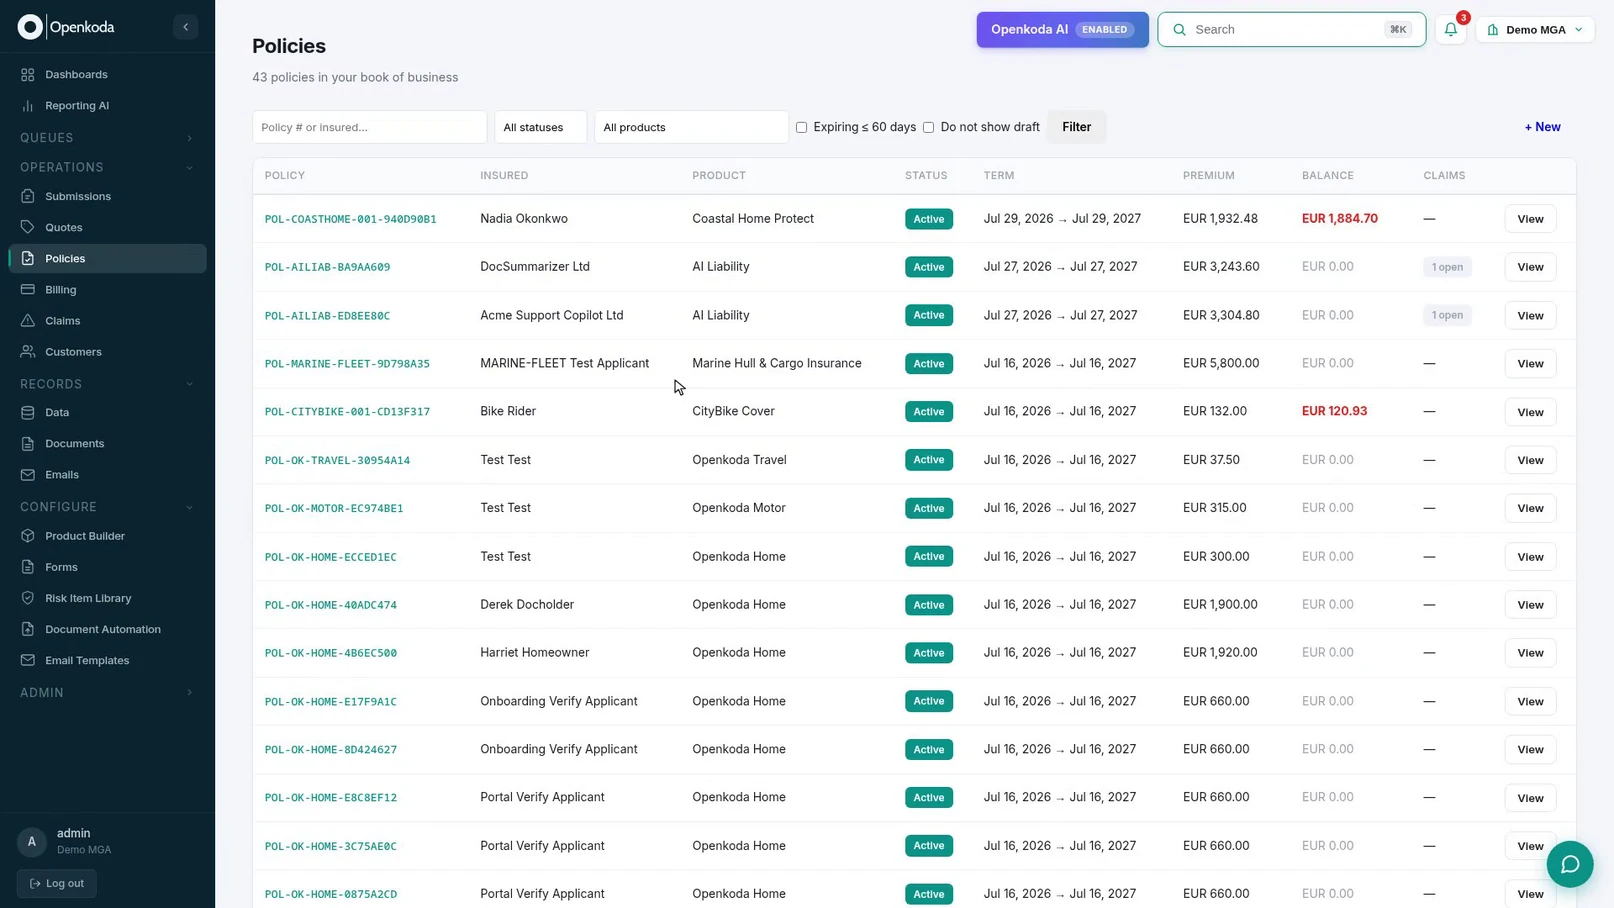
Search by the caller’s name rather than by the policy number. It is what the person on the phone actually gives you, and it is one field instead of sixteen characters of reference read out letter by letter.

Open the row. Everything from here to Step 7 is one page.
The KPI band answers the questions that get asked first, before anyone scrolls: the annual premium, the balance due, how many claims are open, and how many days until renewal.

Two of those four are alarms rather than facts. A balance due that is not zero and a claim count that is not zero both mean the conversation is about to be longer, and it is worth knowing that in the first second rather than the first minute.
Underneath sit the coverages, each with its limits and its deductible, and below them the property the policy is written on.
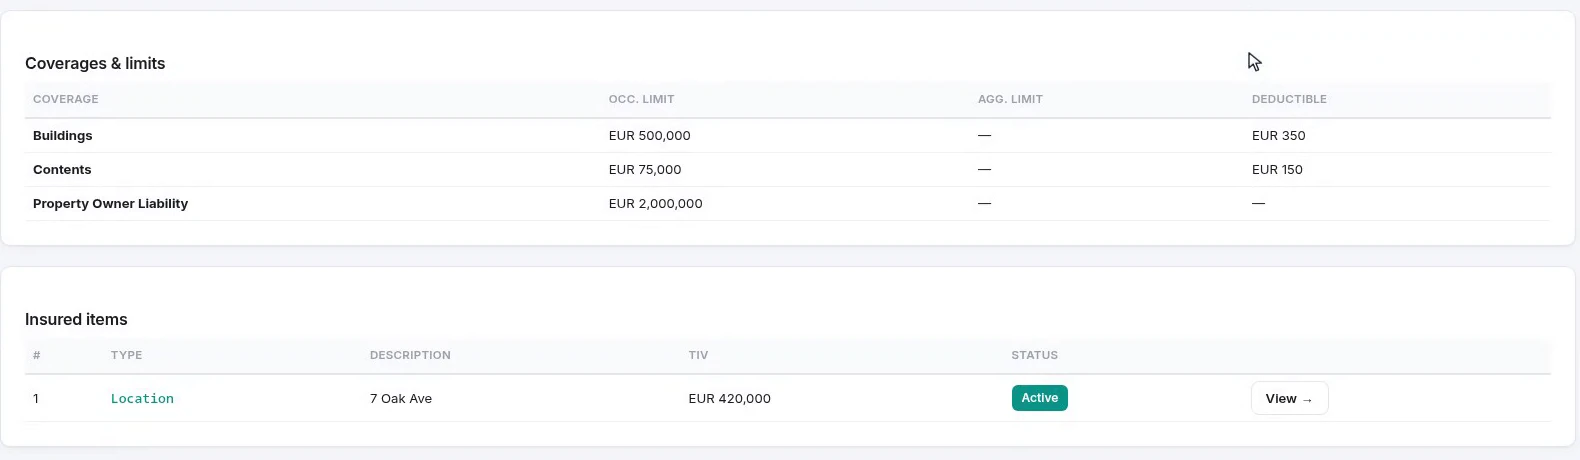
This is the part a customer disputes, so read it as they would: a limit per coverage, a deductible per coverage, and an address that had better match the one they are standing in.
Then billing: the account, the plan, the status, every instalment with what has been paid and what is outstanding, and the payments that have already cleared.
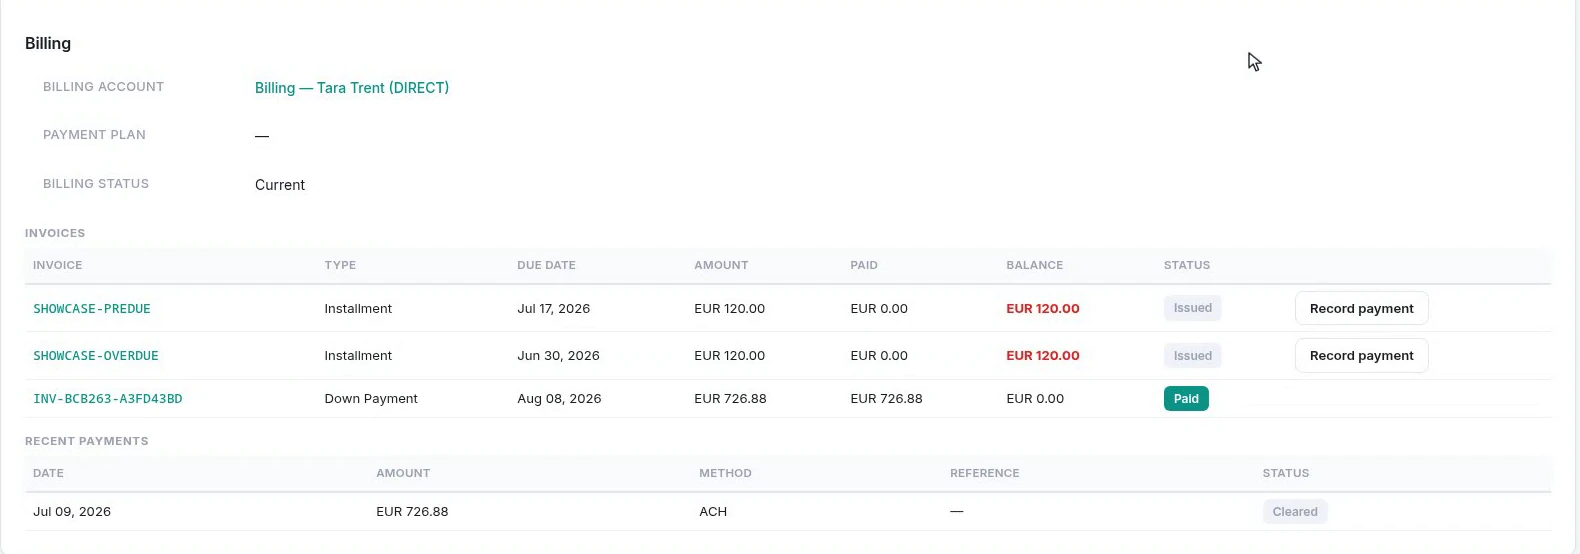
Note the button on each unpaid row. A customer who rings about a document very often ends the call by paying something, and the difference between recording that here and recording it in a separate insurance billing system is the difference between a call that ends and a call that gets called back.
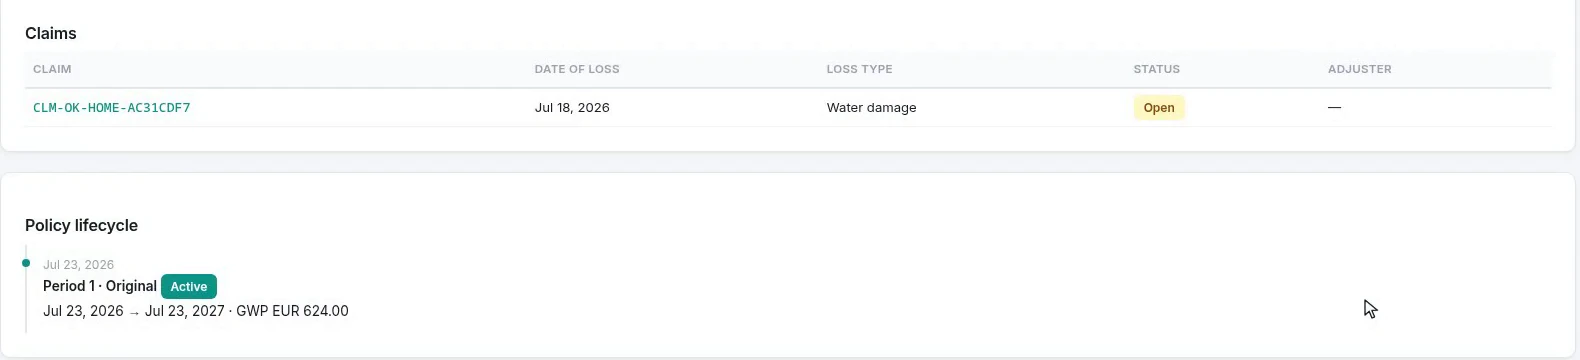
Claims against the policy sit in the same scroll - no second system, no reference number to carry across. Under them, the policy’s own history: each period, its dates and its written premium.
Further down, every document generated against this record - certificates, declarations pages - each with its type, whether the customer may see it, and when it was produced. Beneath them, every email the system has sent about this policy.
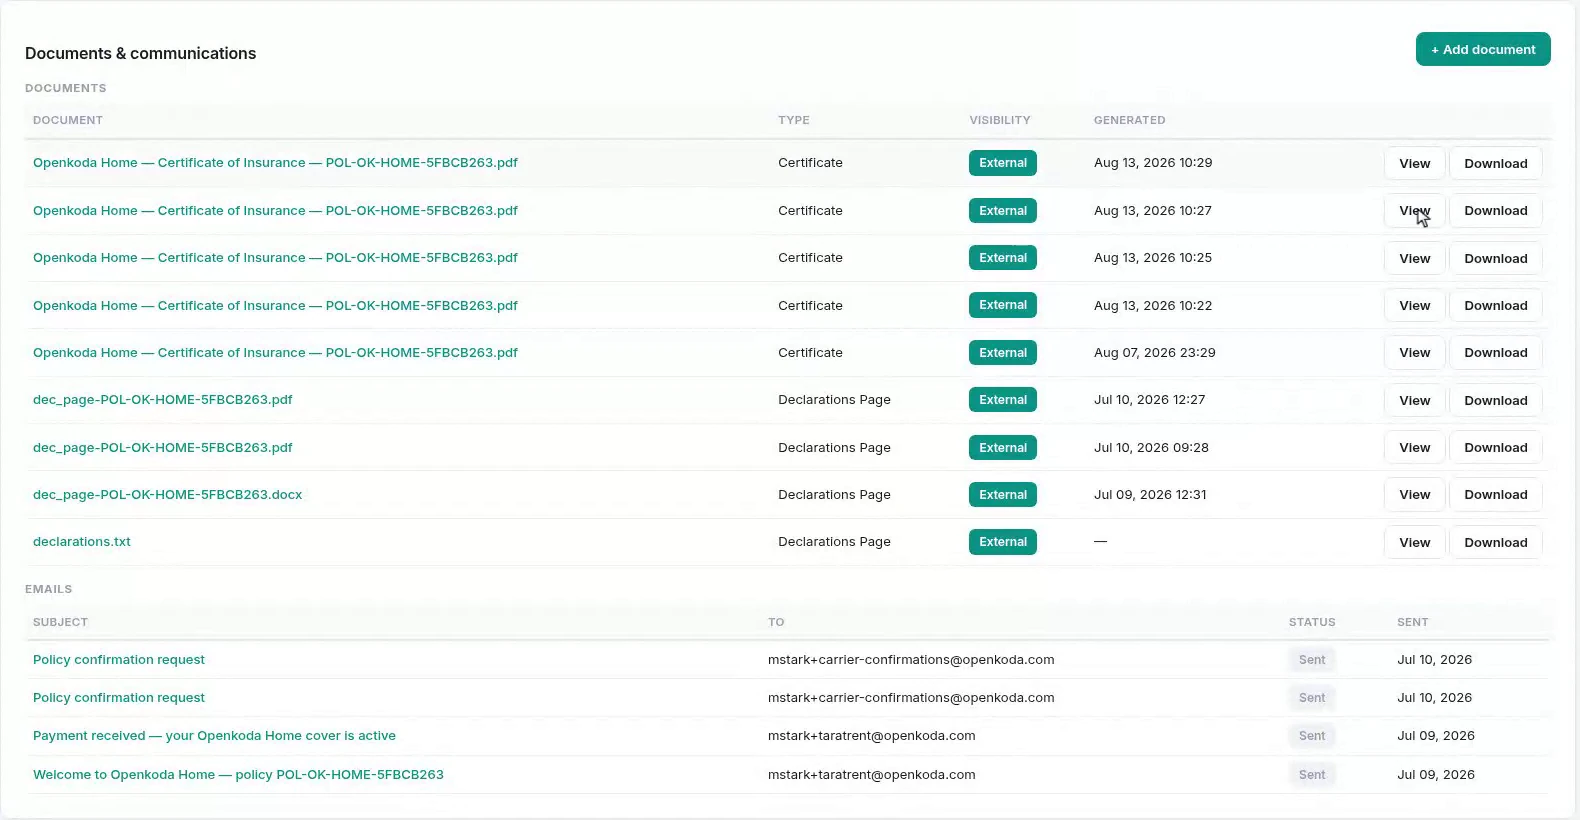
Anything that arrives by other means - a signed form, a photograph, a surveyor’s report - is filed onto the policy from the same panel, with its type and its visibility set as it goes on.
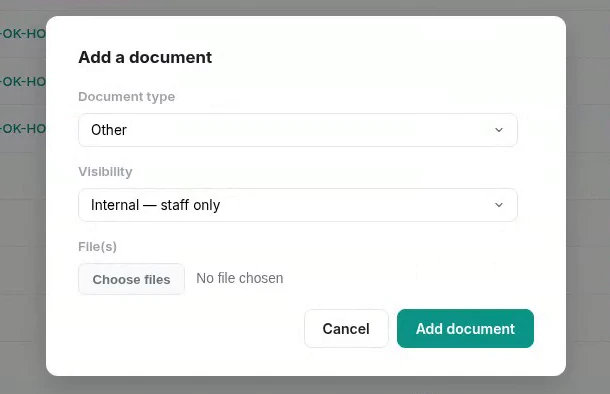
Visibility is the field to be deliberate about: it is what decides whether the customer sees the file in their own portal, and it is easier to set correctly now than to explain later.
Back at the top, the toolbar: edit, endorse, cancel, renew, file a claim, record a payment, raise a submission or a quote.

Look at the last button. Request carrier confirmation is not a standard action of a policy administration system - it is one this product’s own team added, and it sits on the bar looking exactly like the ones that shipped. That is the whole of the second half of this article, already done once.
Say the team wants one more: email the policy documents to the client, on demand. Open the product in the Product Builder and go to its Workflows tab. The actions and the automations live together here - the lifecycle flow, the collections run, the carrier confirmation from Step 7. Most of what sits on this tab arrived with the product, which can itself be configured from a requirements document by the AI Product Builder.
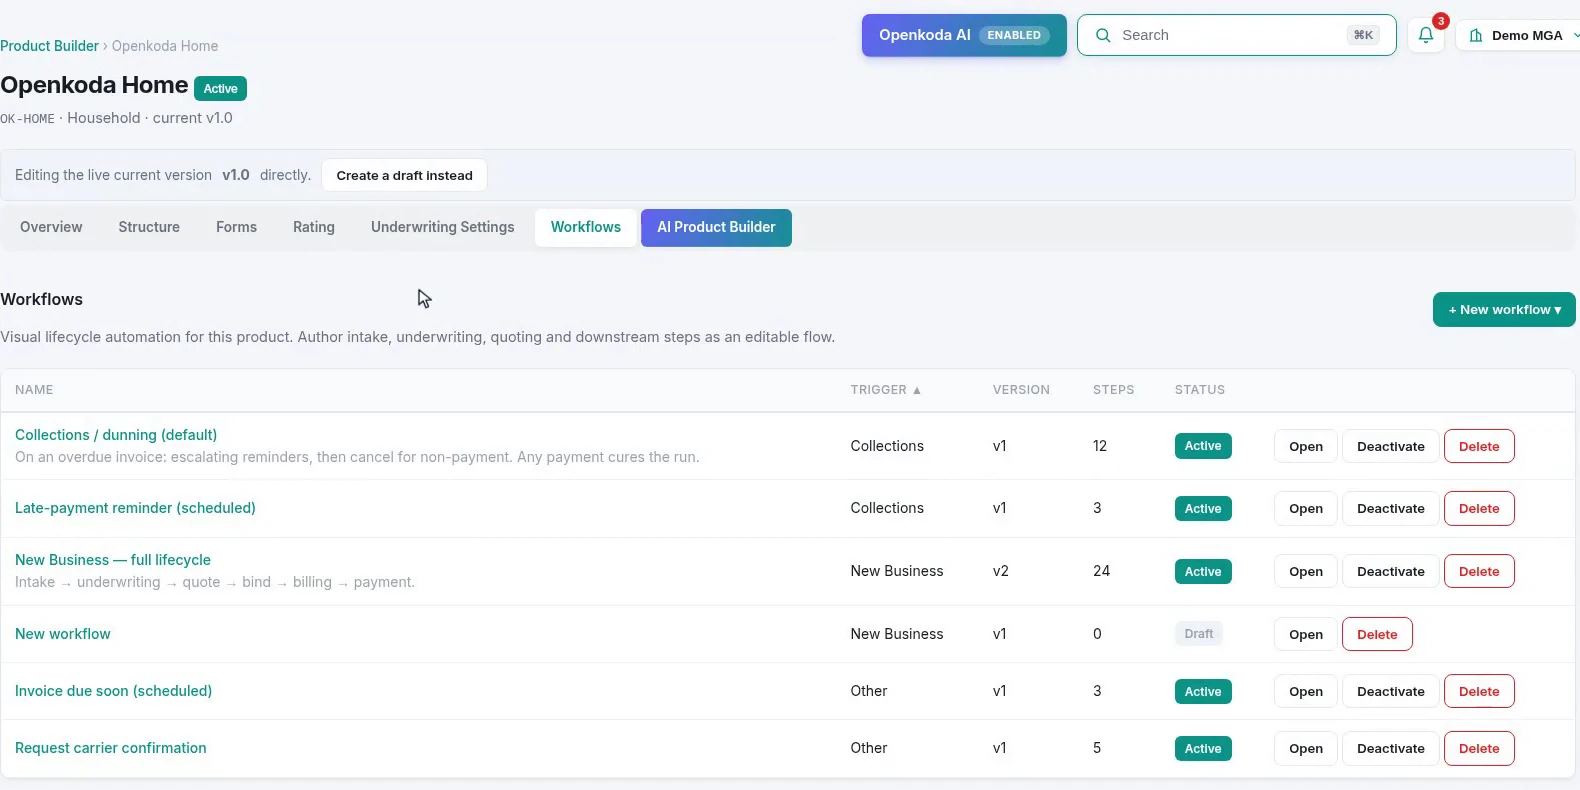
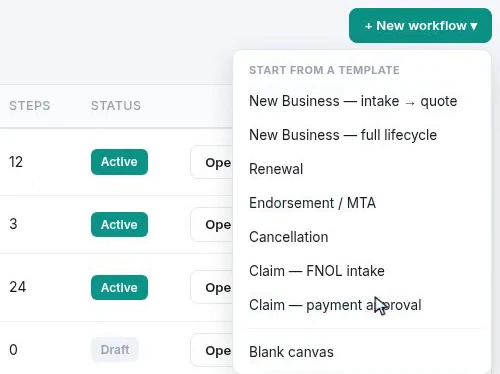
New workflow offers the usual lifecycle templates and a blank canvas. An action of your own starts blank.
Name it for what it does, not for how it works: the name is what the next person sees in this list when they wonder where the button came from.
An action needs three things: something that starts it, something it does, and an end. Drag them out of the palette - Button on a case, Send message, End.
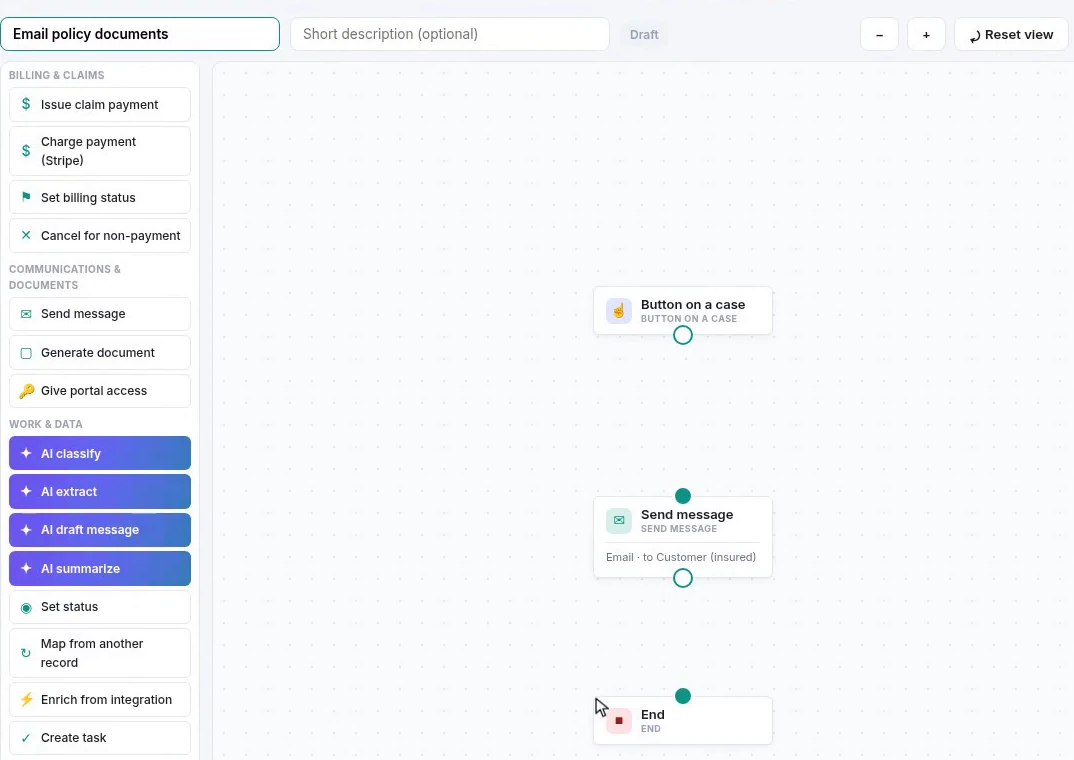
The palette is worth a moment on its own. Everything an action can do is in it - issue a claim payment, charge a card, generate a document, give portal access, create a task, wait, branch - and none of it is written in a language. What you cannot express here, you cannot express by typing either, which is a fair trade for never editing code to change a button.
Select the trigger. Two fields matter: the record type the button belongs on - Policy - and the label operators will read.
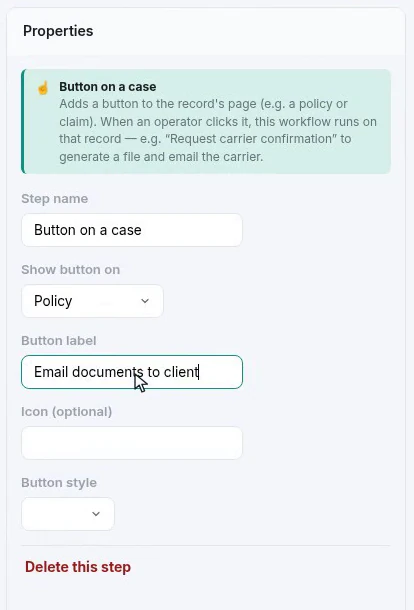
Write the label as an instruction to the person clicking it, not as a description of the mechanism. Email documents to client tells an operator what will happen; Run document workflow tells them what you built.
Select the message step. The channel is email, the template is the product’s own, and the recipient is the customer rather than a hard-coded address - which is what makes the same action correct on every policy of this product.
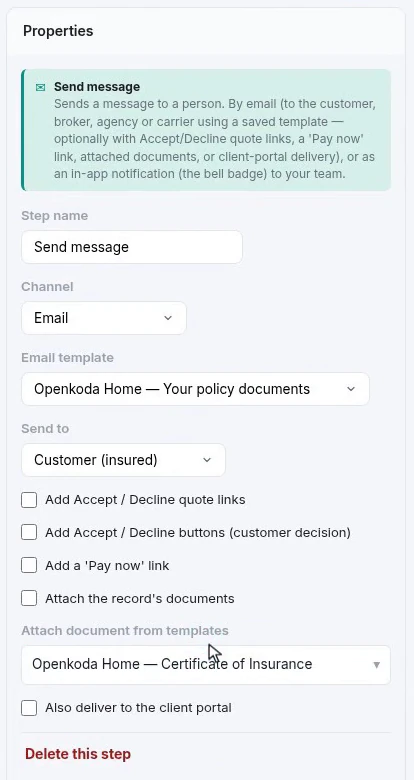
Attach document from templates is the line that does the real work. It does not attach a file sitting somewhere; it renders that document template against whichever policy the button was pressed on, at the moment it is pressed, and attaches the result. The customer gets a certificate with their own numbers in it, and a copy is filed on the record. Building the template behind it is its own job, covered in creating insurance policy documents with customizable templates.
Join the three steps in a line, save, and activate.
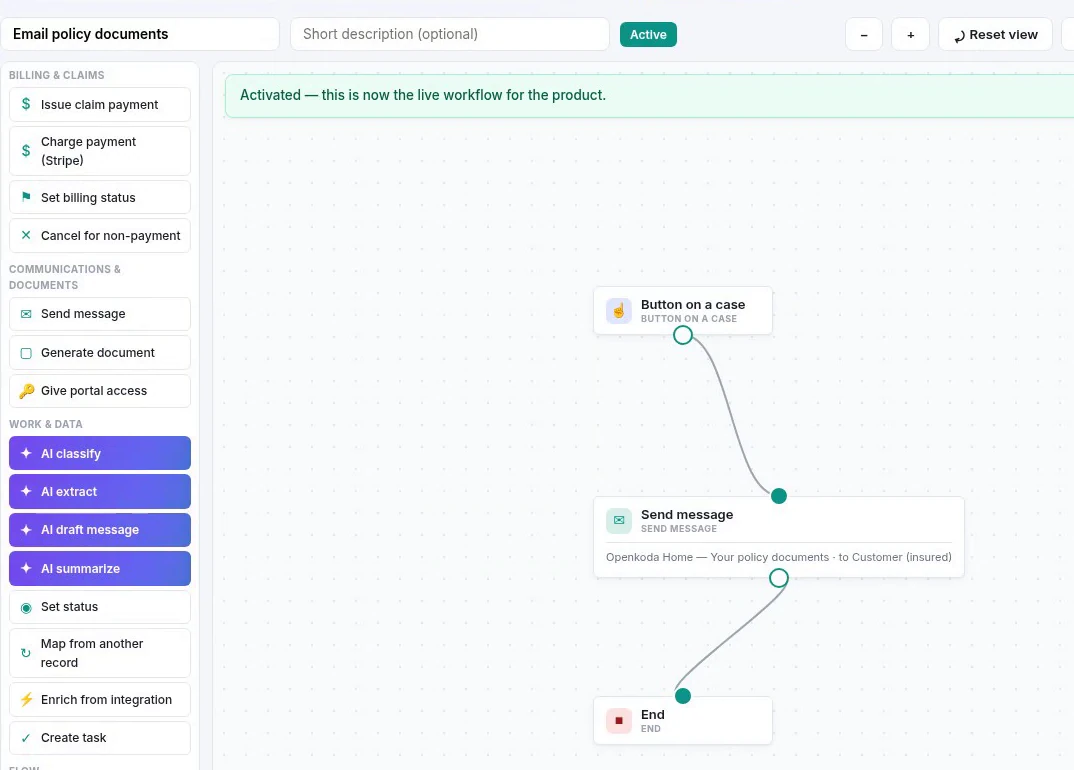
Activation is the moment the button exists. Until then the workflow is a draft that no operator can see; after it, everyone working on this product has the action, with no release to schedule and nothing to restart.
Go back to any policy on that product. The toolbar now carries one more button, sitting among the actions that shipped with the system.

One press runs the whole chain, and the answer comes back beside the button rather than in a notification somewhere else.

A tick is a claim, not evidence. The Emails log is the evidence: the message sits at the top, addressed to the insured, filed against this policy, with an attachment on it.
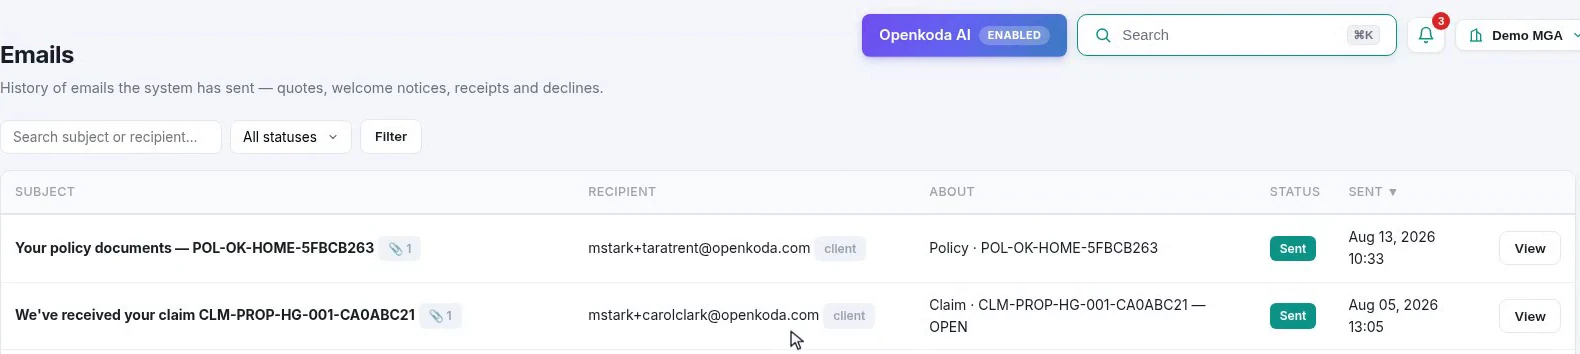
Open it and check the two things that are actually worth checking: that the attachment is the document you meant, and that the subject and body came out with the policy’s own values in them rather than a placeholder that never got substituted.
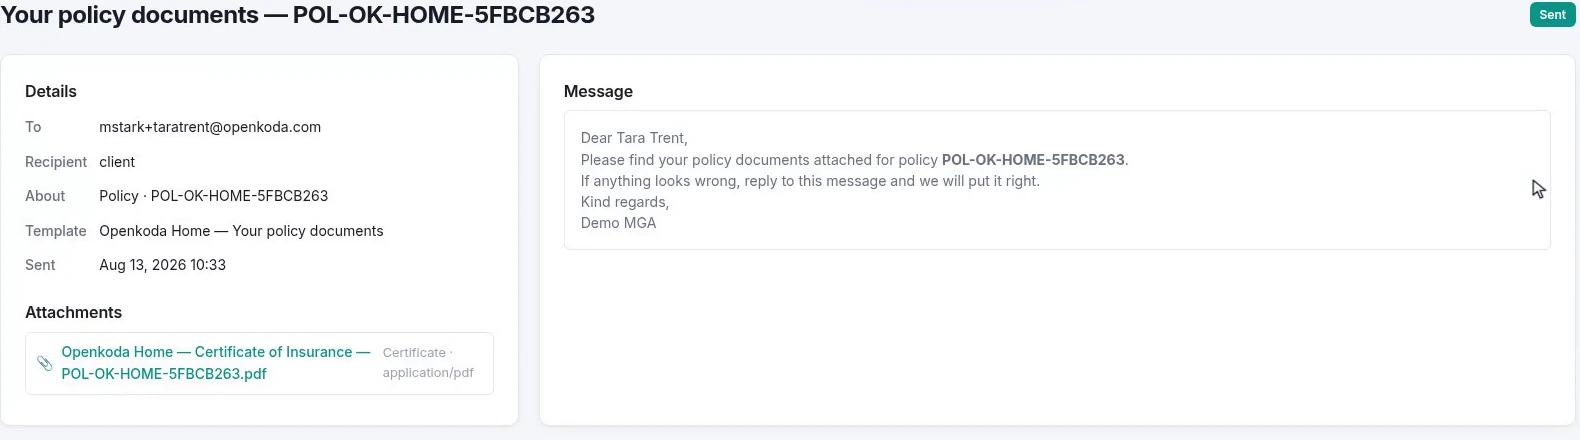
The same file is now on the policy’s own document list, in the panel from Step 6 - so the next person to open the record can see what this customer was sent, and when.
A policy 360 view earns its name in the first minute of a phone call: the numbers at the top, the cover, the money, the claim and the paperwork in one scroll, with no second system to open.
But the part worth taking away is the toolbar. When the actions on a record are configuration rather than code, the distance between “we do this by hand every week” and “there is a button for it” is three steps on a canvas and an afternoon, and the person who noticed the problem is the person who can fix it.

Describe an AI agent as insurable attributes - pinned model version, autonomy, spending authority, guardrails - then read the cover, rules and rating built on them.
Hand a Word requirements document to the AI Product Builder, read the proposal before anything changes, then check the risk item, rating, rules and workflow it wrote.
Revise a live policy schedule in twelve steps: write the wording in Word, map the placeholders, activate the version, and let a workflow send the PDF.
Book a live, personalized demo with our product team - tell us your use case and see the platform work with your data. No commitment.