How to Create an AI Insurance Agent Product in Openkoda PAS
Describe an AI agent as insurable attributes - pinned model version, autonomy, spending authority, guardrails - then read the cover, rules and rating built on them.
Revise a live policy schedule in twelve steps: write the wording in Word, map the placeholders, activate the version, and let a workflow send the PDF.

Every policy an insurer issues comes with paper behind it: a schedule that says who is covered and for how much, a certificate, a declarations page, a renewal notice. Document automation is the part of a policy administration system that produces those files, filled in from the record, in the insurer’s own wording, without anyone retyping a policy number.
The idea is simple enough to state in one line.
The wording lives in a Word file. The data lives on the record. A document binds the two together, and a workflow decides when the finished file is produced and who receives it.
Three terms are worth separating before you start, because most of the confusion about document automation comes from collapsing them:
{##policy_number##} becomes POL-MOTOR-PRIVATE-BBBE7CBE when the document is generated.Keeping the document separate from its versions is what makes the wording changeable. Workflows, portals and customer emails all point at the document; swapping the Word file behind it changes what every one of them sends, with no workflow to edit and nothing to redeploy.
The whole thing is also on video, if you would rather watch someone do it than read the steps. It runs just under four minutes and covers the same twelve steps; the written version below has the detail you will want open in another window while you work.
The walkthrough below revises a live document, the policy schedule of a Private Motor product, by putting a new 2026 wording behind it. Then it produces a real PDF against a real policy and follows the file out to the customer. The same twelve steps apply to a certificate, a quote illustration or a renewal notice.
Before you start, you will need: a product with at least one policy on it, a Word file with your wording in it, and an account that can reach Document Automation and the Product Builder.
Open Document Automation. The library lists every document the organization produces, and each row already answers the questions people usually ask in a meeting: which product it belongs to, which record it is produced from, what type of document it is, and how many Word versions sit behind it.
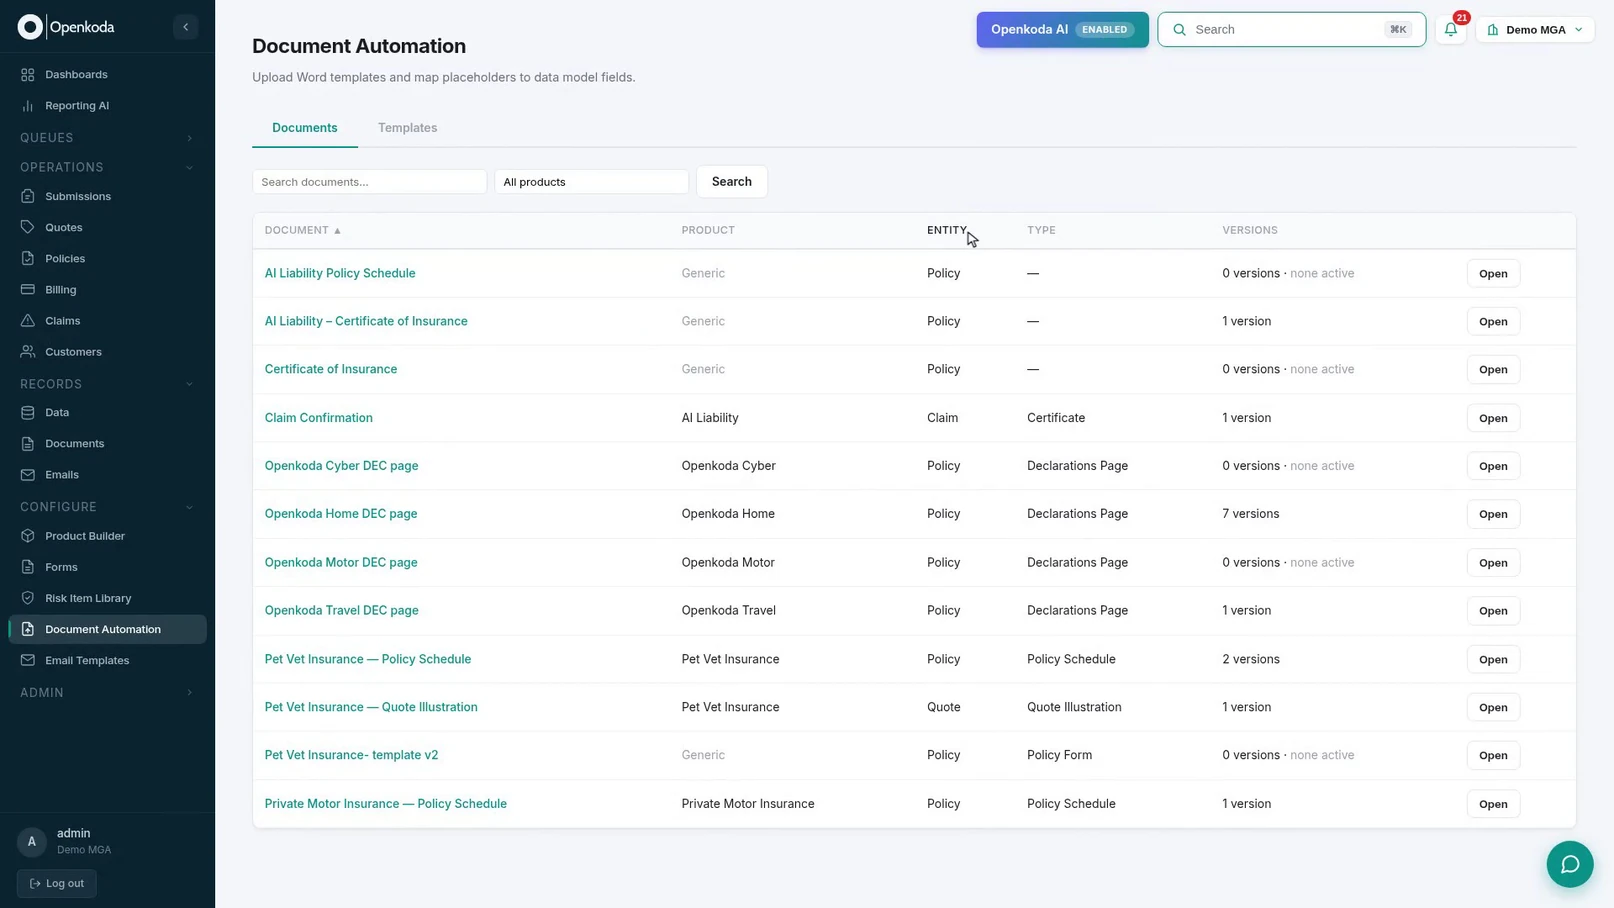
Open the one you are revising. In this walkthrough that is Private Motor Insurance - Policy Schedule.
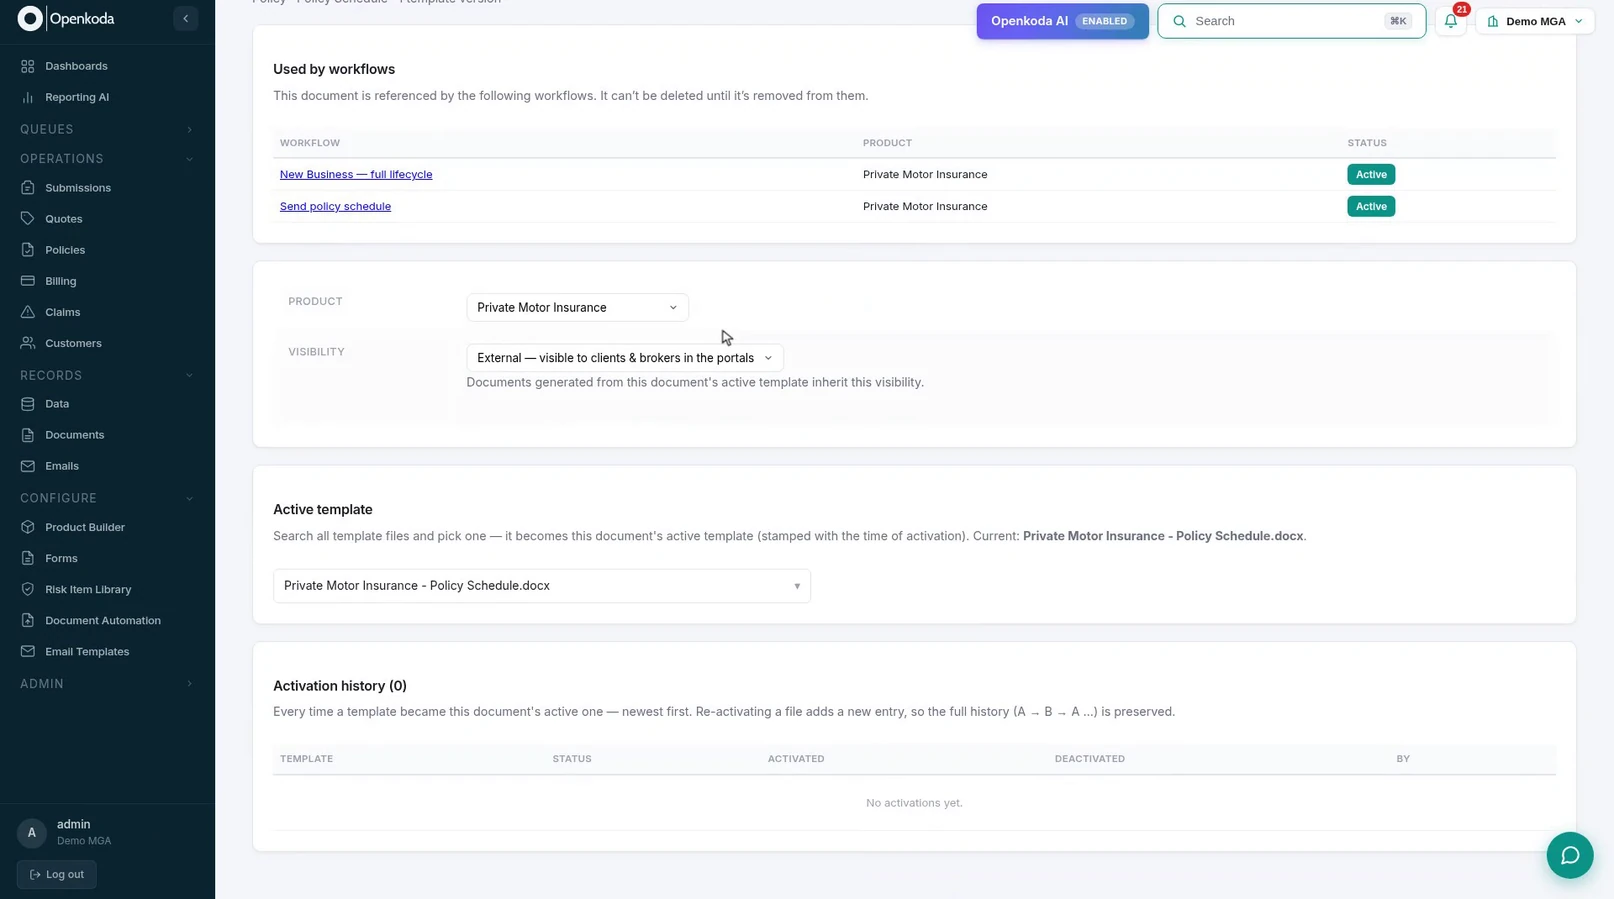
Before changing anything, read the page. Used by workflows names every workflow that sends this document, here a full new-business lifecycle and a standalone Send policy schedule. They point at the document, not at a file, which is exactly why a version swap reaches all of them at once.
Visibility is set here, once: External means the generated file appears in the client and broker portals; Internal keeps it to staff. Underneath sit the Word versions, with one marked active, and an activation history that is still empty on a document nobody has revised yet.
The template is an ordinary .docx. Write it in Word, style it however your brand demands, and put a placeholder everywhere the record’s own data belongs, using {##field_name##} syntax.
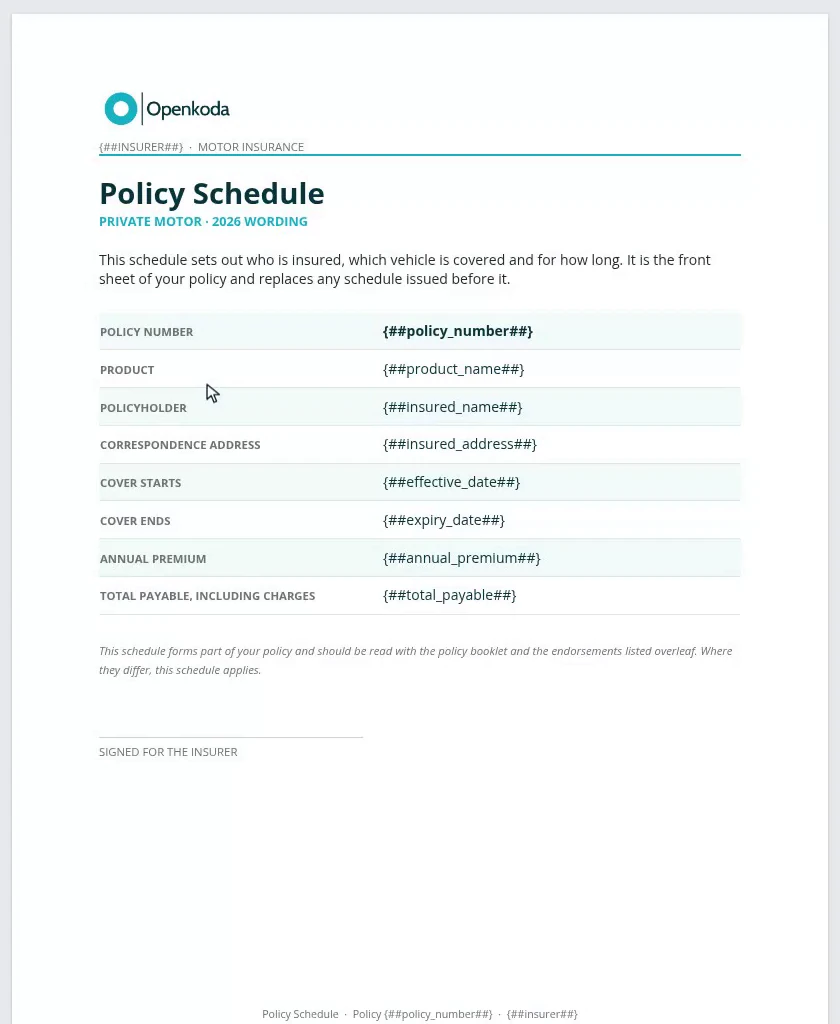
{##policy_number##}, {##insured_name##}, {##annual_premium##} - so nothing is ever typed twice.Placeholders work anywhere text does: paragraphs, table cells, headers and footers. That matters on page two, where the risk data lives - registration, make and model, engine size, declared value, cover type - and in the footer, which usually repeats the policy number and the insurer’s name on every page.
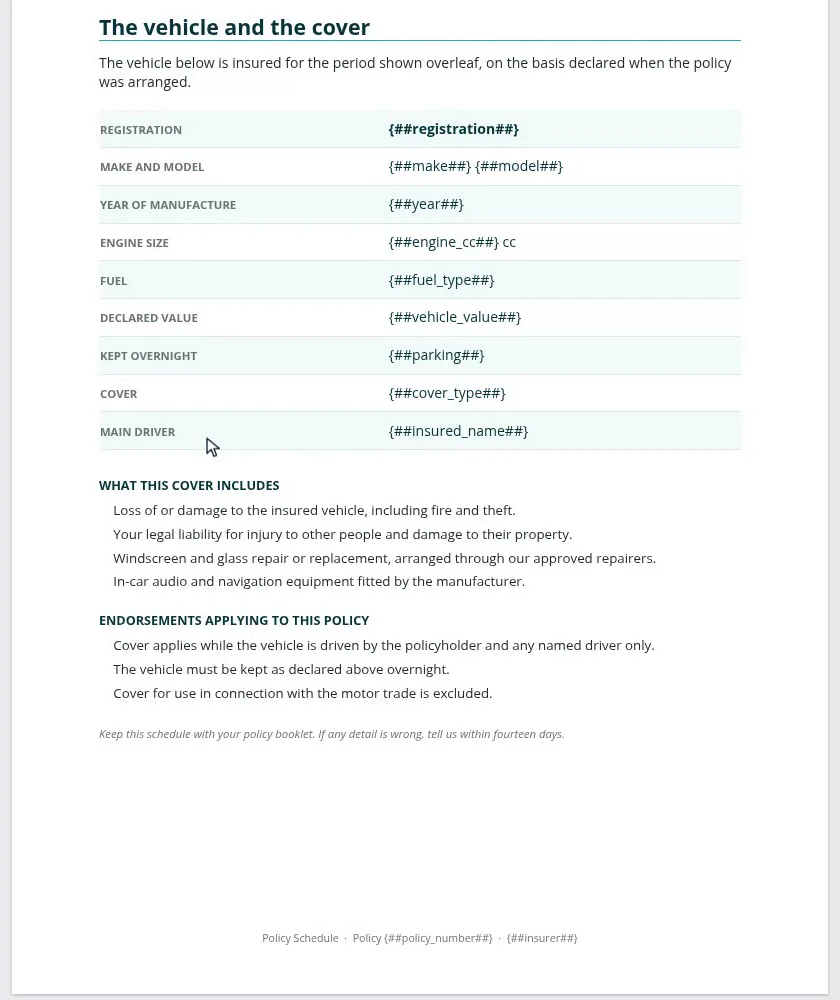
Name placeholders the way a person would name the field. That is not cosmetic. It is what lets the next step bind them for you.
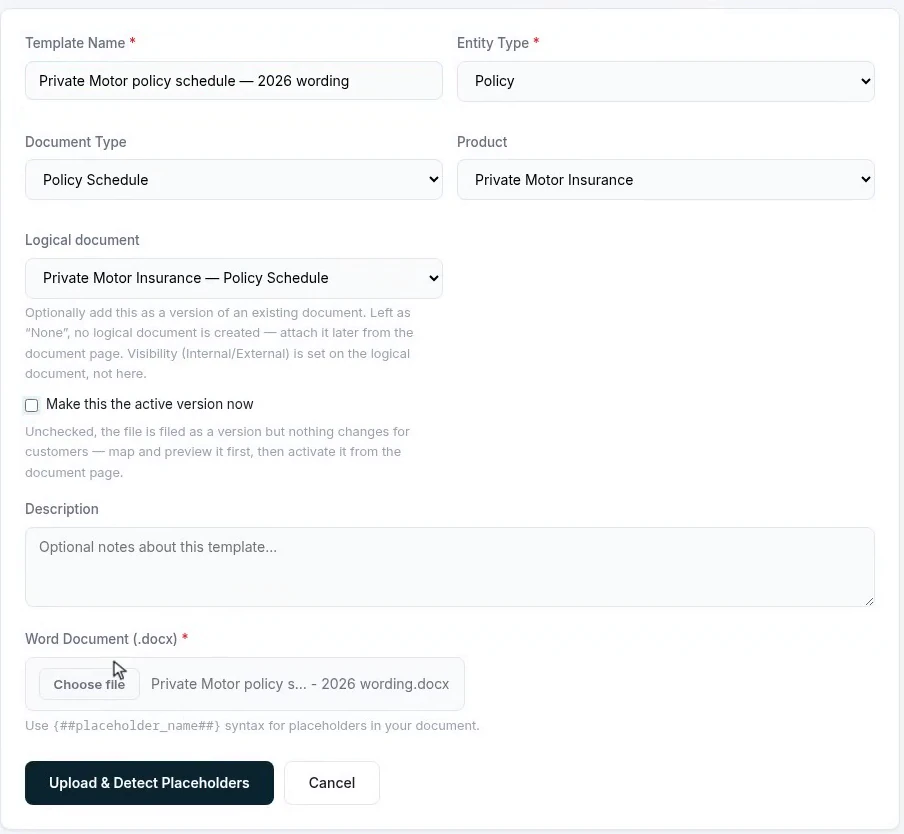
Upload the Word file as a new version of the existing document rather than as a loose template. The form asks what record it is produced from (Policy), what kind of document it is (Policy Schedule), which product it belongs to, and, the field that does the real work, which logical document it is a version of.
Leave “Make this the active version now” unchecked. Filing the version without making it live is what turns the next few steps into a safe review: check the placeholders, look at a preview, and switch only when you are satisfied. Then choose the file and select Upload & Detect Placeholders.
Starting from nothing? The same form offers Draft with AI: describe the document you want and it designs a first draft, placeholders included, which you can preview before saving it as a template. The product the document belongs to can be built the same way, with the AI Product Builder.
The upload reads the file and reports what it found, here eighteen placeholders across the paragraphs, the tables and the footer. Then it does the tedious part for you: each one is matched to a field on the policy. Page-one names are recognized by their common aliases; page-two names are matched against the product’s own risk fields.
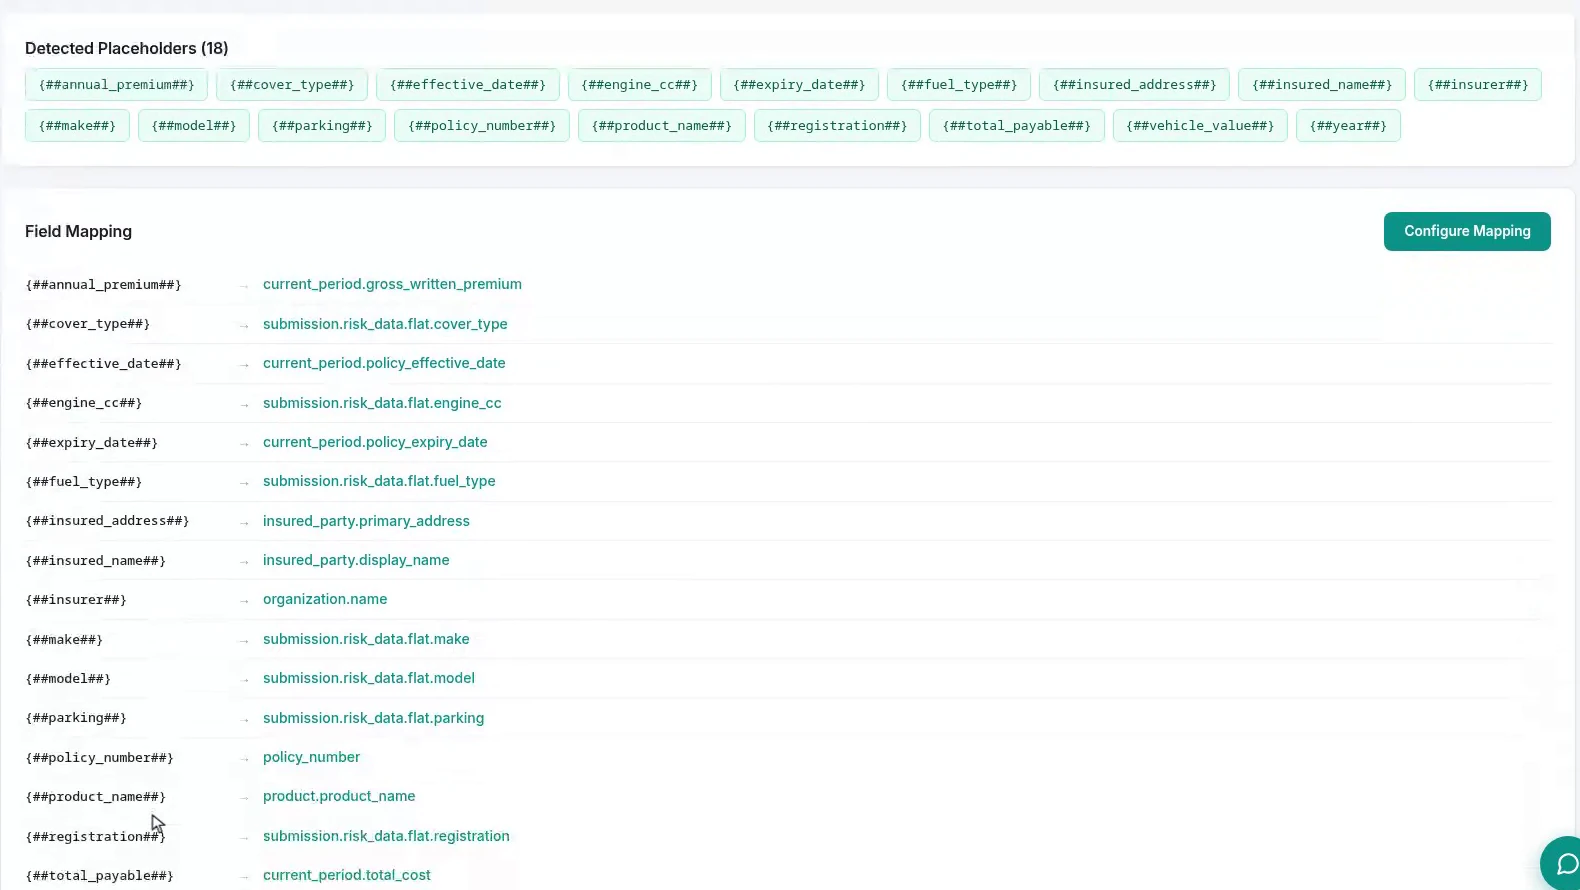
Read the count first. If the file has twenty placeholders and the page reports eighteen, two of them are misspelled or split by Word’s own formatting, and it is far cheaper to fix that in Word than to patch it in the mapping table.
Configure Mapping gives you one row per placeholder, each a dropdown onto the record’s fields. The list follows the record’s links outward, to the product, the insured party, the vehicle, so a single document can reach the whole of a policy without anyone writing a query. There is also a default value per row, for the times a field is legitimately empty.
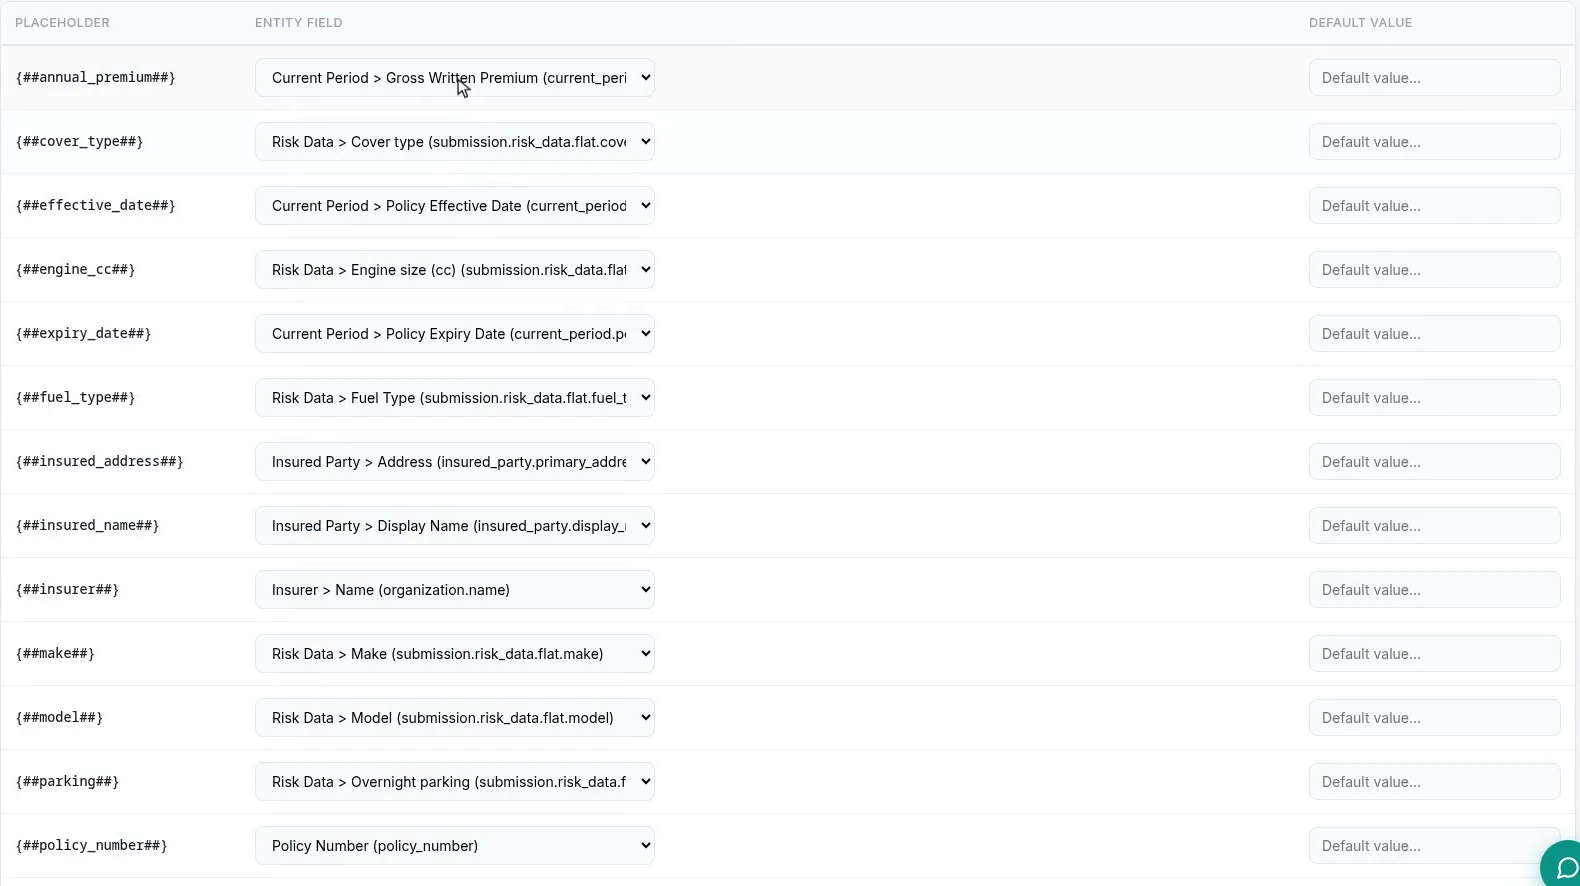
When every row is already bound, as it is here, this step is a review rather than repair work. Worth thirty seconds to confirm the money fields point where you think they do.
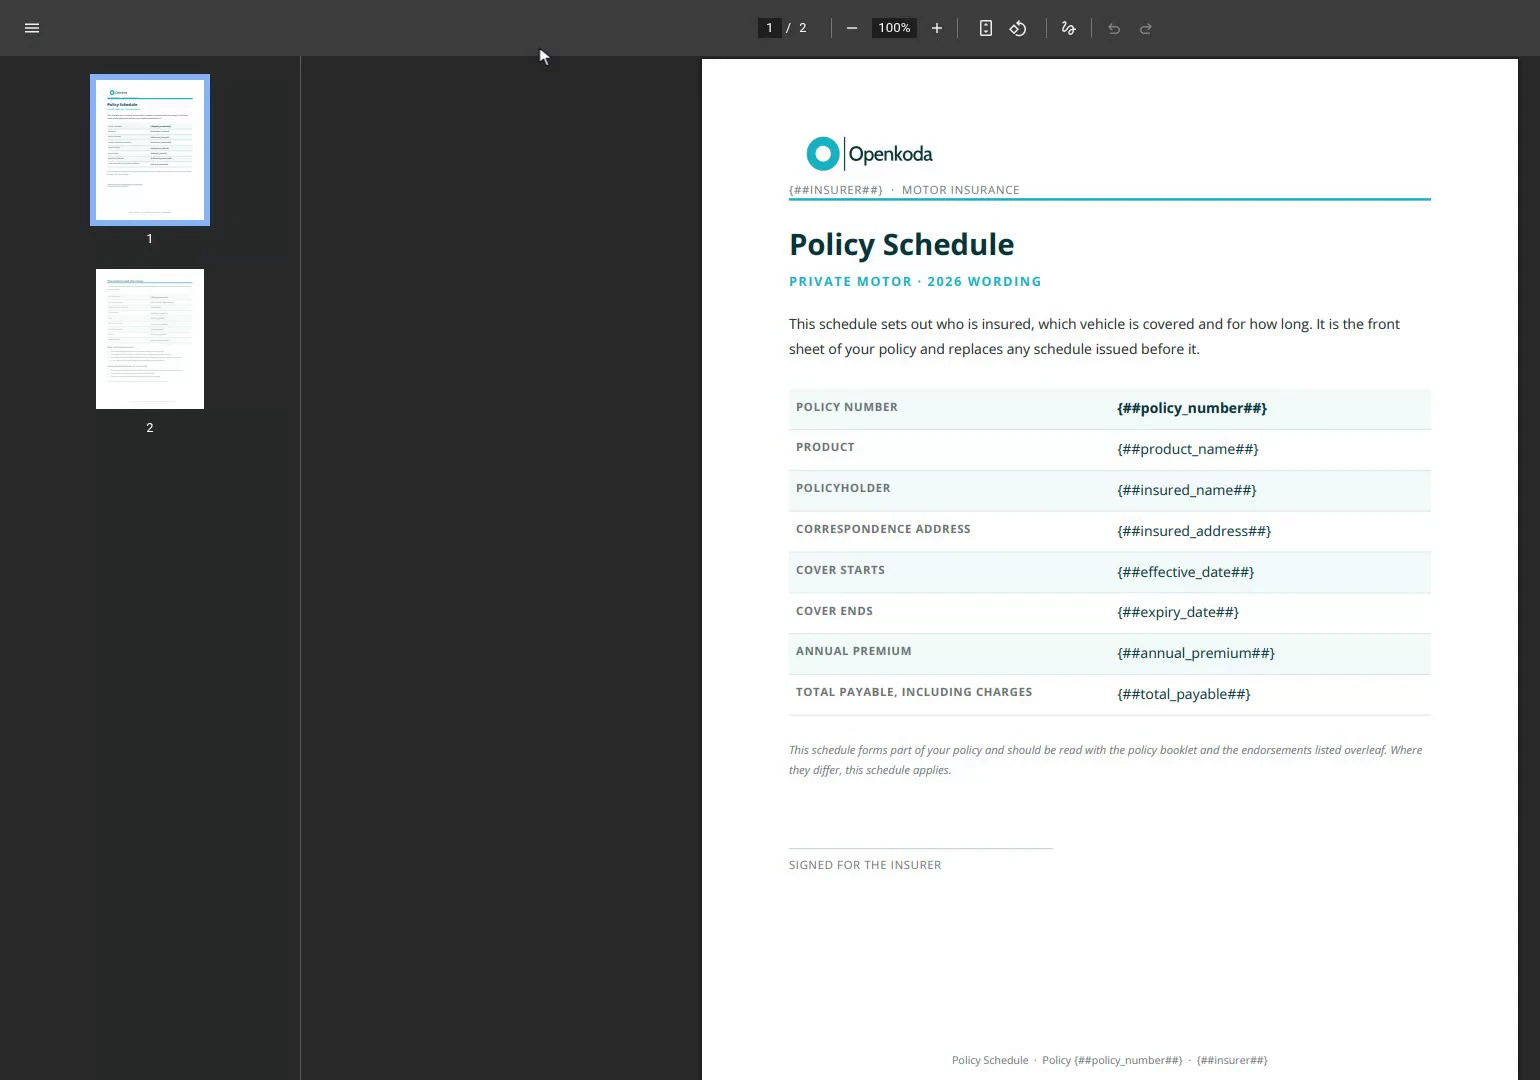
Preview renders the template exactly as it will print, placeholders and all. This catches the things a Word window hides: a table that breaks across the page boundary, a logo that shifts, a footer that collides with the page number.
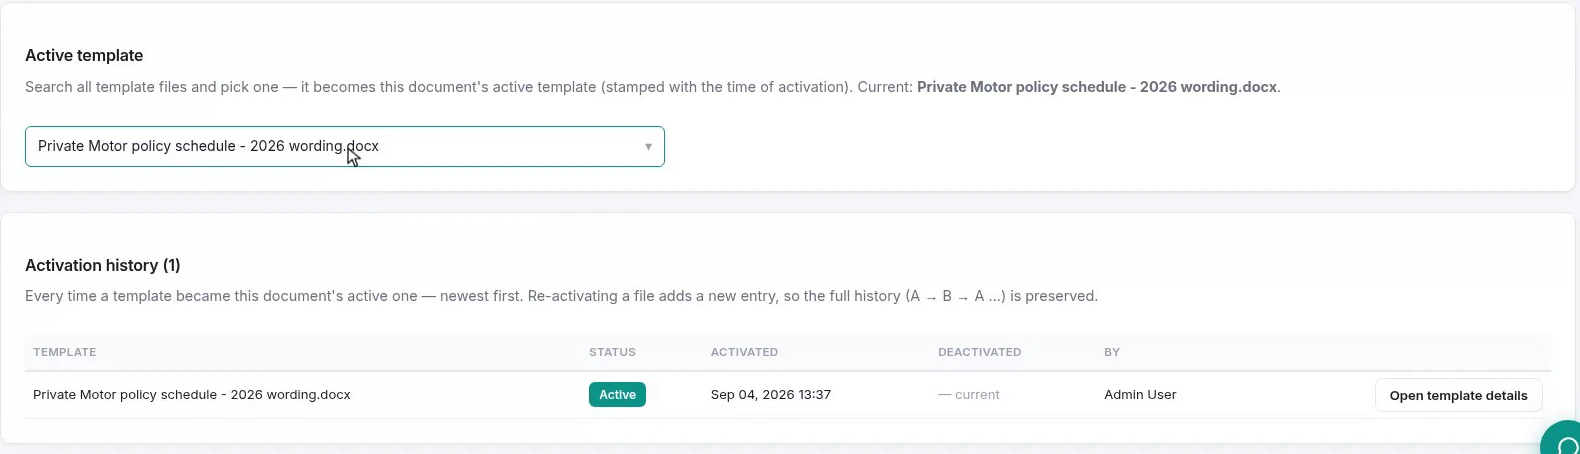
Back on the document, set the new file as the active template. Search for it by name and pick it; the control searches every template file in the organization, so type enough of the name to land on exactly one.

This is the moment the change goes live. Until now the document was still sending last year’s file, and every workflow that touches it was sending that too. From here on they all send the new one. The switch is stamped into the activation history with the file, the time and the person, which is what lets you answer, months later, exactly what a customer was sent and when.
Generating documents by hand does not scale, and it is not where the errors come from anyway. Missing documents are. In the Product Builder → Workflows, a workflow generates the schedule and emails it: a trigger, a generate document step pointing at the document, a message step that attaches the result, and an end state.
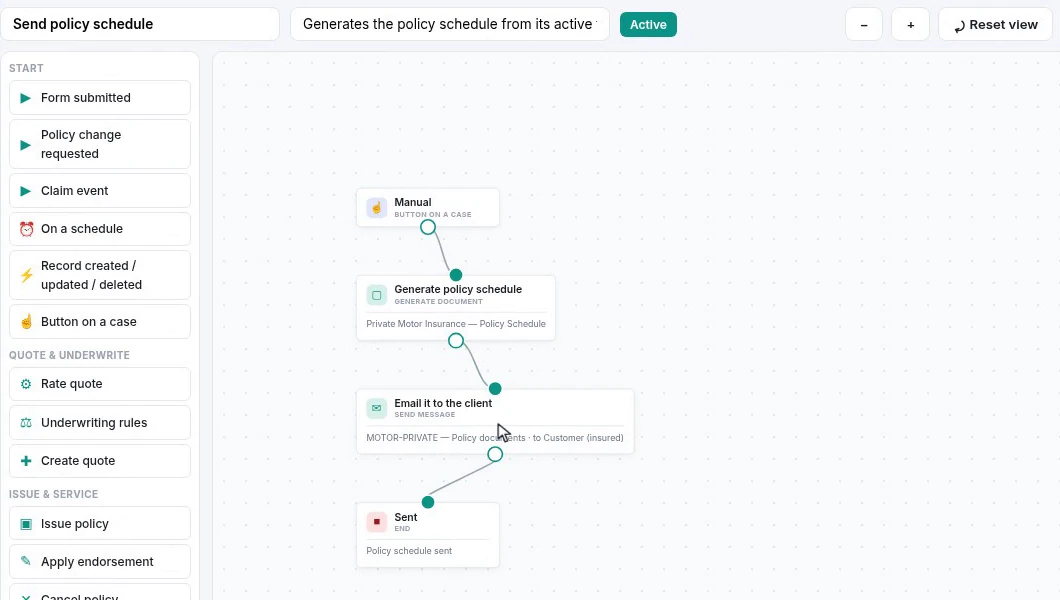
Because the step points at the document rather than at a file, it picks up whichever version is active when it runs. You never edit a workflow to change wording.
A workflow whose trigger is button on a case appears on the record itself. Open the policy and it is there in the action row, Send policy schedule, next to endorse, renew and cancel. Building one of those from scratch is its own walkthrough: adding a custom action button to the policy 360 view.
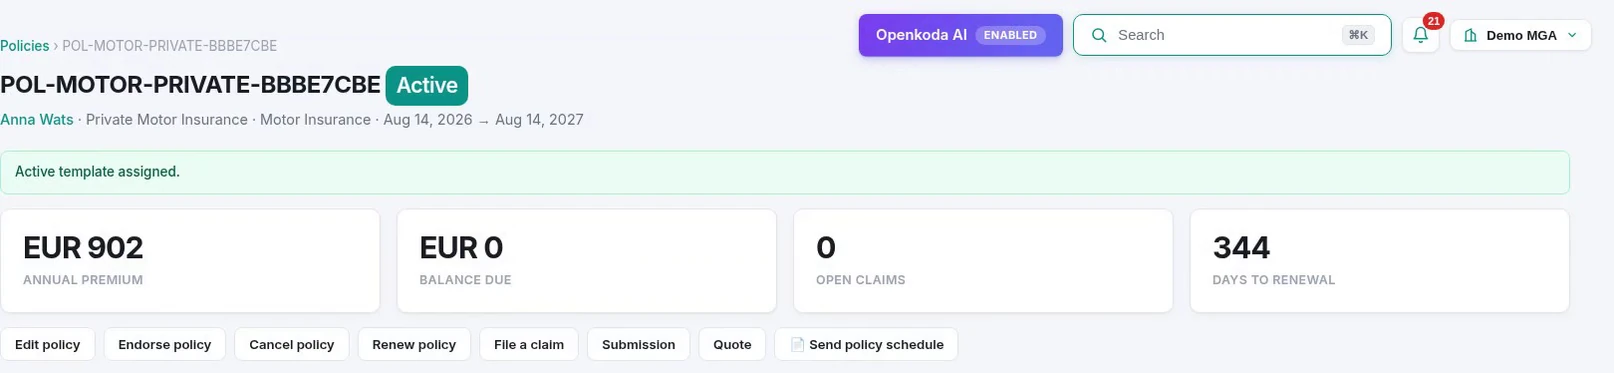
One press runs the whole chain: render the PDF, attach it, send it, record it.
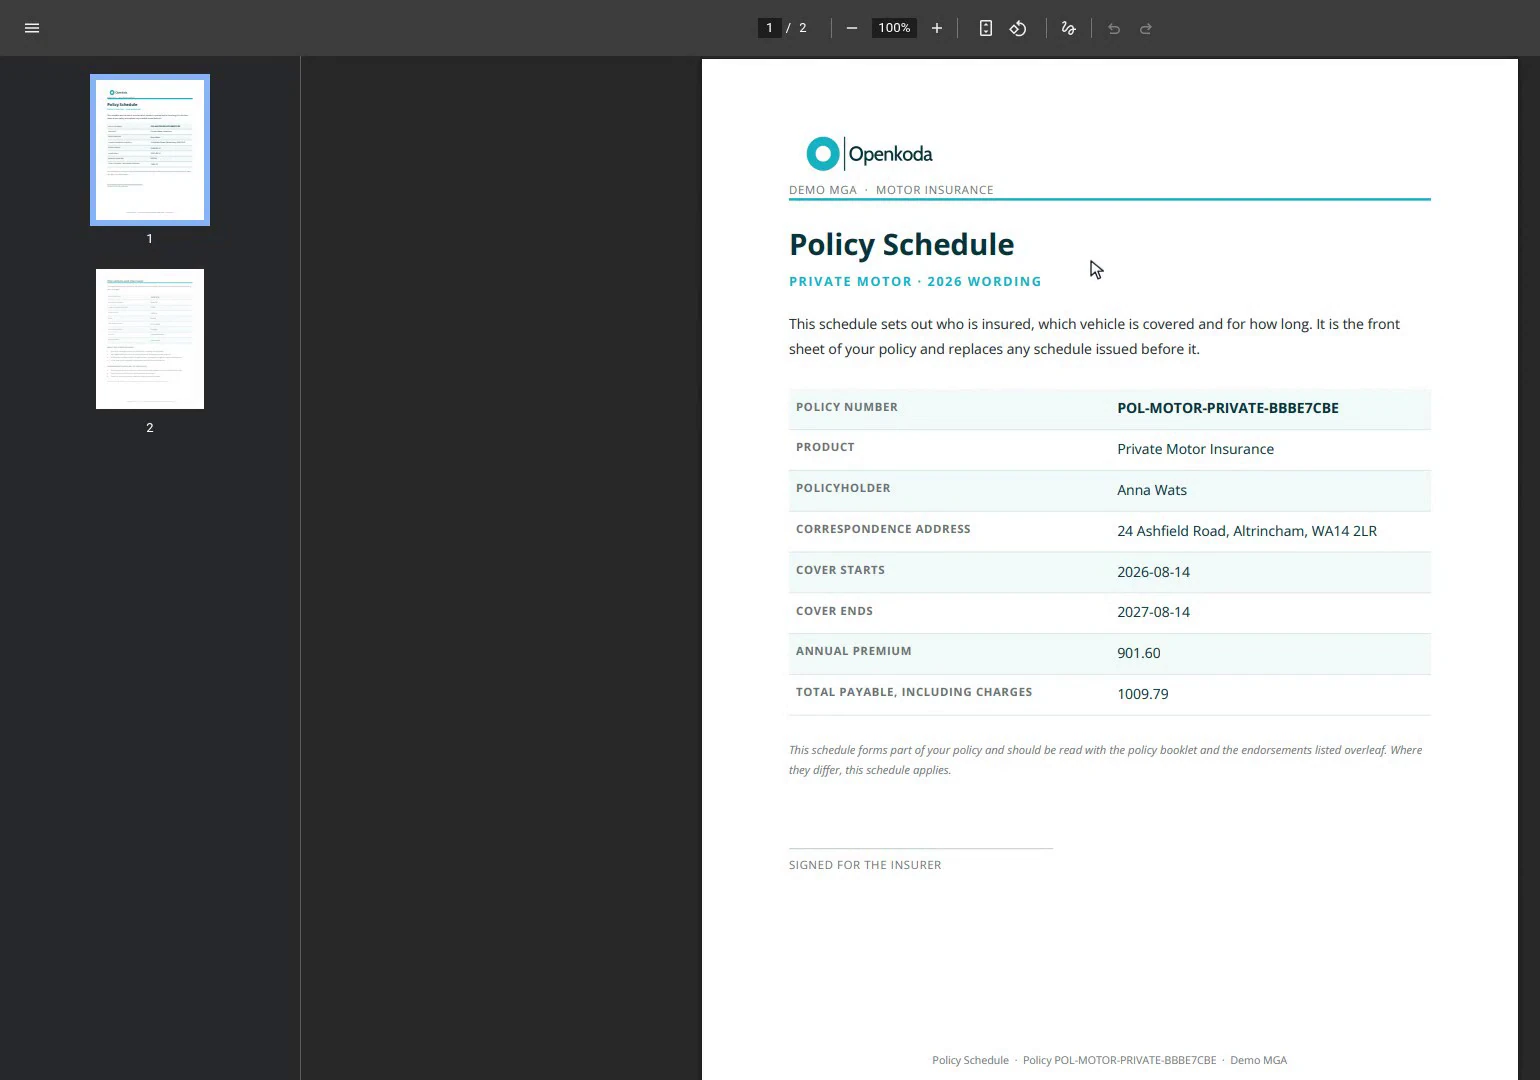
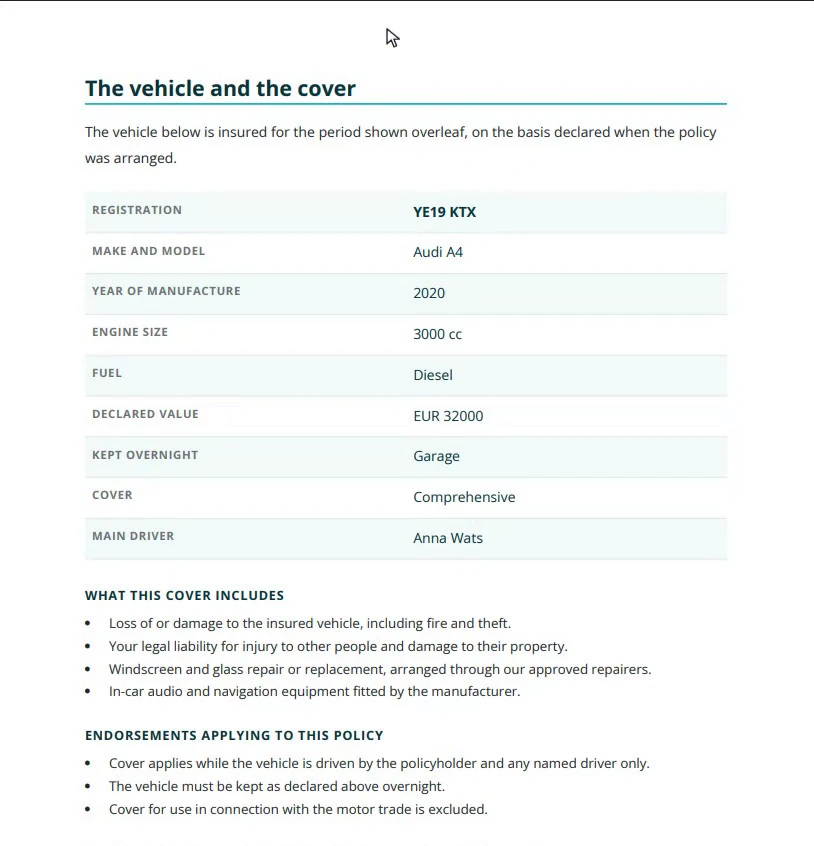
Open the generated file. Page one carries the policy number, the policyholder and her address, the cover dates and the premium; page two carries the vehicle, its registration and the cover bought. Every one of them read from the record at the moment of generation.
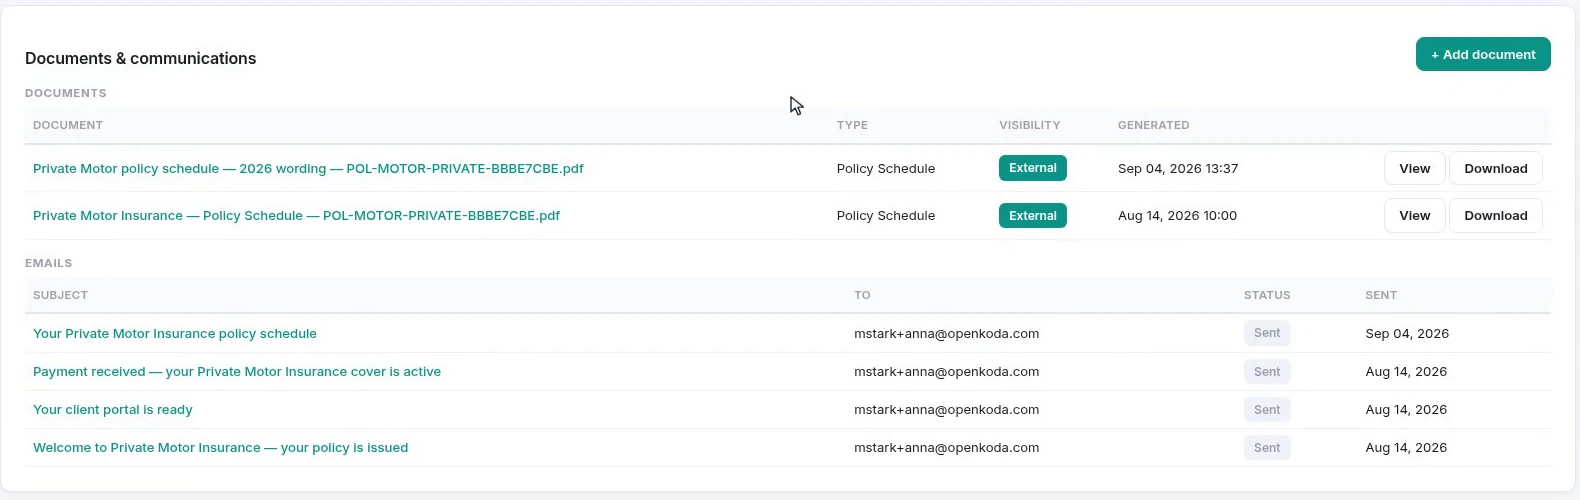
The file also lands on the record’s own document list, named after the template and the policy, with the email that carried it recorded beside it. A year from now that is the evidence trail: what was sent, generated from which template, on what date.
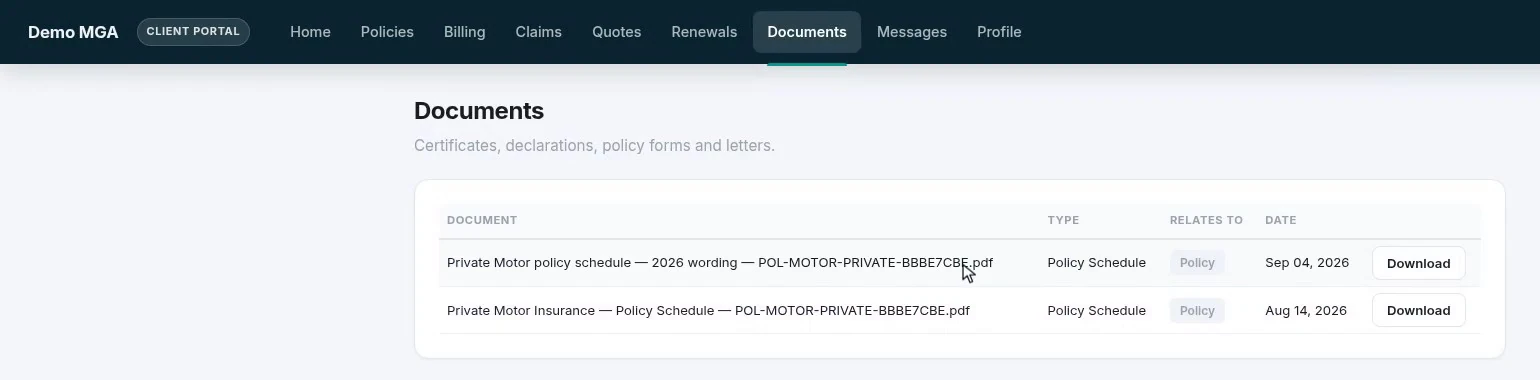
Remember the visibility set back in Step 2. Because this document is external, the same file is already waiting in the insured’s own portal. Nothing attached by hand, and no second copy to keep in step with the first.
Treating a policy document as wording plus data, with a version history in between, turns a document change from a project into an afternoon: edit the Word file, upload it as a version, check what it bound itself to, and switch. The workflows, portals and emails that send it never need to know.
And because every activation is stamped and every generated file is kept on the record, the question regulators and customers actually ask - what did you send me, and when - has an answer you can point at.

Describe an AI agent as insurable attributes - pinned model version, autonomy, spending authority, guardrails - then read the cover, rules and rating built on them.
Hand a Word requirements document to the AI Product Builder, read the proposal before anything changes, then check the risk item, rating, rules and workflow it wrote.

Five businesses on one installation, a role built from three ticks out of seventy-nine, and an audit log that records the walkthrough that built it.
Book a live, personalized demo with our product team - tell us your use case and see the platform work with your data. No commitment.