How to Create Your Own Customizable Insurance Dashboards in Openkoda PAS
Build a billing desk board tile by tile, then a second one by describing it in a sentence, and make one the screen your team signs in to.
Build a renewal reminder in twelve steps: draft it with AI, edit it visually, bind record fields as placeholders, and let a workflow send it.

Most of what a customer knows about their insurer arrives by email. The quote, the welcome, the renewal reminder, the receipt, the request for a missing document. The policy is a database row, but the relationship is a sequence of messages.
Those messages are usually the last thing anybody configures. They end up hard-coded in a developer’s file, or pasted by hand from somebody’s drafts folder, which is why so many of them look like a form letter from 2009.
A template system worth having answers four questions:
This walkthrough builds one renewal reminder from nothing and follows it all the way to the sent log. The first draft is written by AI, which turns out to matter less for the prose than for the placeholders, as Step 4 explains.
Before you start, you will need: an account that can reach the template library and the product builder, and a product with at least one workflow on it.
The whole thing is on video too, if you would rather watch it than read it. It runs three and a half minutes; the written version below has the detail worth having open in another window while you work.
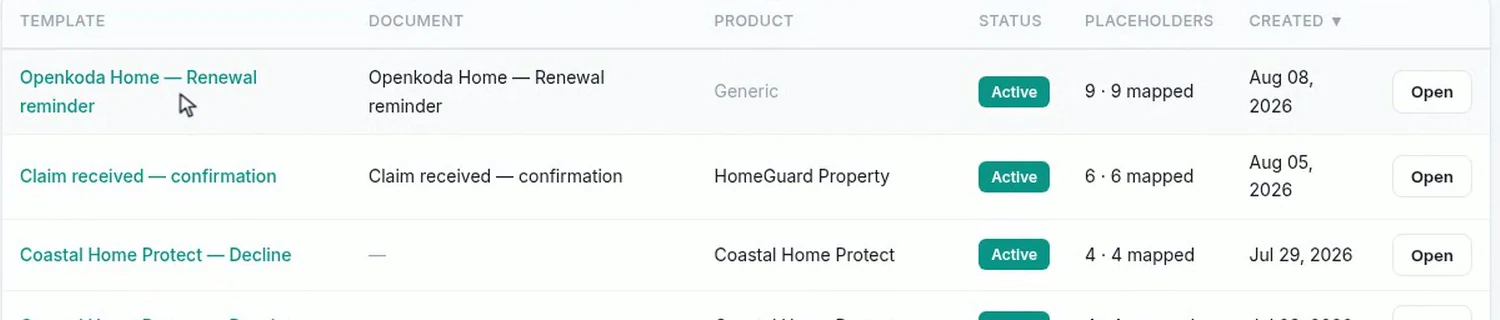
Every message the system sends starts as a template, and they live together in one place: quote letters, welcome emails, renewal notices, payment reminders, decline letters.
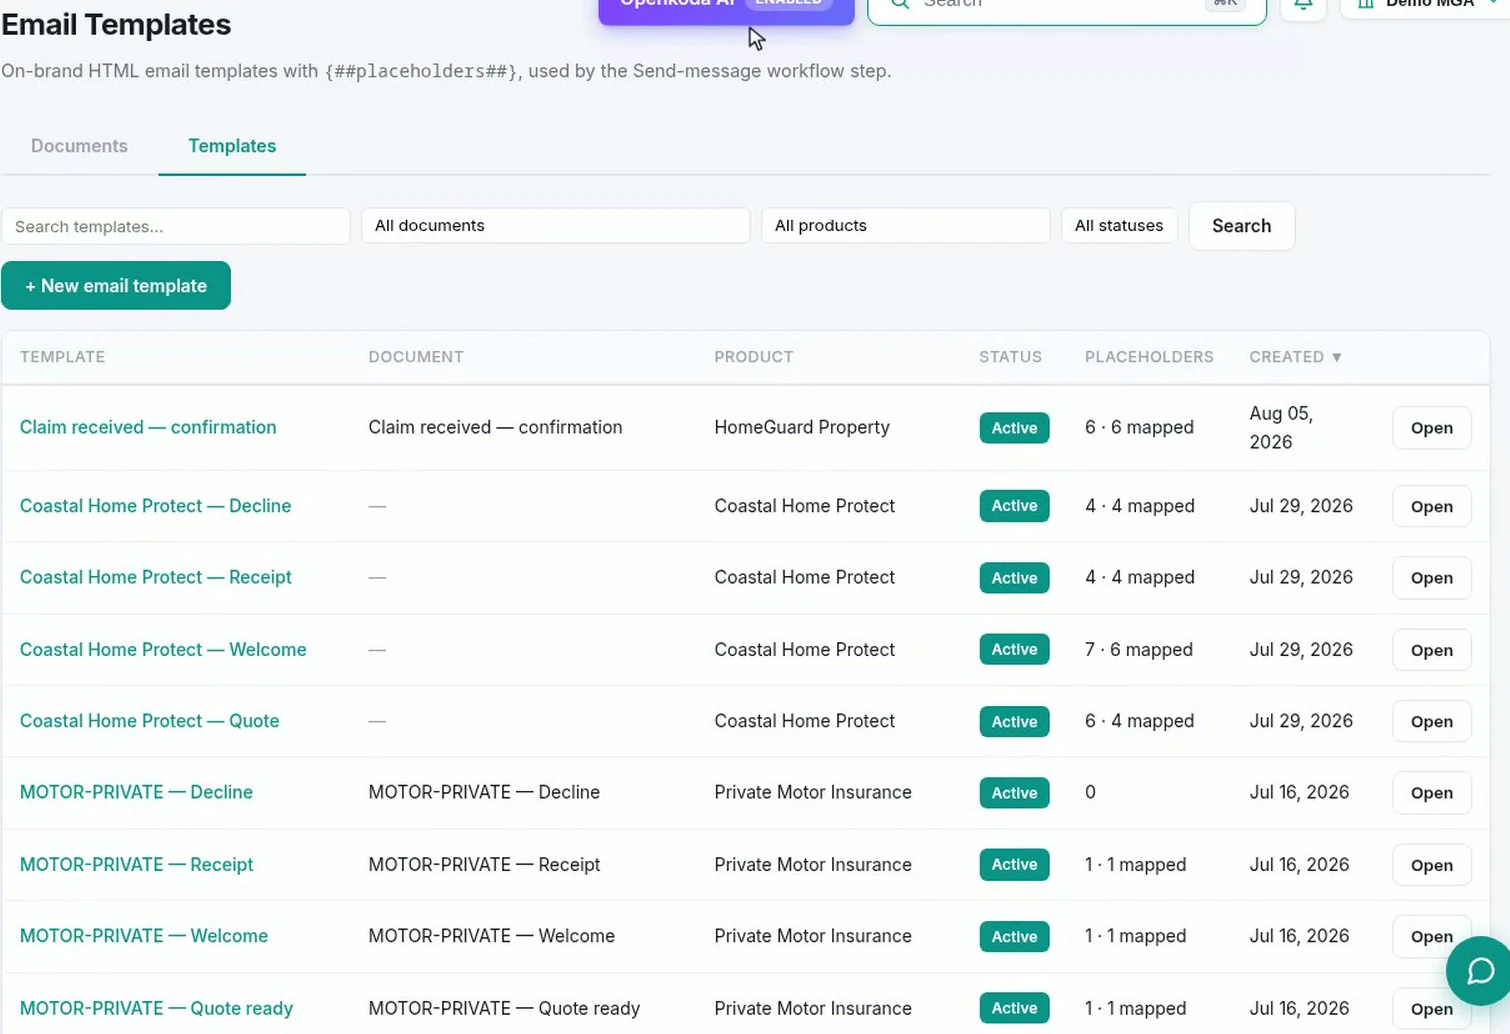
The placeholders column is the one to read when you inherit somebody else’s library. 6 · 6 mapped means six tokens in the template and all six bound to a field. A template showing 7 · 6 mapped has one token that will not resolve, which is how “Dear {##insured_party.first_name##},” reaches a real customer.
A new template needs a name and the kind of record it belongs to. Everything else follows from that second choice.
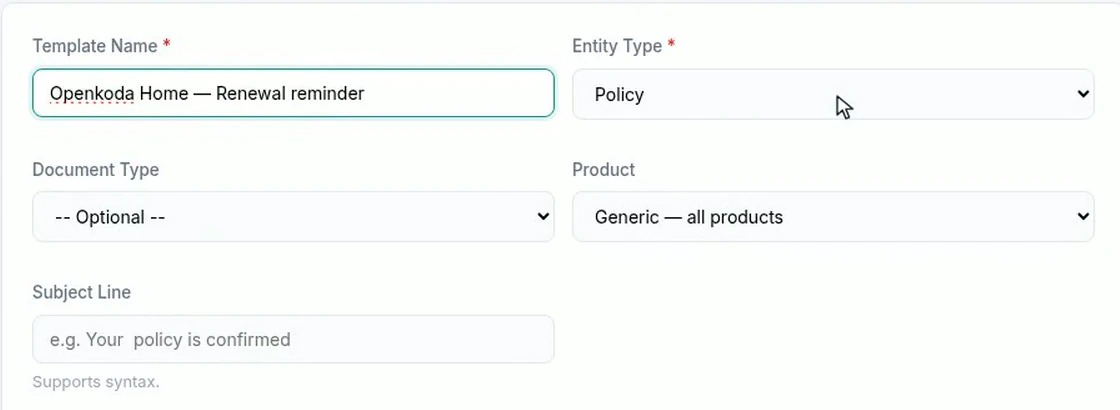
Choosing Policy does two things at once: it decides which fields the template can reach, and it decides where the template is offered, on policies and nowhere else. The product scope is the narrower cut. Leave it generic and every product can use this wording, or pin it to one product when the tone or the legal wording differs.
Rather than starting from an empty box, describe the job in a sentence or two.
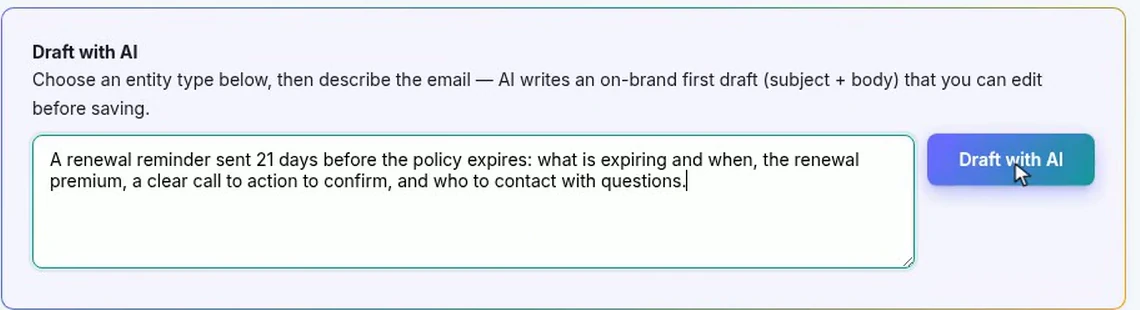
Describe the job, not the layout. What the email is, when it goes out, the facts it must carry, and the one thing you want the reader to do. Layout is what the draft is good at; intent is what only you know.
One practical warning: the draft writes the subject line as well as the body, so anything you type into the subject beforehand is overwritten. Draft first, edit second.
What arrives is a whole email rather than a blob of text: a branded header, a headline, a greeting, body copy, a call-to-action button, a sign-off.
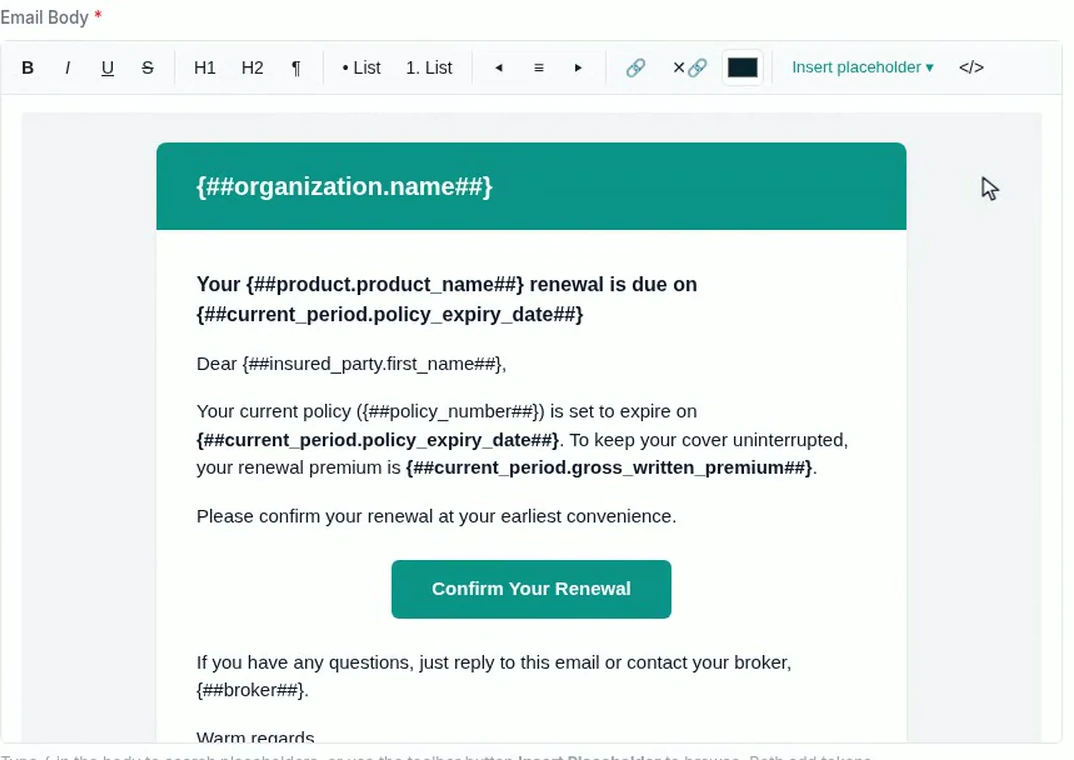
The prose is the least interesting part of this. What matters is that the fields are written as real placeholders, {##current_period.policy_expiry_date##} and {##current_period.gross_written_premium##}, rather than plausible guesses at what your data might be called. A draft that invents field names costs more to fix than writing the email by hand; one that uses your actual schema is genuinely a first draft.
Read it as an editor, not as a proofreader. Is the one action you want the reader to take obvious? Does it say when, and how much? Is anything promised that your team cannot deliver?

Placeholders work in the subject, which is worth exploiting: a subject carrying the product name and the expiry date is a reminder even when it is never opened. Keep the tokens near the front, because mail clients truncate, and a personalized detail after the cut is a detail nobody sees.
The draft is a draft. Everything in it is editable in a visual editor: headings, bold, lists, alignment, links, color.
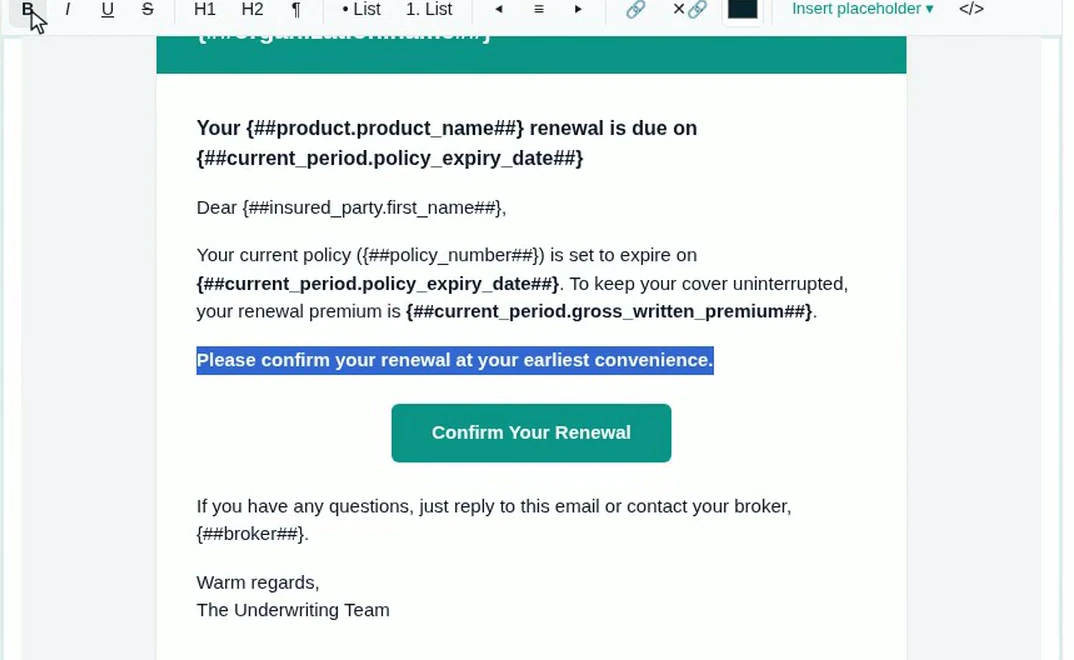
This is the step that decides who owns your customer wording. If changing “at your earliest convenience” to “within 14 days” takes a selection and a click, the person who cares about the sentence can make it. If it takes a pull request, they will not, and the sentence will stay wrong for a year.
When the message needs to say something about the record, pick the field.
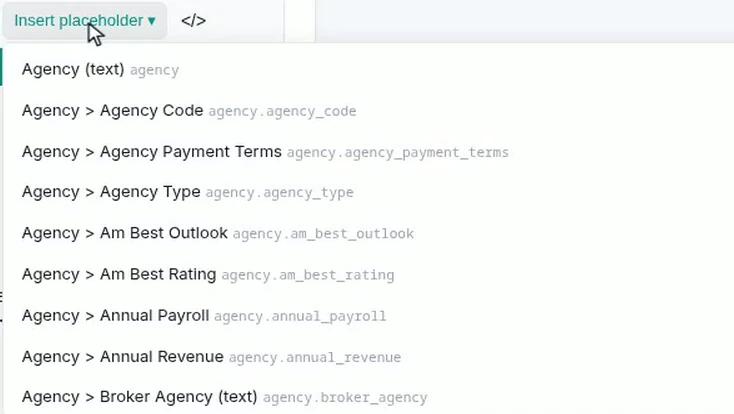
Two things make this list usable rather than a lucky dip. It follows the record’s links outward, from the policy to the product, the insured, the broker, the agency, the current period, so a template can reach the whole of a policy’s world without anybody writing a query. And every row shows both the human label and the token it inserts, so you choose by meaning and the system writes the syntax.
There is a keyboard route too: typing an opening brace in the body searches the same list without leaving the keyboard.
On save the template is read back, and the placeholders in it are listed and bound.
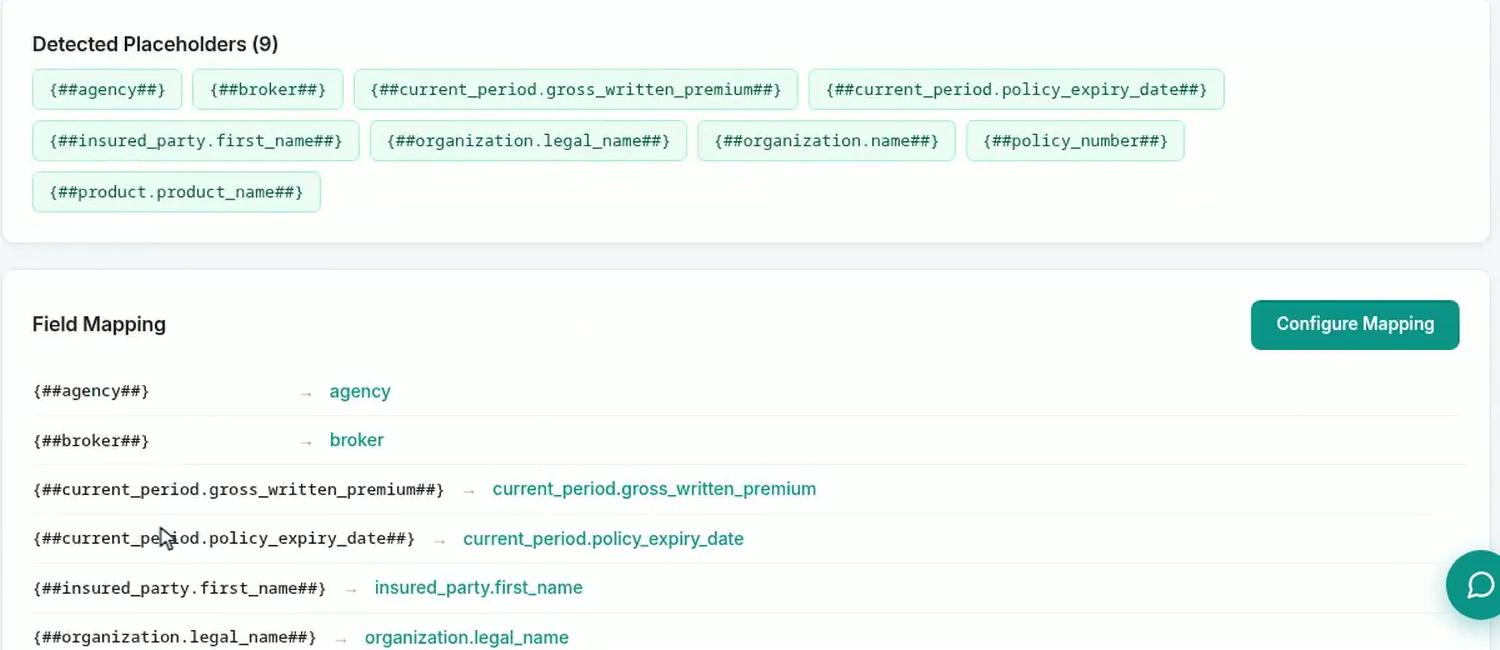
Do the arithmetic here, the same as in Step 1: detected should equal mapped. If the page finds nine placeholders and maps eight, one of them is misspelled or points at a field that does not exist on this record type, and fixing it now costs nothing.
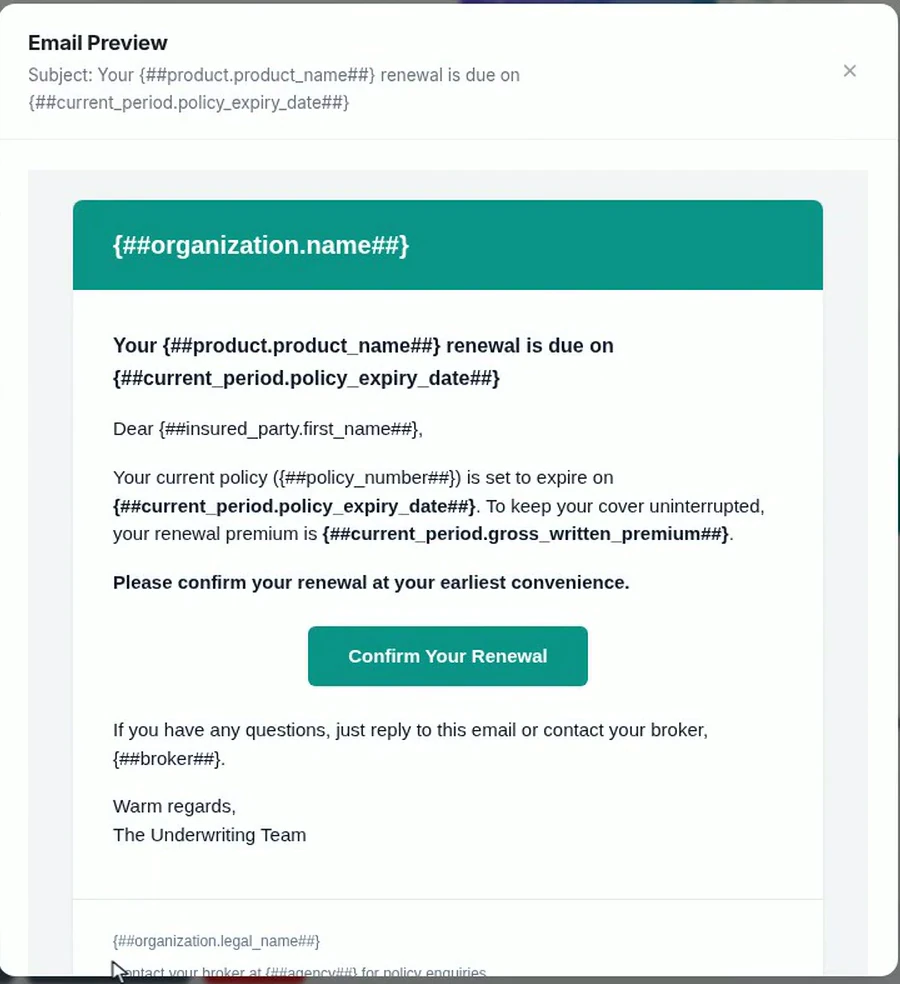
The tokens still showing is correct, not a bug: no policy is attached, so there is nothing to substitute. This is the template. Attach a record, which is what happens when a workflow sends it, and each token becomes that policy’s own detail.
What preview is for is the layout: does the header survive, does the button sit where you meant, does a long product name wrap into something ugly.
Then nobody has to remember. A Send message step in any workflow picks the template and the recipient.
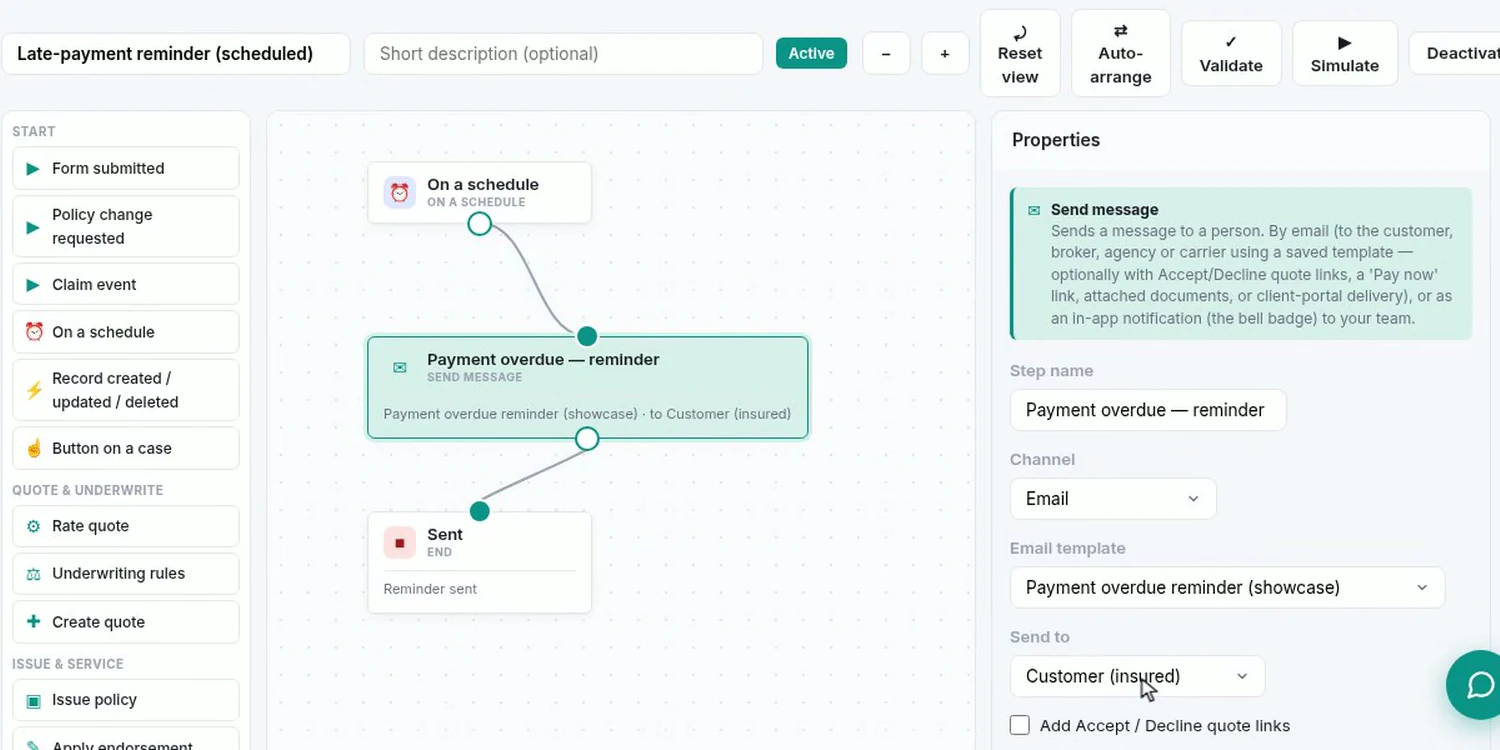
The recipient is a role rather than an address, the customer, their broker, the agency, the carrier, which is what makes one step correct for every policy the workflow runs on. The same step can attach a document generated from a Word template, add accept and decline links or a pay-now link, and drop a copy into the client portal.
And because the step points at the template, not at a copy of its text, editing the wording changes what every workflow using it sends. No workflow to edit, nothing to redeploy.
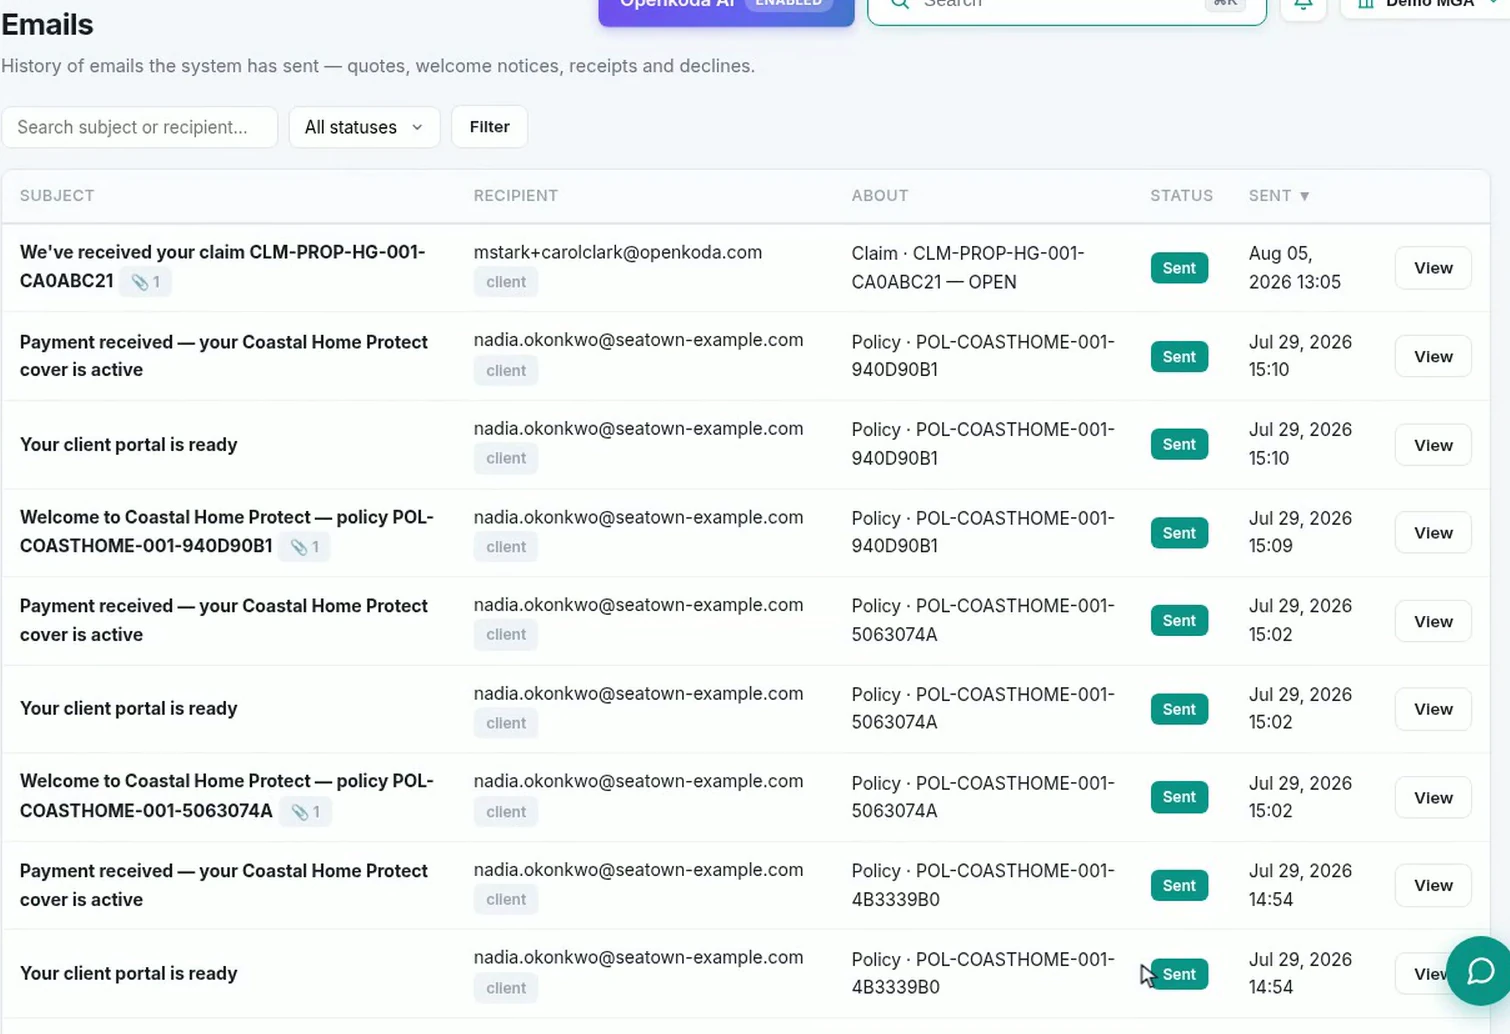
Each row records what was sent, to whom, about which record, whether it left, and when, with attachments counted. This is the part that is missing when transactional mail is sent from outside the system: the history of a policy should include what the customer was told, not just what was done to their record.
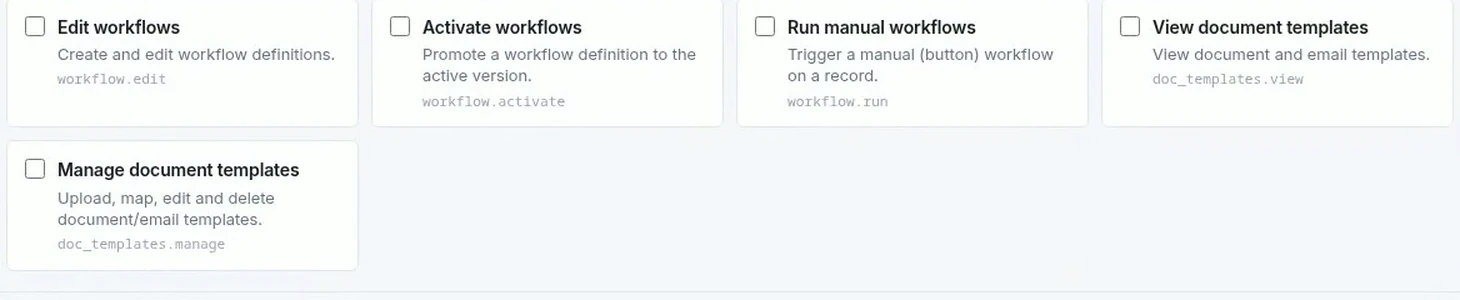
Viewing templates and managing them are separate privileges, which is the right granularity: an underwriter can see what a customer was sent without being able to rewrite next month’s renewal notice.
The useful idea here is not that a model can write an email. It is that the email lives in the product: bound to a record type, its placeholders checked against real fields, sent by a workflow that points at it rather than copying it, and logged against the policy afterwards.
That is what turns “we should soften the renewal reminder” from a ticket into an afternoon. The draft saves you the blank page and, more usefully, gets the field names right the first time. The visual editor means the person who owns the sentence can change the sentence. Everything after that, the mapping check, the preview, the sent log, exists so you can be confident about what your customers actually received.
Build a billing desk board tile by tile, then a second one by describing it in a sentence, and make one the screen your team signs in to.

Follow one hand-over end to end: a chat message carrying the policy, a task with an owner and a due date, and the notification that reaches the assignee.

Ask for the report in plain English, refine it in the same conversation, read the SQL it wrote, and put the result on the team’s dashboard.
Book a live, personalized demo with our product team - tell us your use case and see the platform work with your data. No commitment.