How to Set Up Your Own Rating and Premium Calculation Rules in Openkoda PAS
Build a motor rating engine from four tables: derive the ages you do not store, combine the factors, add fees and tax, then price a real risk and reprice it.
Automate a claim acknowledgment end to end: a Word template with placeholders, the email that carries it, and a workflow that fires when the claim form arrives.

When a customer files a claim, the thing they remember is what happened in the next five minutes. Most insurers answer within a day or two, with a letter somebody assembled by copying a reference number out of one screen and into a Word file.
It is not difficult work. It is just work that happens hundreds of times, always at the point where the customer is most anxious, and always slightly differently depending on who does it.
It is also the best process to automate first, because it has all three pieces of a real one and none of the risk:
Nobody’s money moves and no decision is made, so the worst case of getting it wrong is a badly worded letter rather than a mispriced policy. And once those three pieces exist, every other automation on the product is the same shape.
This walkthrough builds all three and then files a claim as a customer to watch them fire.
Before you start, you will need: a product with a claim form, a Word file with your wording in it, and an account that can reach Document Automation, Email Templates and the Product Builder.
There is a video version if you would rather watch it than read it. The written steps below are the ones worth having open while you build your own.
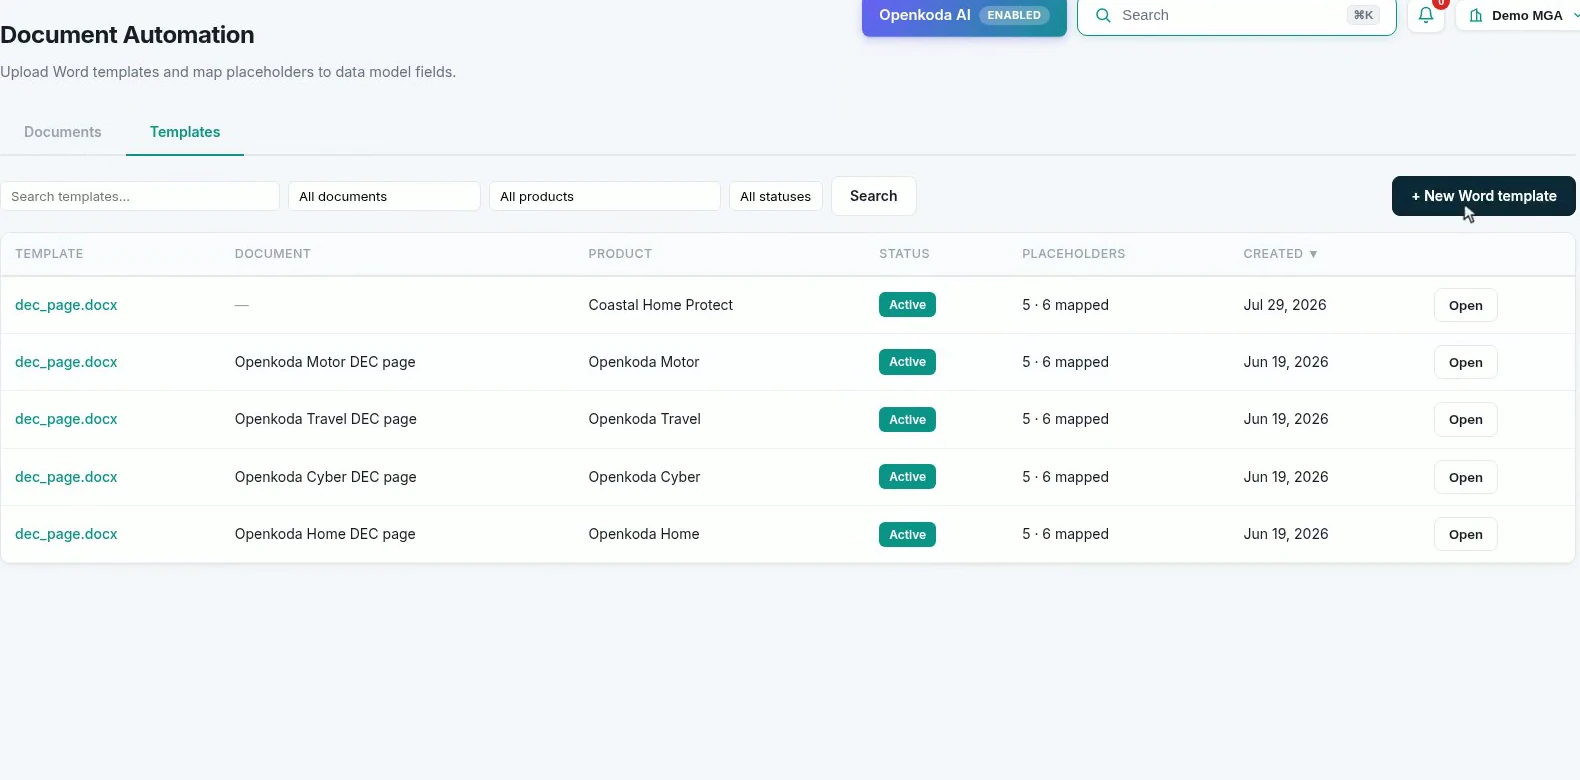
Take visibility seriously. External is what lets the customer see the file in their portal, and it is much easier to set now than to explain later.
And set the document type, even though it is optional. Leaving it as Other is why the generated file turns up later in this walkthrough named other.pdf rather than as a claim confirmation. It costs one dropdown now and saves every future reader of that claim a guess.
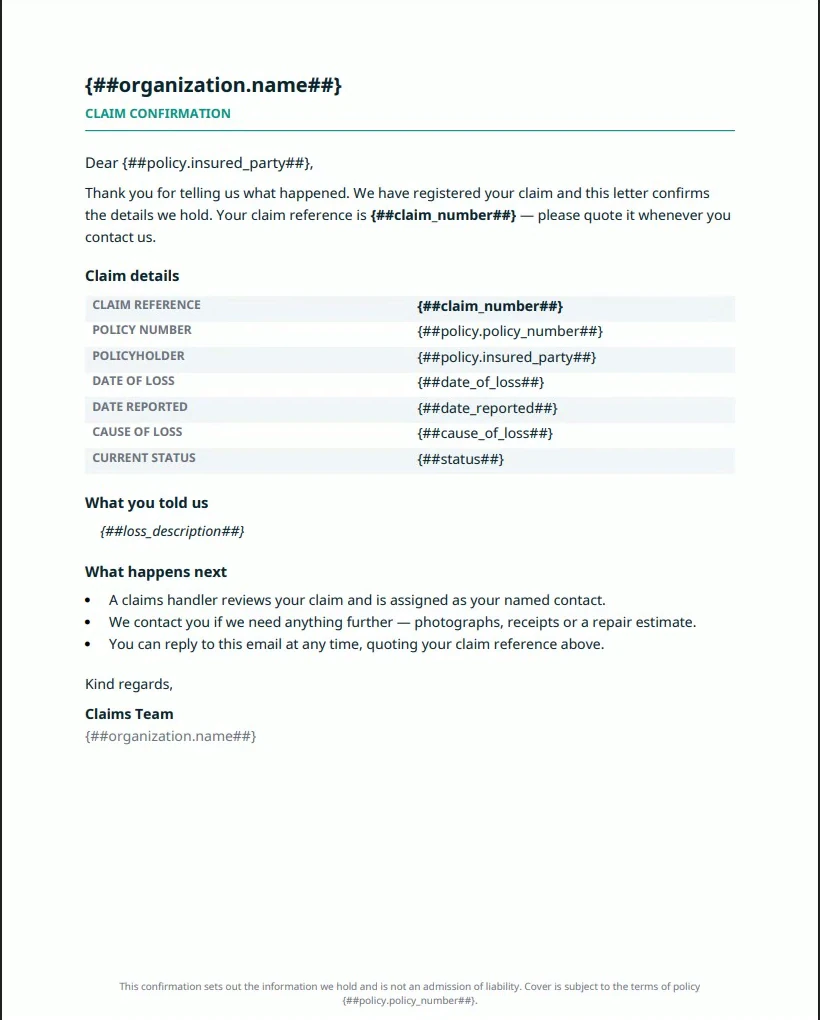
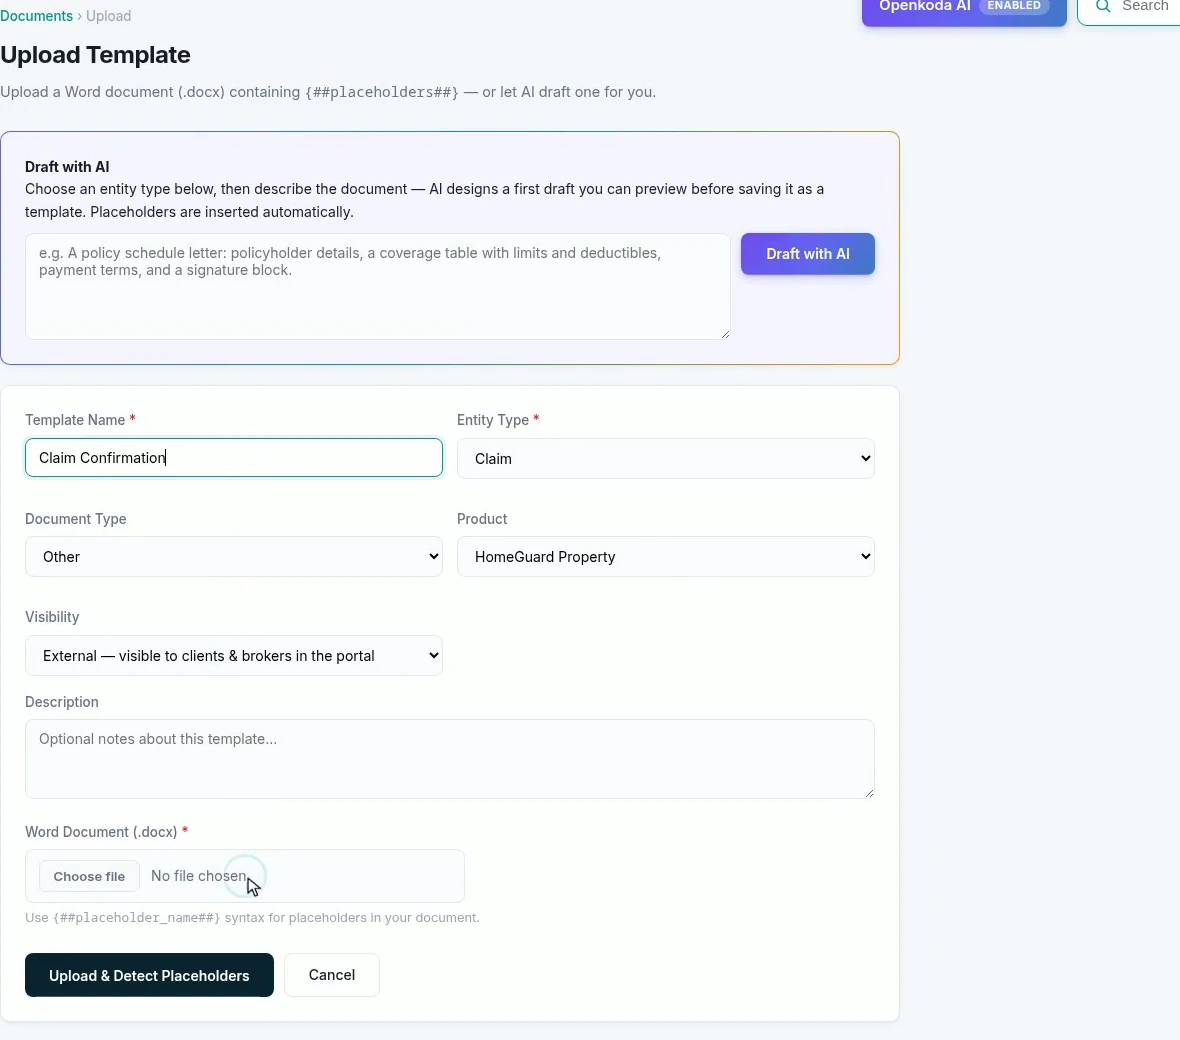
The detail that makes the next step free: name each placeholder after the field it draws from. {##claim_number##}, {##policy.insured_party##}, {##cause_of_loss##}. The letter reads exactly the same to a human, and the system can bind it without being told.
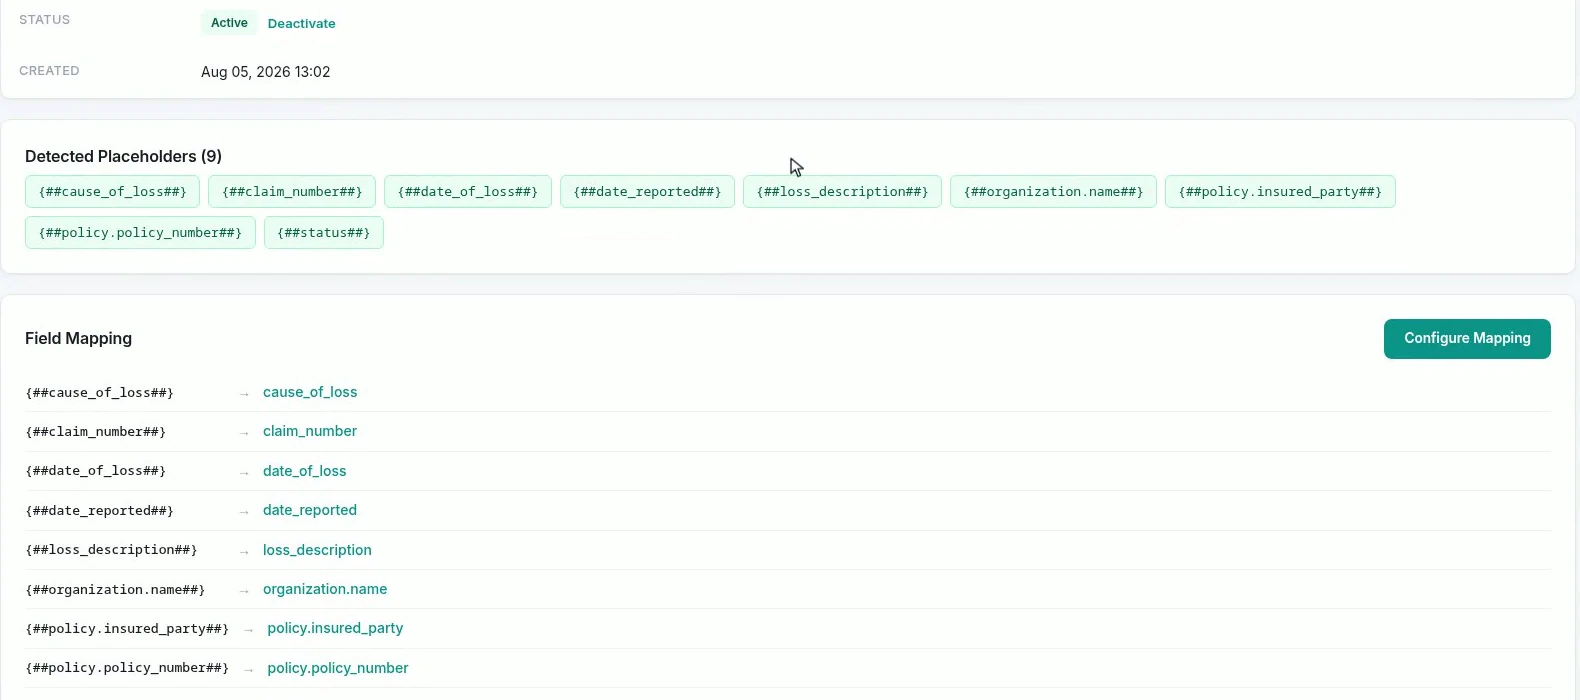
Read the two numbers first: detected and mapped should be equal. If the file has ten placeholders and the page maps nine, one is misspelled or split by Word’s own formatting, and it is far cheaper to fix that in Word than to patch it here.
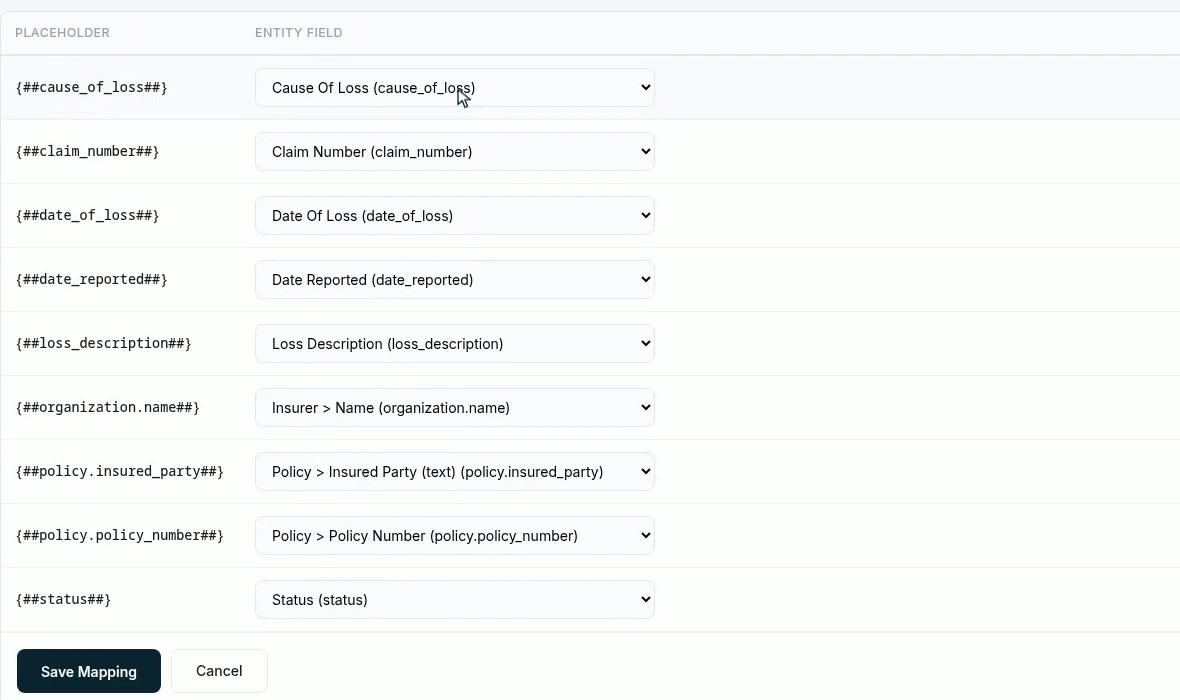
Note that the mapping follows the record outward. The claim knows its policy, so the policy’s insured party is reachable from a letter about the claim. That is what lets one template say everything a customer needs without anybody writing a query.
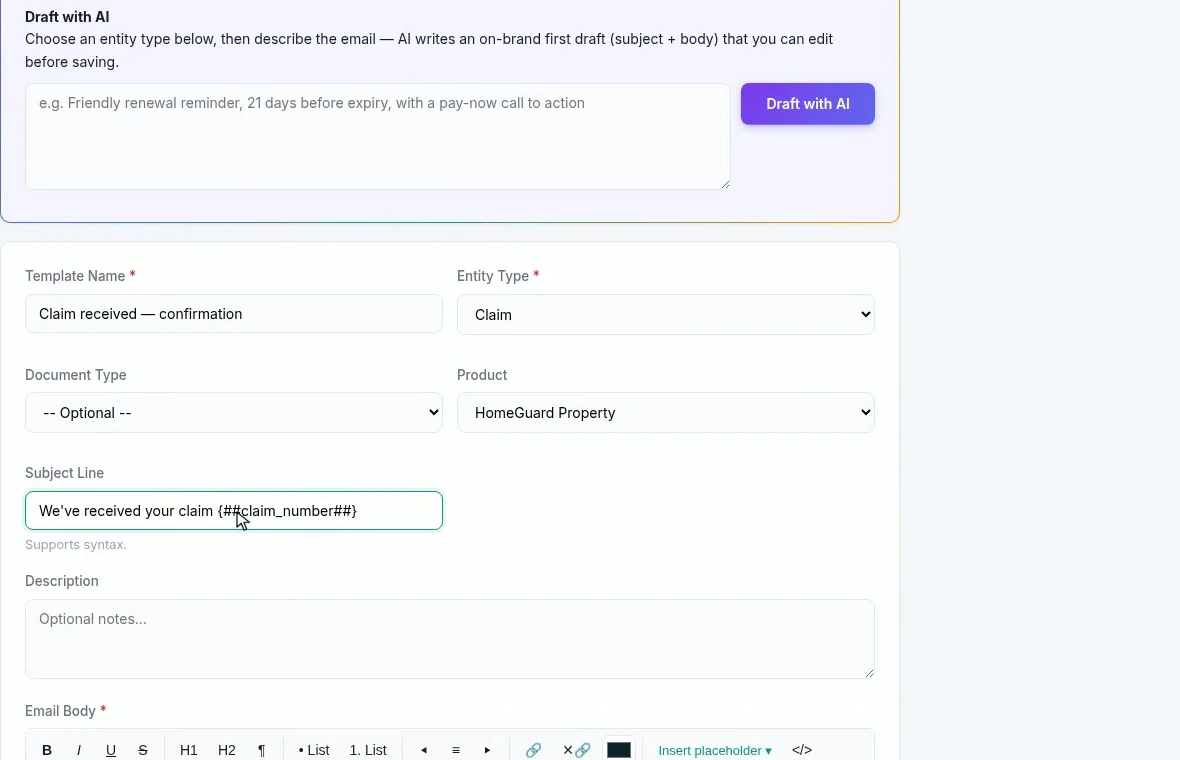
A claim reference in the subject line is worth the thirty seconds. It is what lets the customer find the email again three weeks later, and what lets your team match a reply to a claim.
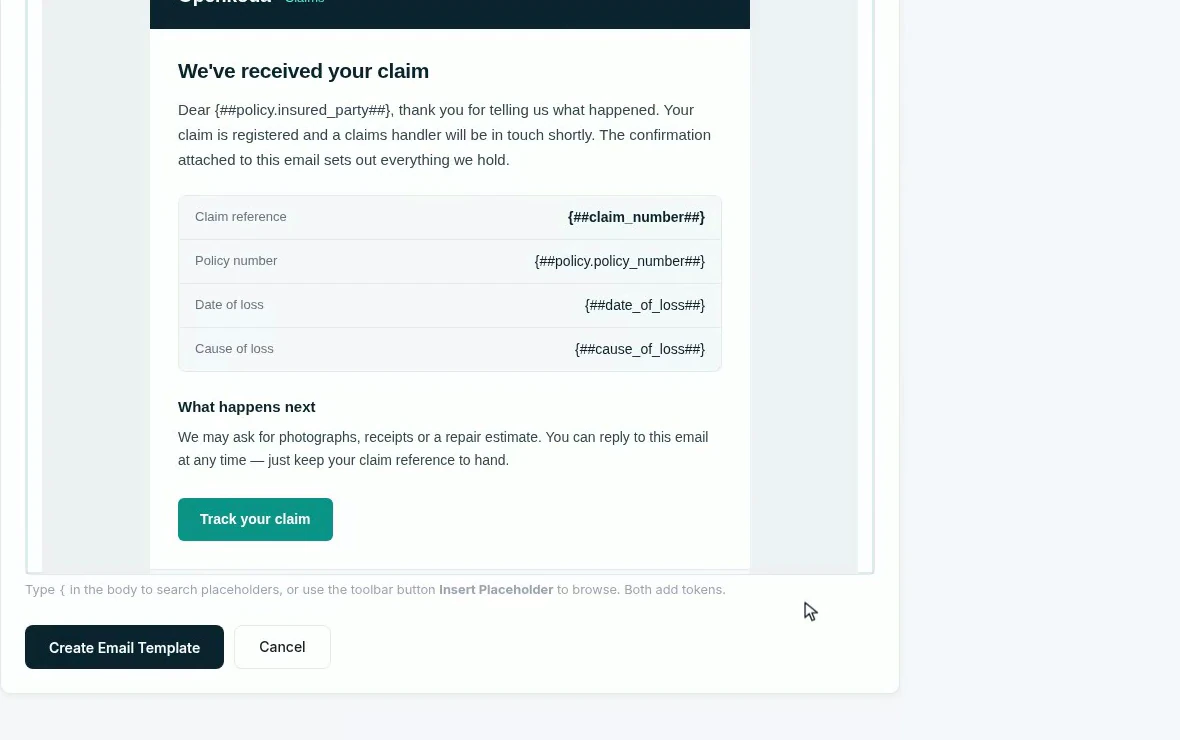
Keep the email and the letter saying the same thing in different depth. The email is the summary a person reads on a phone; the attached letter is the record they keep. Repeating the whole letter in the body makes the attachment pointless.
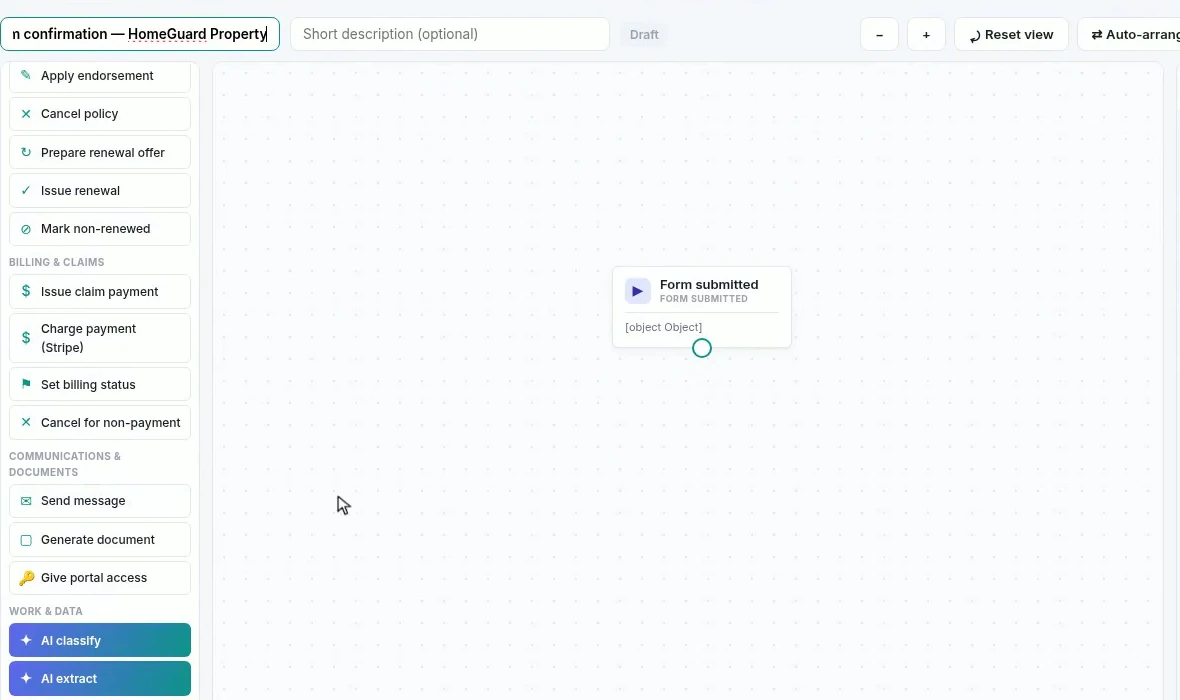
Three steps is the whole flow: something that starts it, something it does, and an end.
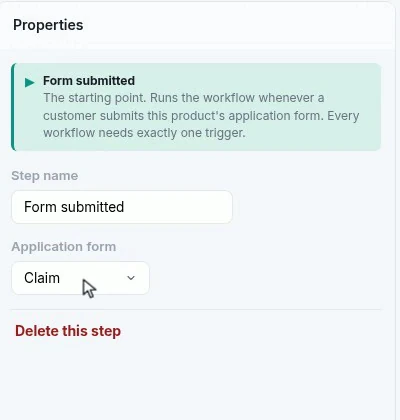
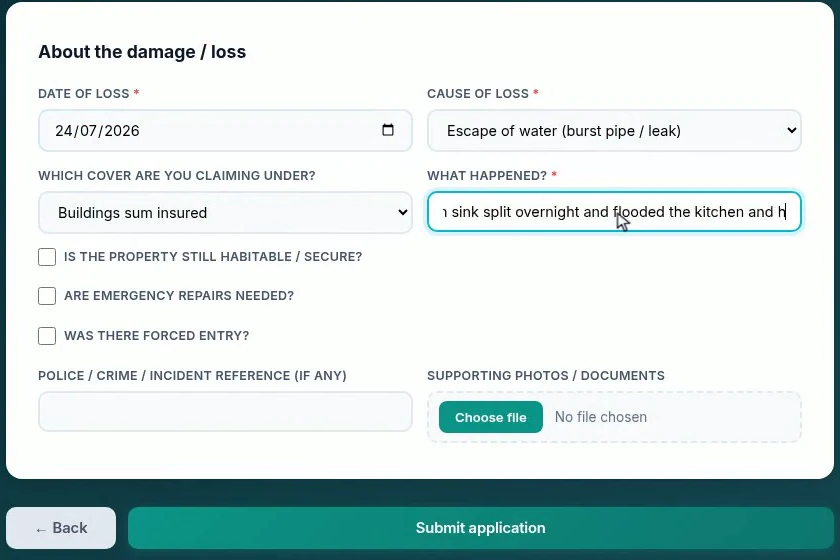
Bind the trigger to one named form, not to “a claim was created”. Claims get created by staff, by imports and by integrations; a customer filing the claim form is a different event, and it is the only one that should produce a “we have received your claim” email.
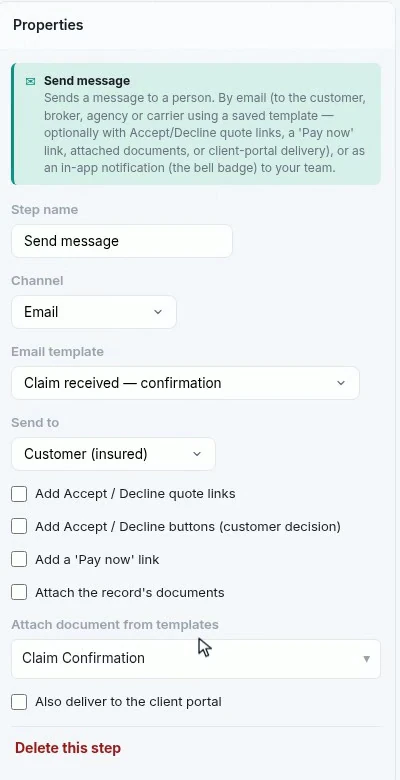
Attach document from templates is the line that does the real work, and it is worth being precise about what it means. It does not attach a file sitting somewhere. It renders that Word template against whichever claim triggered the flow, at the moment it runs, and attaches the result. The customer gets a letter with their own claim in it, and a copy is filed on the record.
Note too that the recipient is a role, the customer insured on the policy, rather than an address. That is what makes one step correct for every claim the product will ever receive.
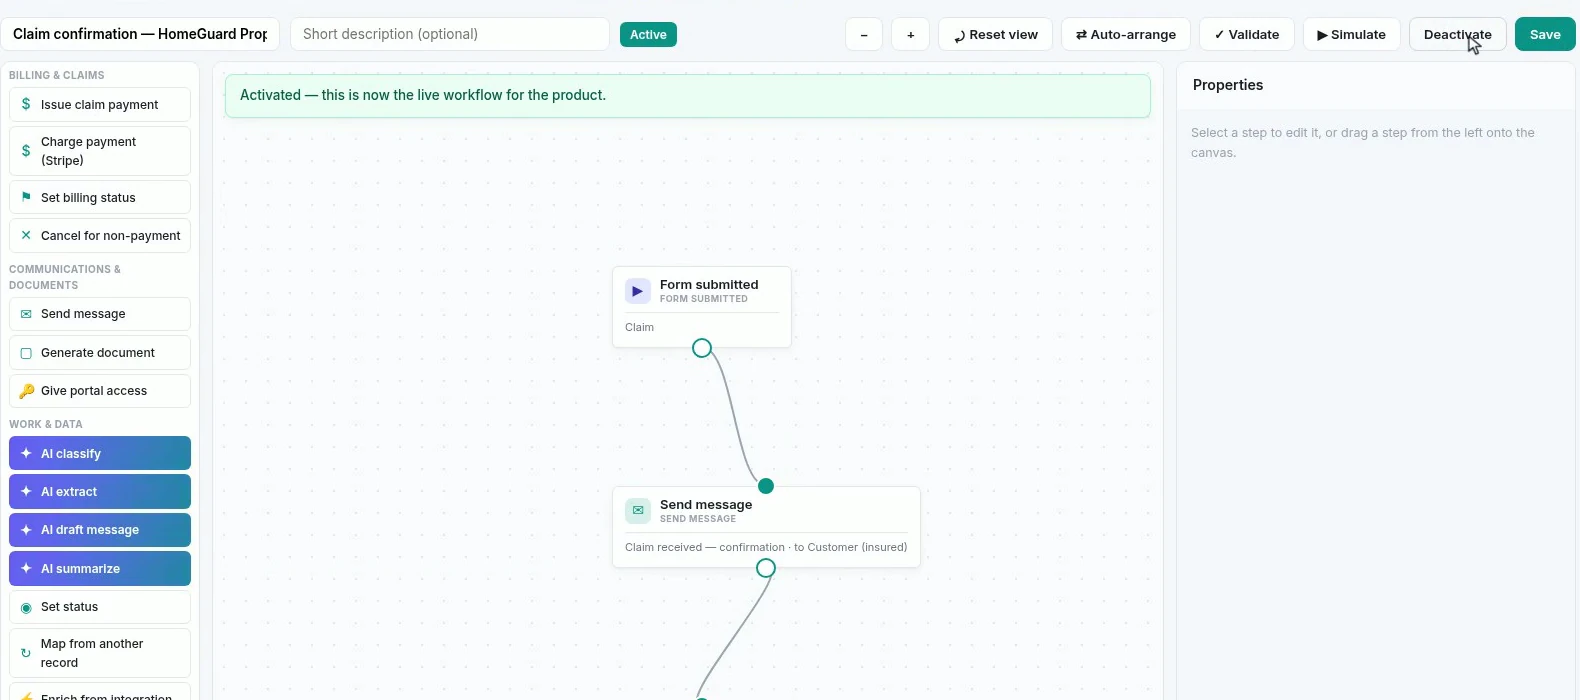
Run the validation before activating. It catches the loose ends that are invisible on a canvas, a step wired to nothing or a trigger with no path to an end, and those are exactly the faults that otherwise show up as an email that never arrives.
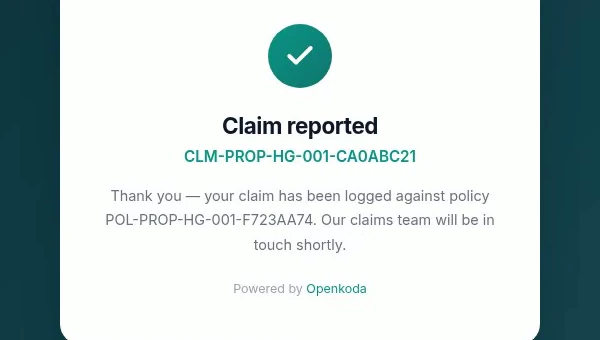
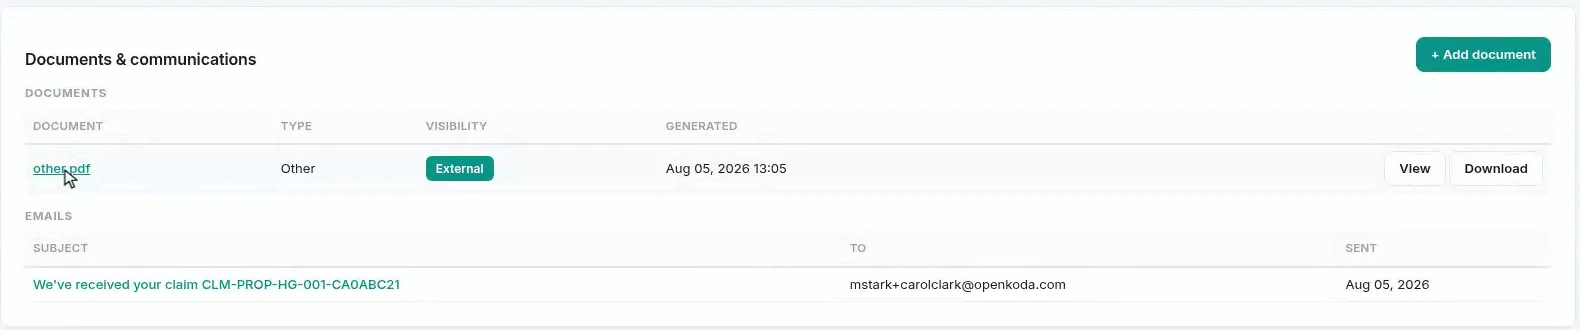
This is the screenshot that shows the cost of skipping the document type in Step 1. The file is correct, external and attached to the right claim, and it is called other.pdf. Set the type on the template and it files under its own name.
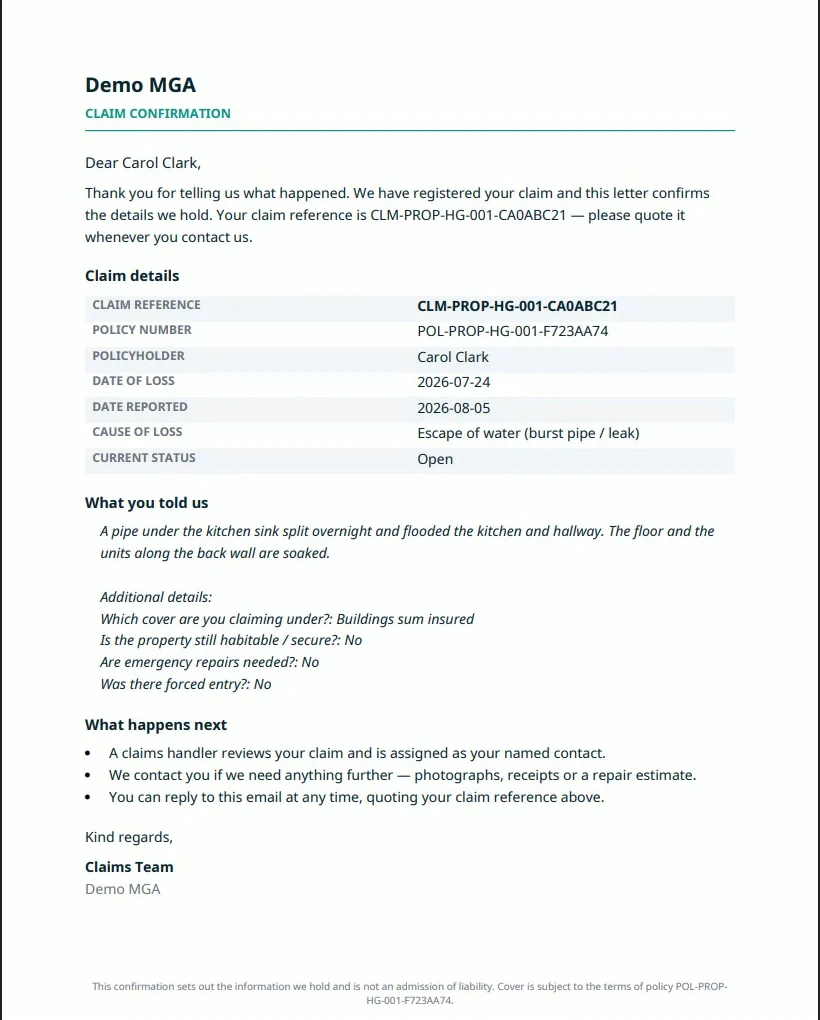
Check the three things that go wrong quietly. The recipient is the insured rather than a test address. The subject and body carry real values rather than an unsubstituted {##…##}. And the attachment is the document you meant.
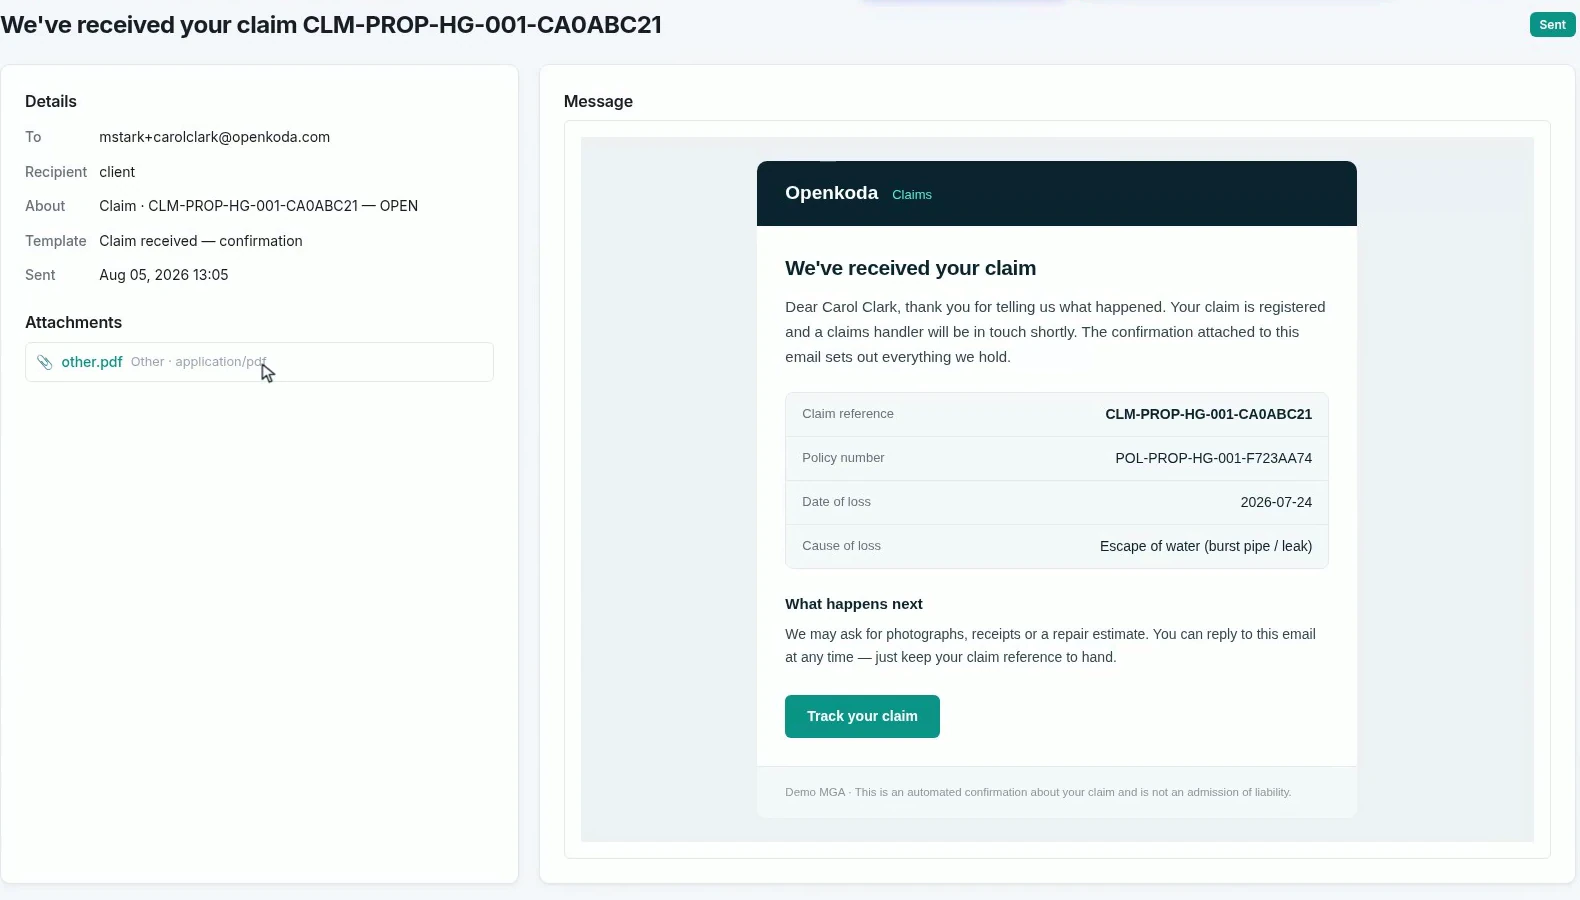
All three are visible on that one screen, and all three are the difference between an automation you trust and one somebody double-checks by hand every morning, which is not an automation at all.
What makes this worth doing is not that a letter gets sent. It is the shape: wording in a template, data on the record, and a workflow that points at both rather than containing either. Change the letter next quarter and every claim from that moment gets the new one, with no workflow to edit. Add a second step, a task for the handler, an SMS, a note to the broker, and it runs on the same trigger.
Start with the acknowledgment precisely because it is low-risk, and because once the customer gets an answer in five seconds instead of two days, the argument for automating the next step tends to make itself.
Build a motor rating engine from four tables: derive the ages you do not store, combine the factors, add fees and tax, then price a real risk and reprice it.
Build a billing desk board tile by tile, then a second one by describing it in a sentence, and make one the screen your team signs in to.
Follow one hand-over end to end: a chat message carrying the policy, a task with an owner and a due date, and the notification that reaches the assignee.
Book a live, personalized demo with our product team - tell us your use case and see the platform work with your data. No commitment.