How to Set Up Your Own Rating and Premium Calculation Rules in Openkoda PAS
Build a motor rating engine from four tables: derive the ages you do not store, combine the factors, add fees and tax, then price a real risk and reprice it.
Build a fully functional, customizable insurance policy management application in minutes with Openkoda's pre-built, no-code features.

Effective policy management is a cornerstone of any insurance company. A well-designed, customizable system ensures streamlined operations, data accuracy, and ease of use for your team. But traditional software system development can be time-consuming and costly.
There are solutions that shorten development time and let you build a policy management application in no time with pre-built and fully customizable features.
One such tool is Openkoda, an insurance-specific application development platform.
By the end of this tutorial, you will have built a fully functional, ready-to-use policy management application that can be expanded at any time. This powerful platform will enable you to efficiently manage policies, automate routine tasks, and handle large-scale operations with ease.
With Openkoda Policy Management Application, you'll be able to:
Watch the video below or follow the steps in this tutorial and discover how Openkoda can help you develop insurance software faster.
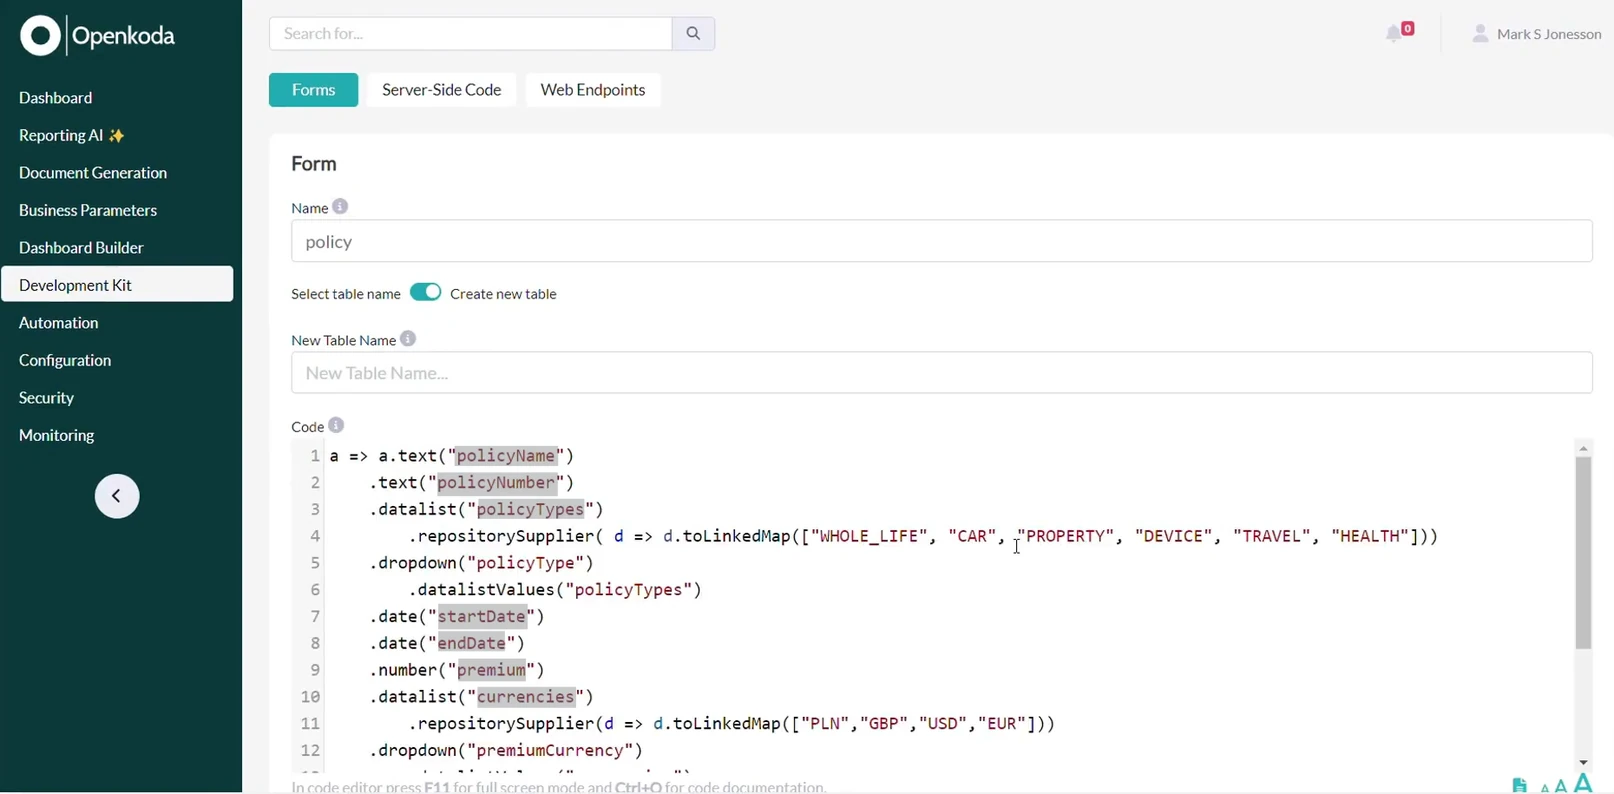
The first step is to set up a custom form where users can enter policy details.
Log in to Openkoda, go to the Development Kit, go to Forms and start by creating a new form
Here you can add all the essential fields you need to store within your policy record, such as: policy name, policy number, policy type, agent name, start and end date, etc.
You can also customize your field types with different formats: such as text, numbers, dropdowns, and reference fields, giving you flexibility in data structure.
Why is this step important? By customizing forms, you can define the exact data points your policies require, ensuring consistency and eliminating irrelevant fields.
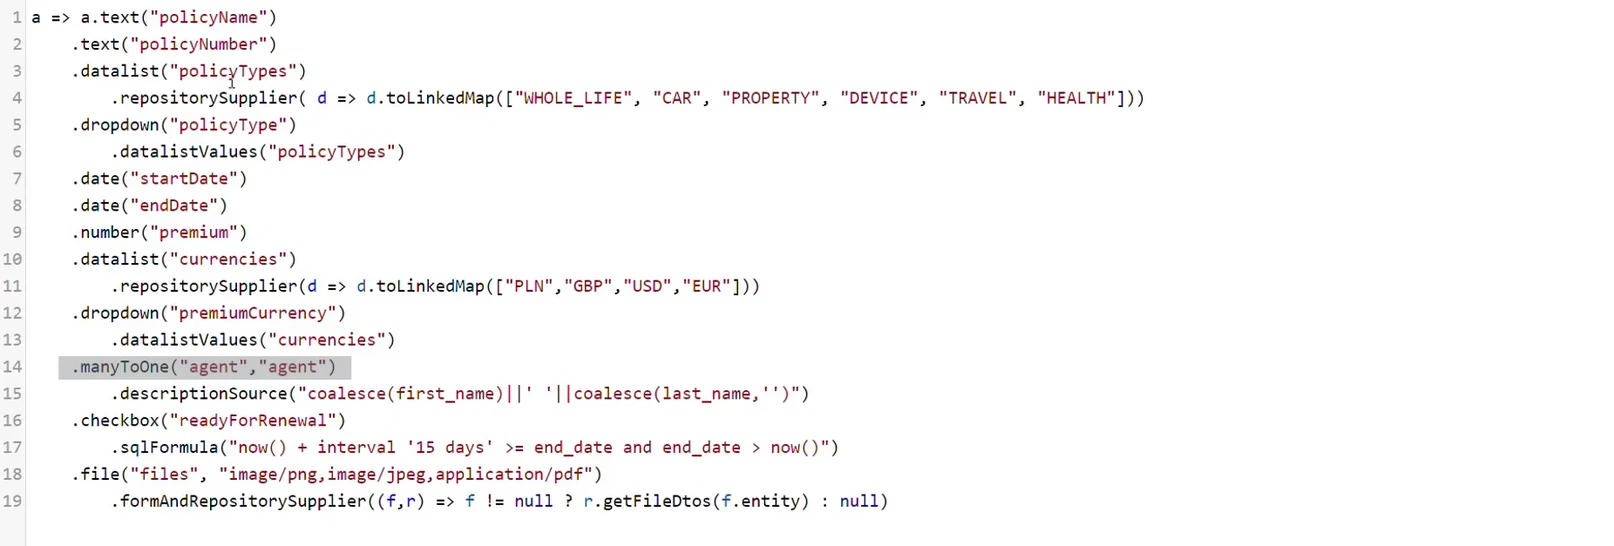
In Openkoda, you can create predefined options for dropdown fields such as Policy Type or Coverage Plan. Dropdowns and reference fields reduce errors, improve data consistency, and make it easier to manage relationships between entities.
For better organization, link your policies to related data, such as a specific agent or client. This helps ensure that each policy record is associated with the appropriate user.
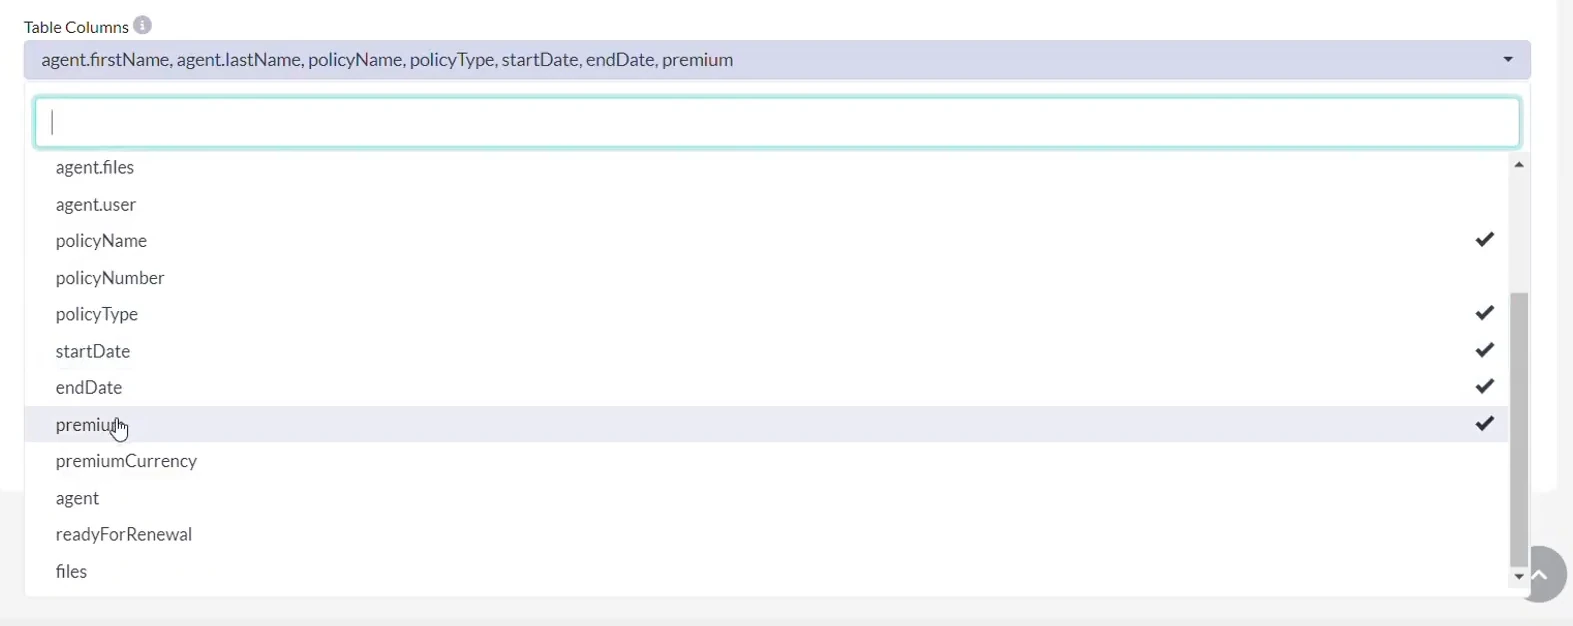
Once you have defined the form, you can customize the table view. Select specific fields to display on the main policy screen. This ensures that users have quick access to the most important data.
Custom table views allow team members to focus on key metrics, improving productivity and decision-making.
A policy table view can be modified and customized at any time, and you can also set custom privileges to allow a specific user to access this view.
Learn more watch this tutorial: How to Manage Users and Define Roles for Effective Team Collaboration.
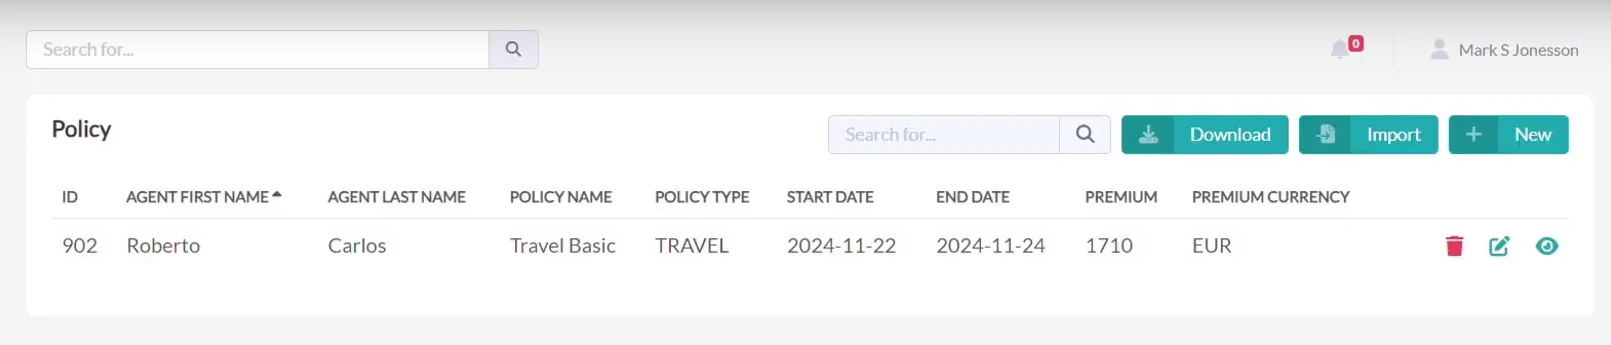
The policy screen now displays all records with the fields you've selected. This is your personal hub for browsing and managing all your policies.
Without any further work, it gives you the ability to view the list of managed policies, add new records, change policy statuses, edit other attributes, and remove them.
This centralized view of policies streamlines management and makes it easy to find and edit relevant records.
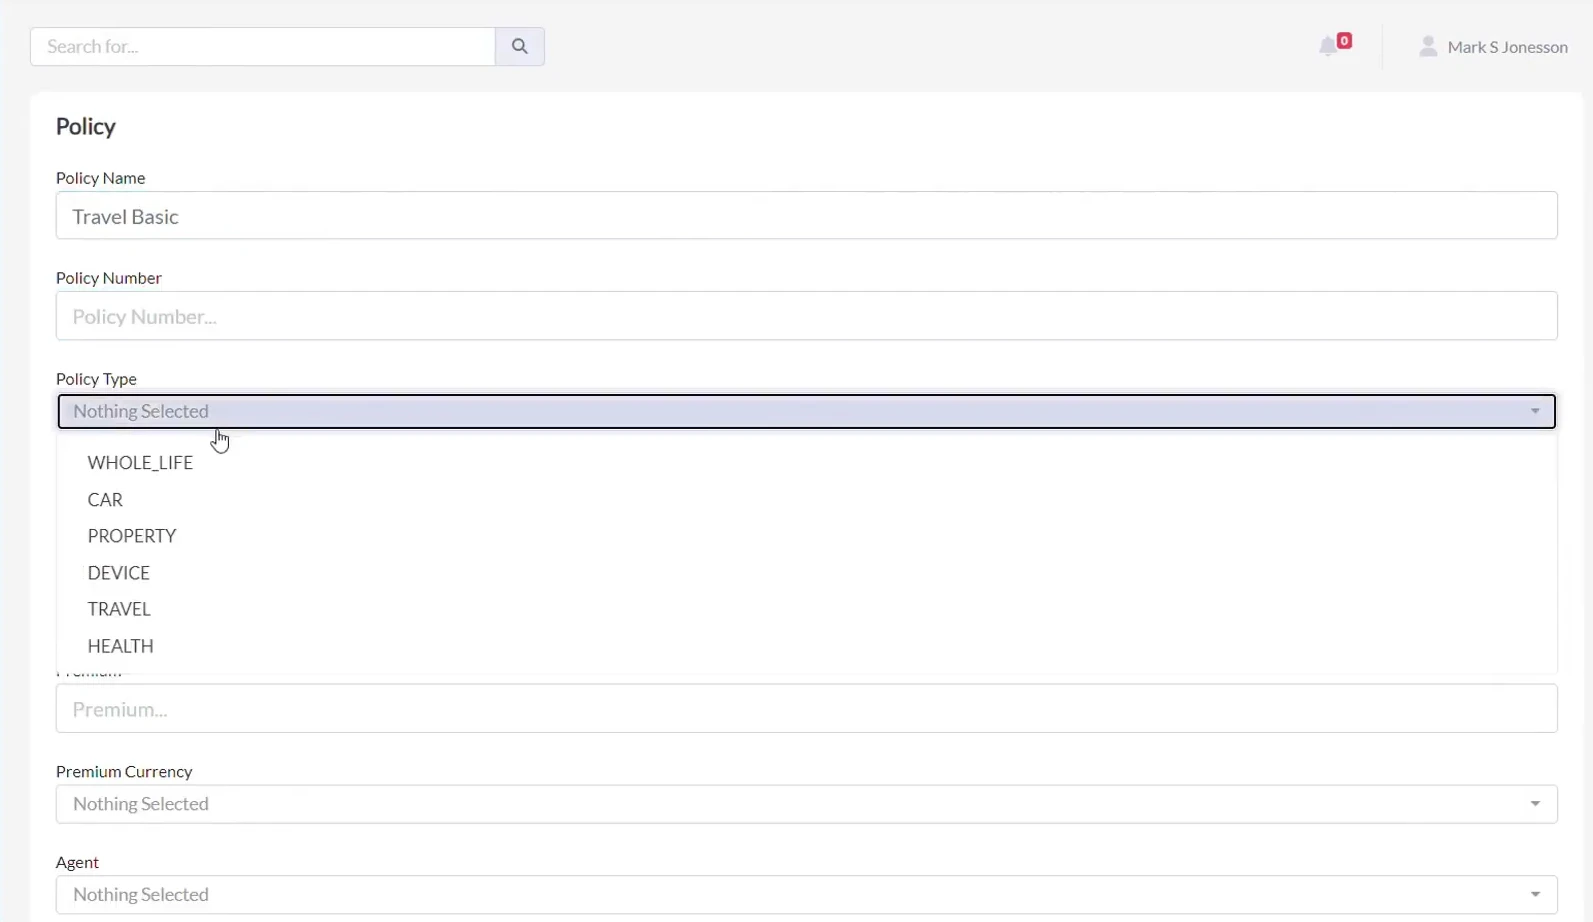
Adding new records, which in this case are policies, is simple.
Click Add New Policy and enter all the details. Use intuitive input such as dropdown menus, date pickers, and text boxes to quickly fill out the form.
Save the policy and the new record will appear on your main screen along with icons for viewing, updating, and deleting. This feature enables quick policy updates, reducing errors and time spent on administrative tasks.
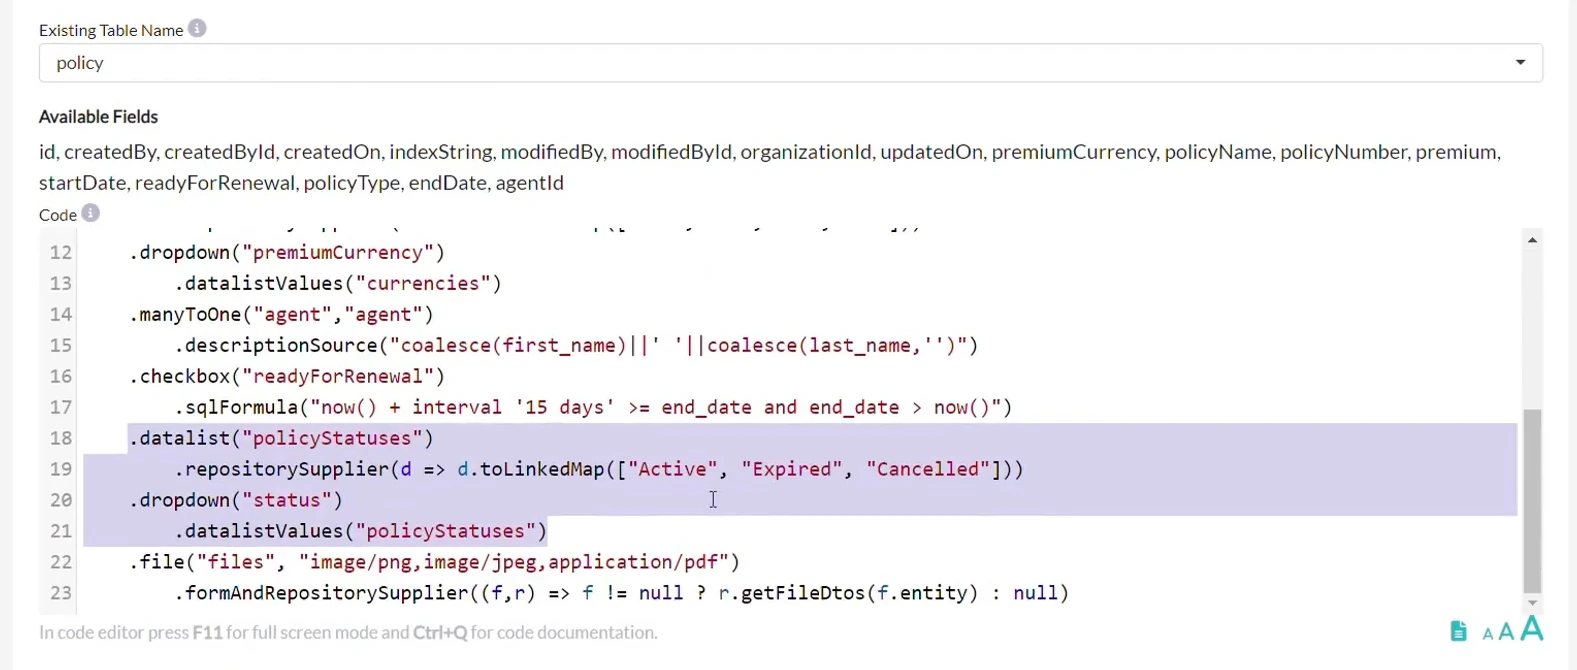
You can always edit your policy form and add new fields that can also be used for filtering your data.
For example, you can add fields such as: Policy Status or Policy Type.
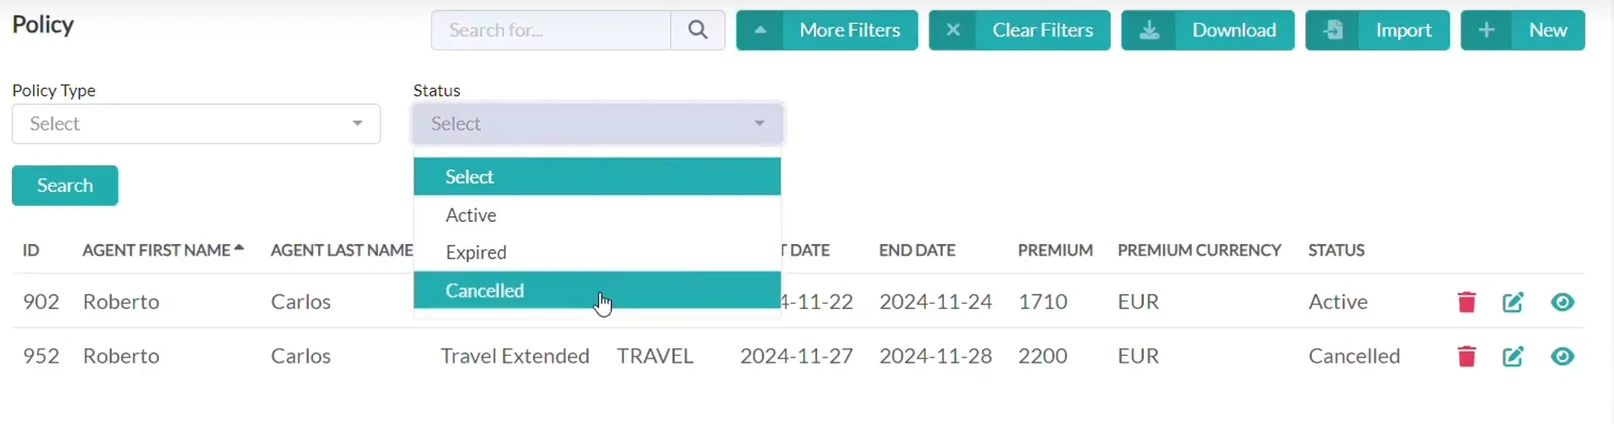
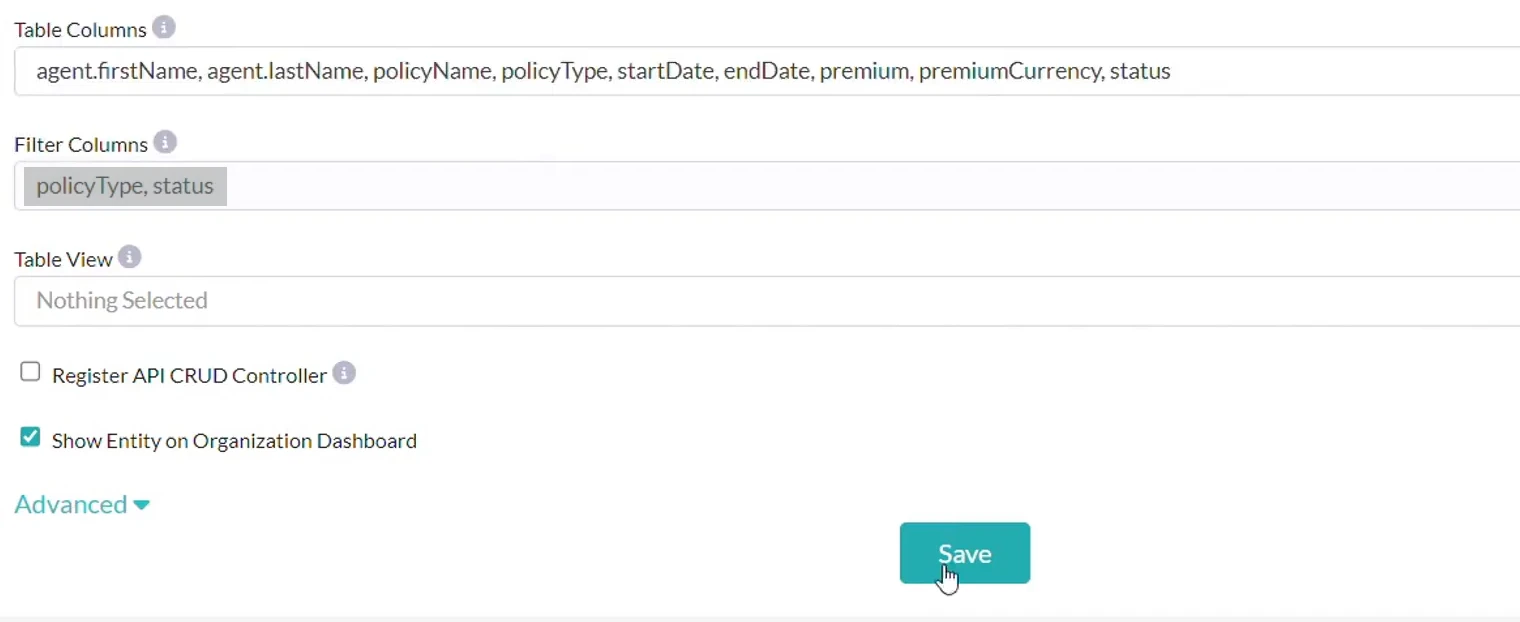
And then define filters for those fields to enable precise searches on the policy form.
Next, apply the filters to find specific policies. For example, filter by active or expired policies. Filters improve the user experience by reducing the time it takes to find records, especially in large data sets. It also minimizes the risk of missed opportunities or errors.
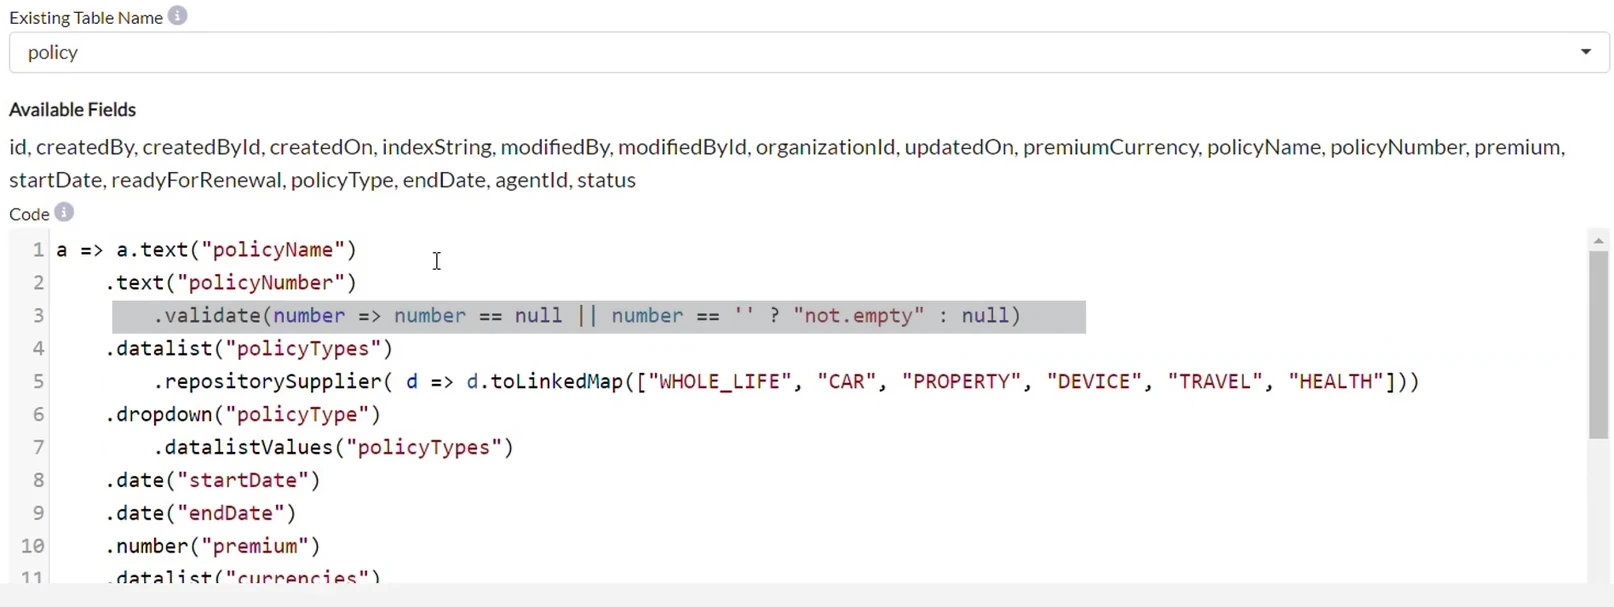
Another important feature of our policy application is the validation rules, which can be easily created in Openkoda and adapted to your needs, since you can introduce any rule you wish.
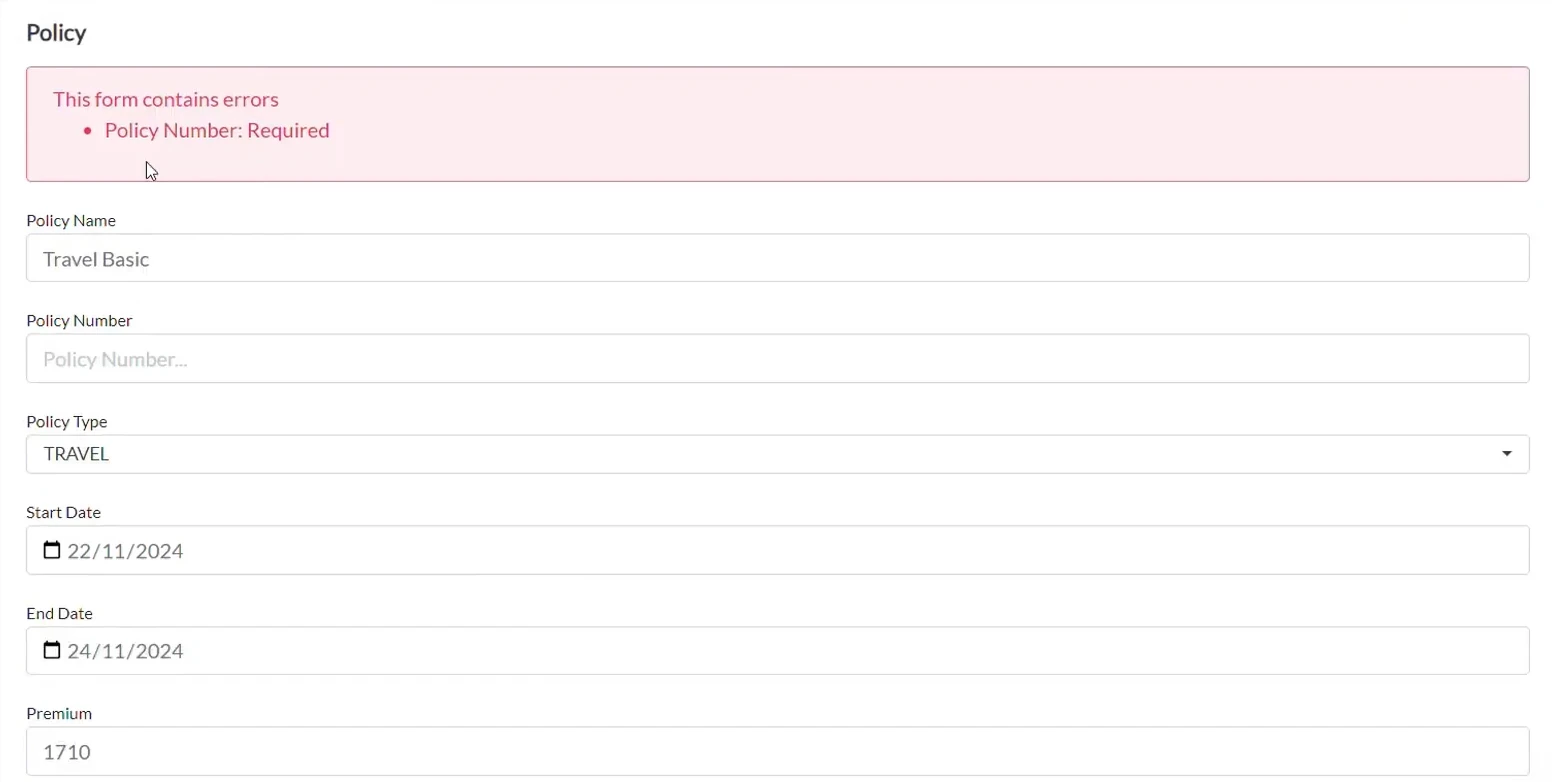
You can set required fields by marking fields like Policy Number or Policy Name as mandatory within Openkoda.
Openkoda highlights missing fields and prompts users to complete the form if they attempt to save an incomplete form.
Validation prevents important fields from being left blank or filled out incorrectly. It ensures high-quality data entry and increases system reliability.

Your Openkoda policy management application is already equipped with upload and export capabilities to make handling large policy datasets easier for insurers.
Easily import multiple policies in bulk using CSV files or download policy data in CSV format to support reporting, compliance, and in-depth analysis.
These tools enhance operational efficiency, save time, and enable easy integration with the insurance platforms and systems you already rely on.
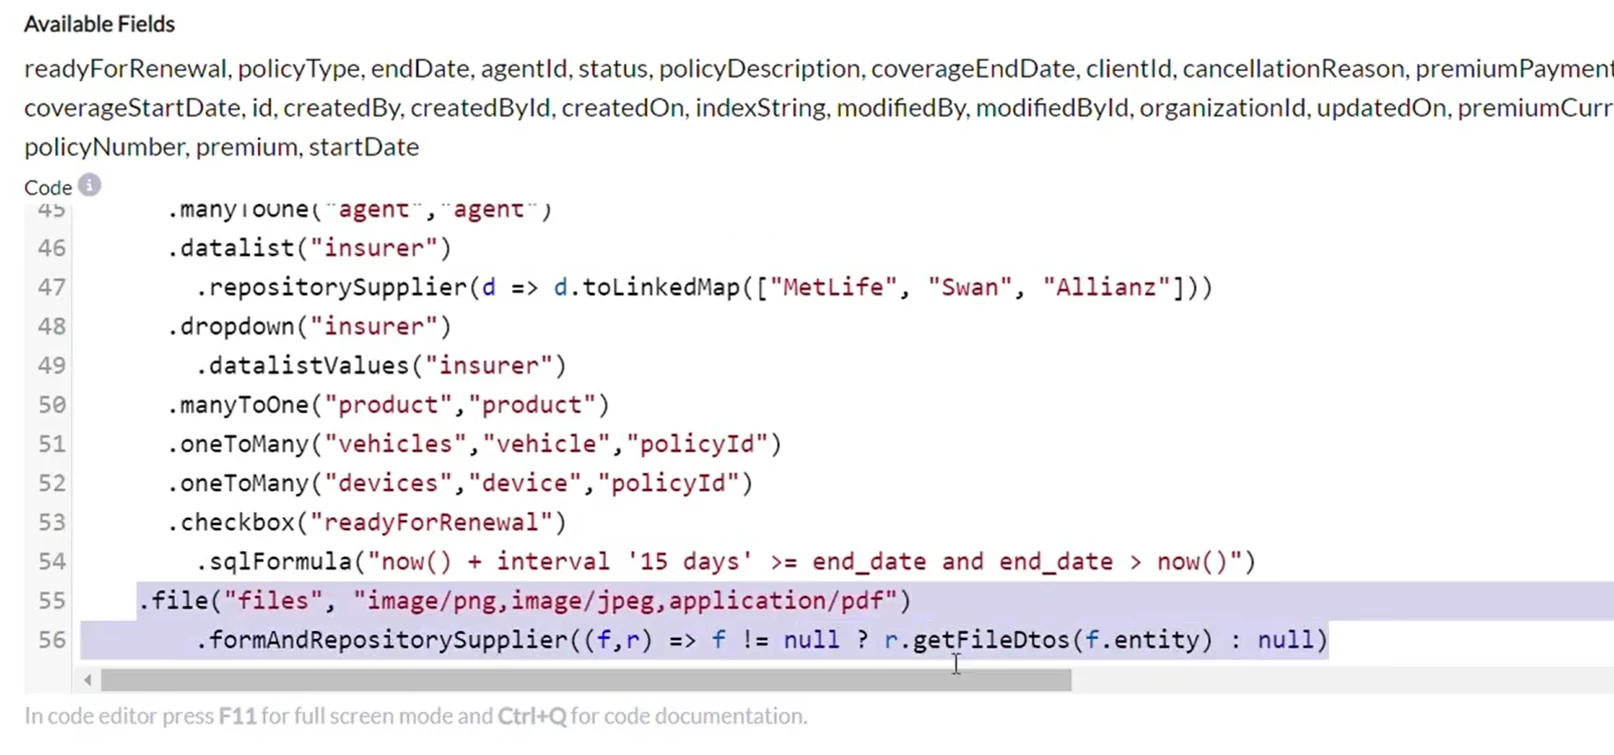
Enhance your policy management application further by adding custom file uploads to your forms in Openkoda. This feature allows users to attach files directly to records improves document management, provides richer data, and ensures important files are always accessible.
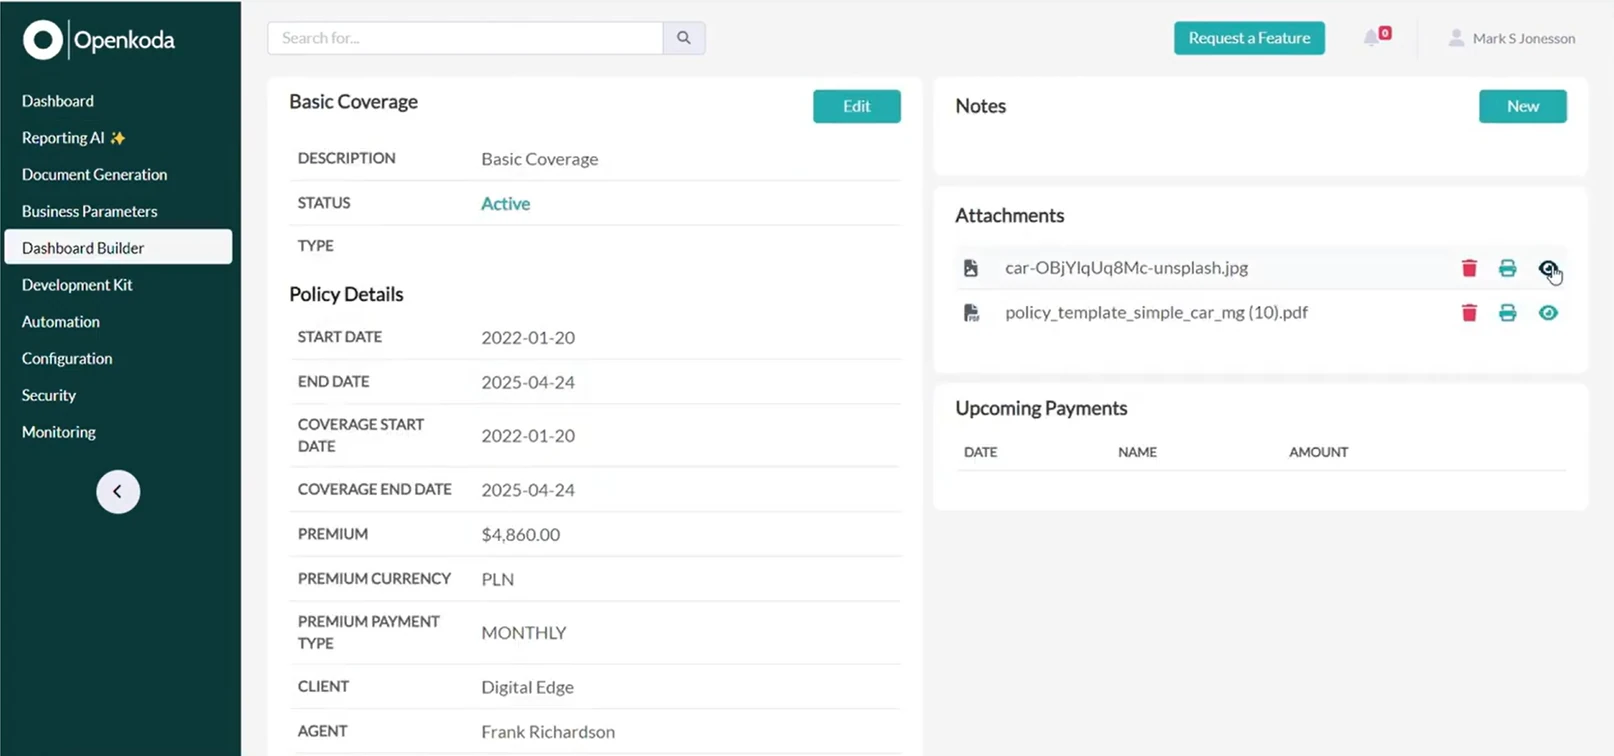
Follow the steps below or watch a video tutorial:
By integrating custom file uploads, your application maintains organized, detailed, and easily accessible policy records, enhancing operational efficiency and compliance.
This step demonstrates how easily you can extend your policy management application with Openkoda. There's no need for your changes to get stuck in the development backlog – waiting weeks or months. With minimal effort and a little bit of configuration or coding, you can implement updates immediately.
In the last step, we'll present more ideas for features you can add at any time. But remember, with Openkoda, the possibilities for customization are truly limitless.
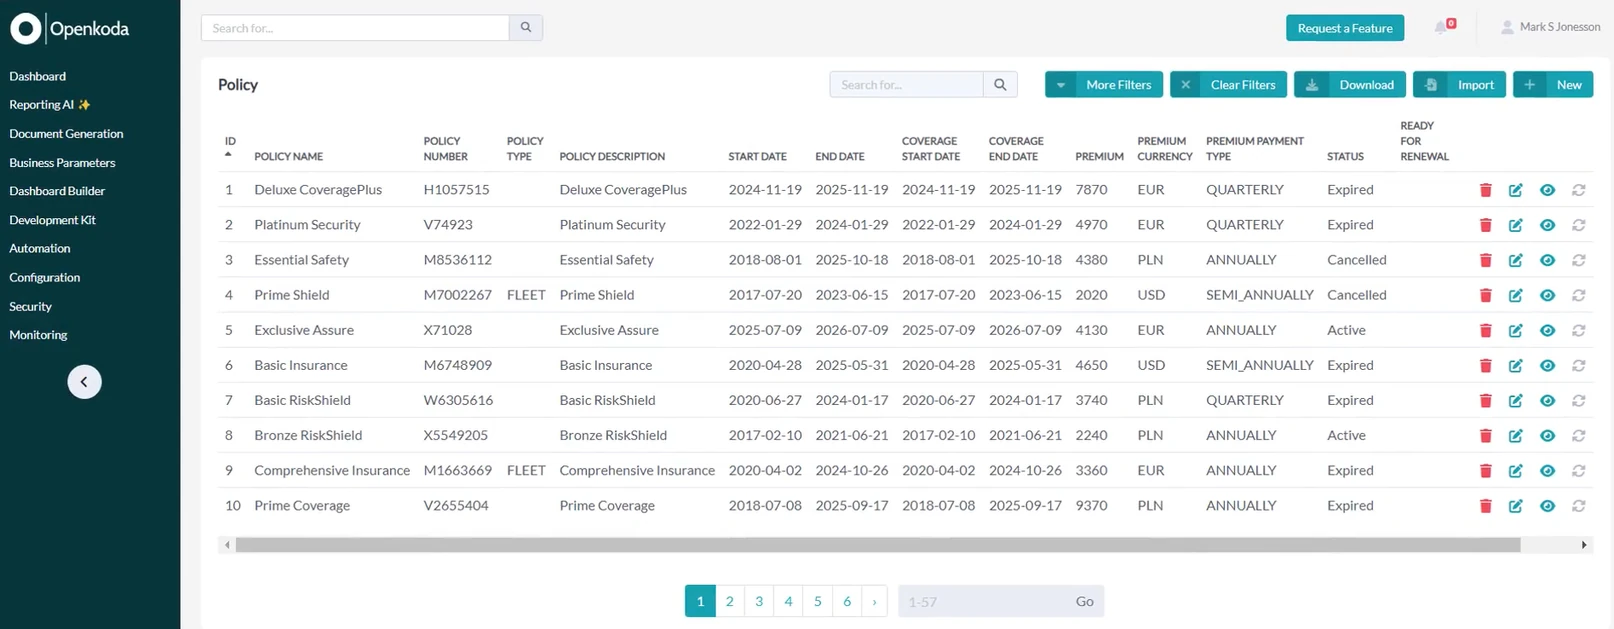
This is your ready-to-go policy management application built in 5 minutes with Openkoda.
Your custom policy management software built with Openkoda can be enhanced further with additional, out-of-the-box features, such as:
Discover all Openkoda features
In just a few minutes, you've created a fully functional policy management application that can be tailored to the specific needs of your insurance business. Openkoda empowers insurers and insurtech businesses to reduce development time, save costs, and focus on delivering value to clients.
Take control and build your custom solutions today with Openkoda – no more waiting months for developers.
Tell us more about your insurance business and book a personal demo with us, and we will help you find the perfect solution in Openkoda that will automate your insurance business.

Build a motor rating engine from four tables: derive the ages you do not store, combine the factors, add fees and tax, then price a real risk and reprice it.

Automate a claim acknowledgment end to end: a Word template with placeholders, the email that carries it, and a workflow that fires when the claim form arrives.

Build a billing desk board tile by tile, then a second one by describing it in a sentence, and make one the screen your team signs in to.
Book a live, personalized demo with our product team - tell us your use case and see the platform work with your data. No commitment.