How to Set Up Your Own Rating and Premium Calculation Rules in Openkoda PAS
Build a motor rating engine from four tables: derive the ages you do not store, combine the factors, add fees and tax, then price a real risk and reprice it.
A step-by-step guide to building a fully functional, customizable claims management application with Openkoda in minutes.

With Openkoda Claims Management Application, you'll be able to:
Watch the video below or follow the steps in this tutorial and discover how Openkoda can help you develop insurance software faster.
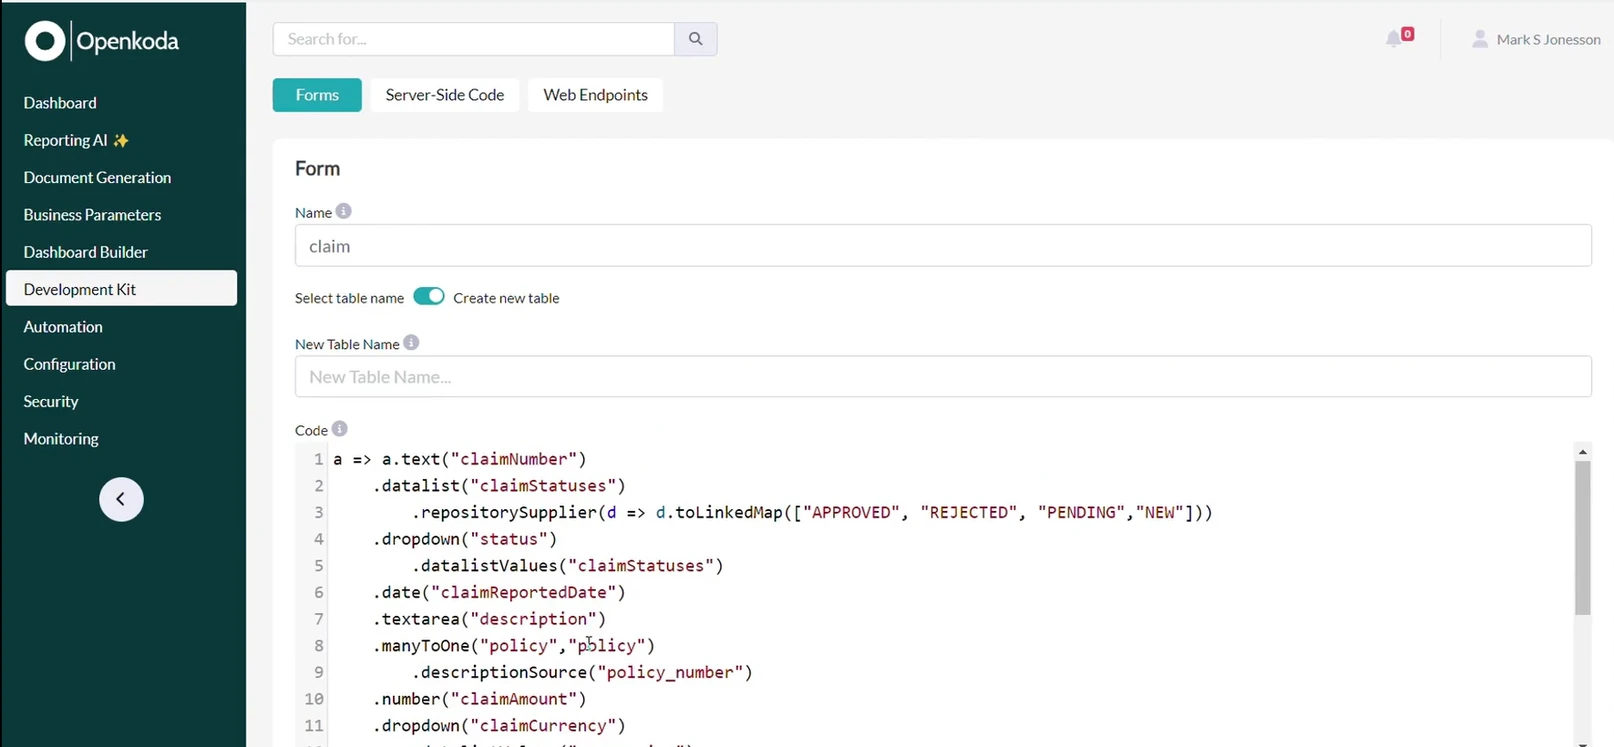
The first step in building our claims management application is to set up a new claims form. This form will capture essential details about each claim. Some of the key fields to include are:
With Openkoda you can easily create and organize these fields the way you want, the customization options are endless:
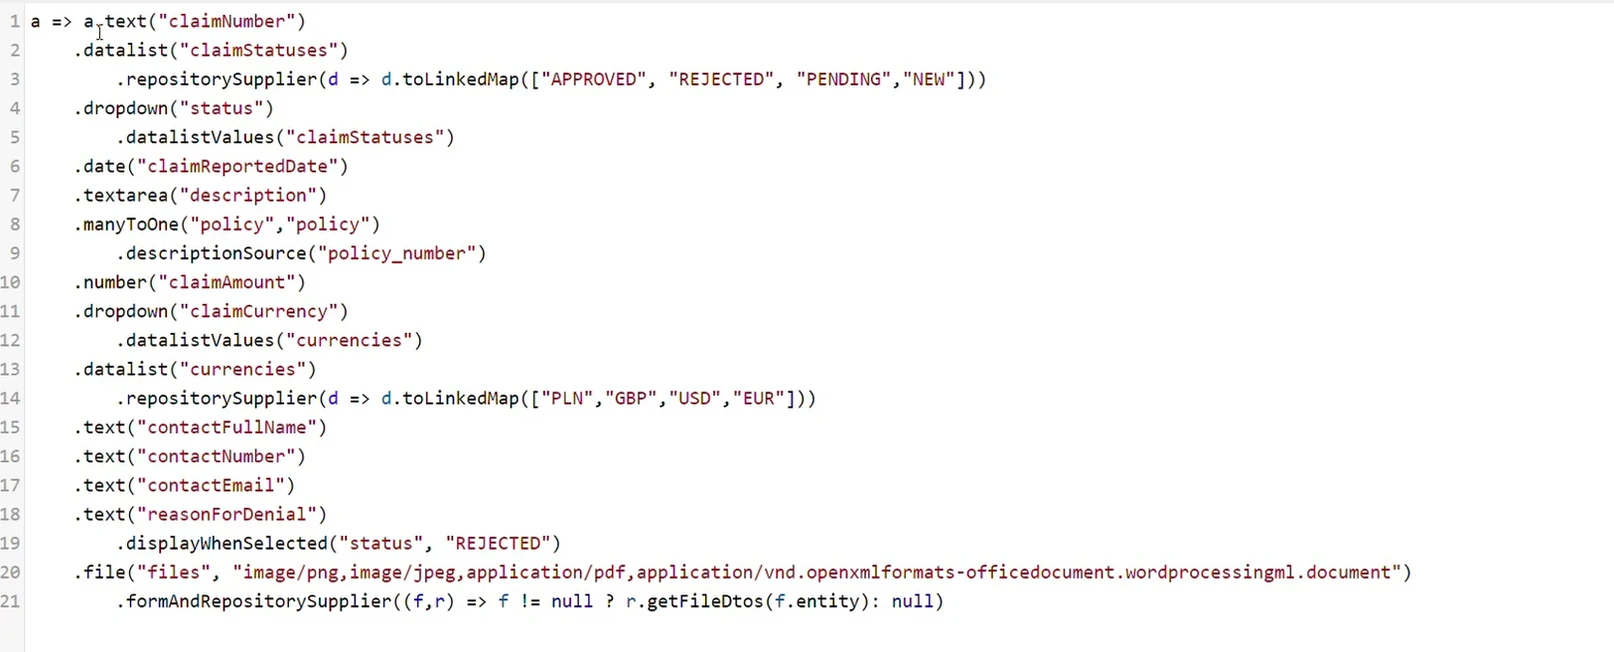
To make data entry more structured, Openkoda supports different field types:
These features help ensure that claims are accurately recorded and easy to manage.
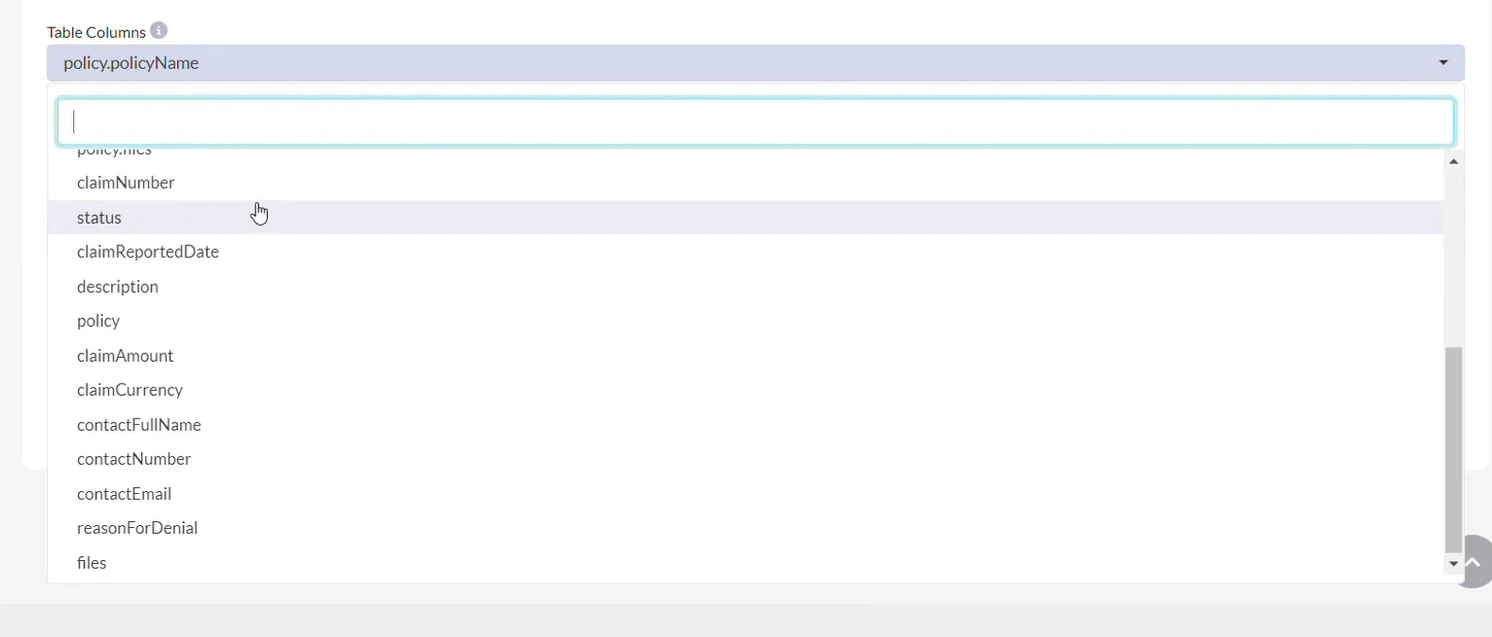
Once the form is created, the next step is selecting which fields should appear in the main claims table.
Openkoda lets you display essential attributes and relational data, ensuring all relevant claim details are easily accessible.
The Claims Screen serves as the main dashboard where users can view, manage, and update claims efficiently.
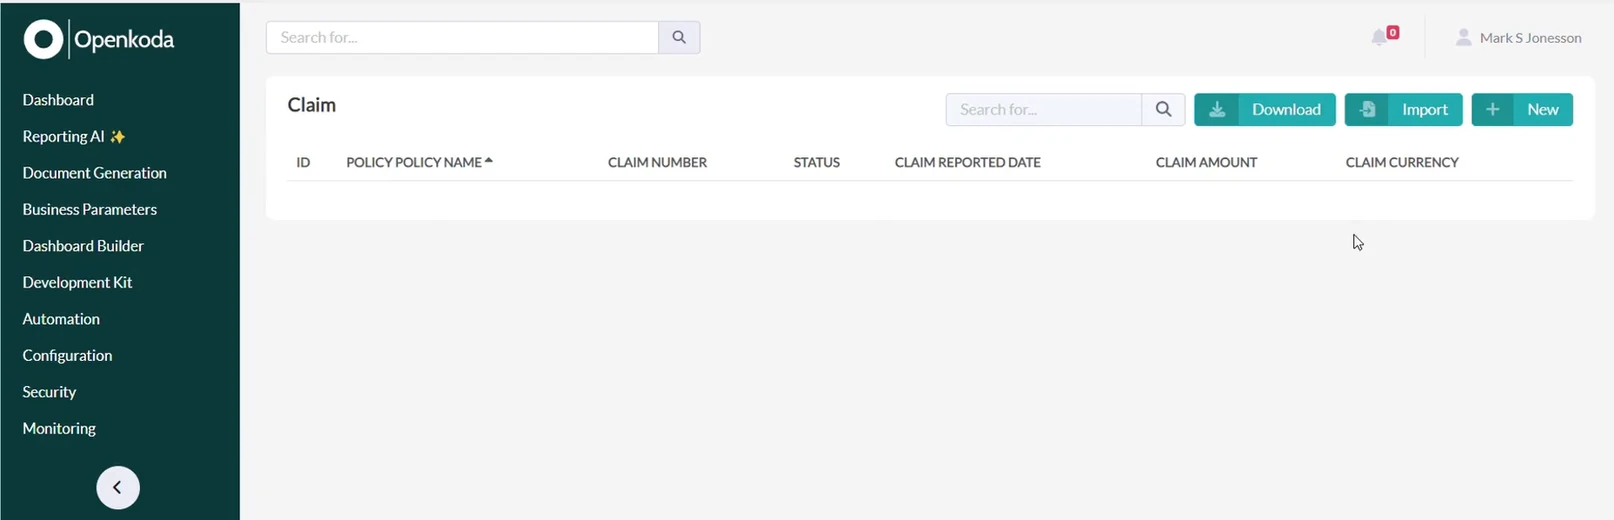
This is what it looks like when the screen is still blank:
You can see all the fields we have just selected (policy name, claim number, status, claim reported date, claim amount, claim currency).
Now it's time to fill it with new claims.
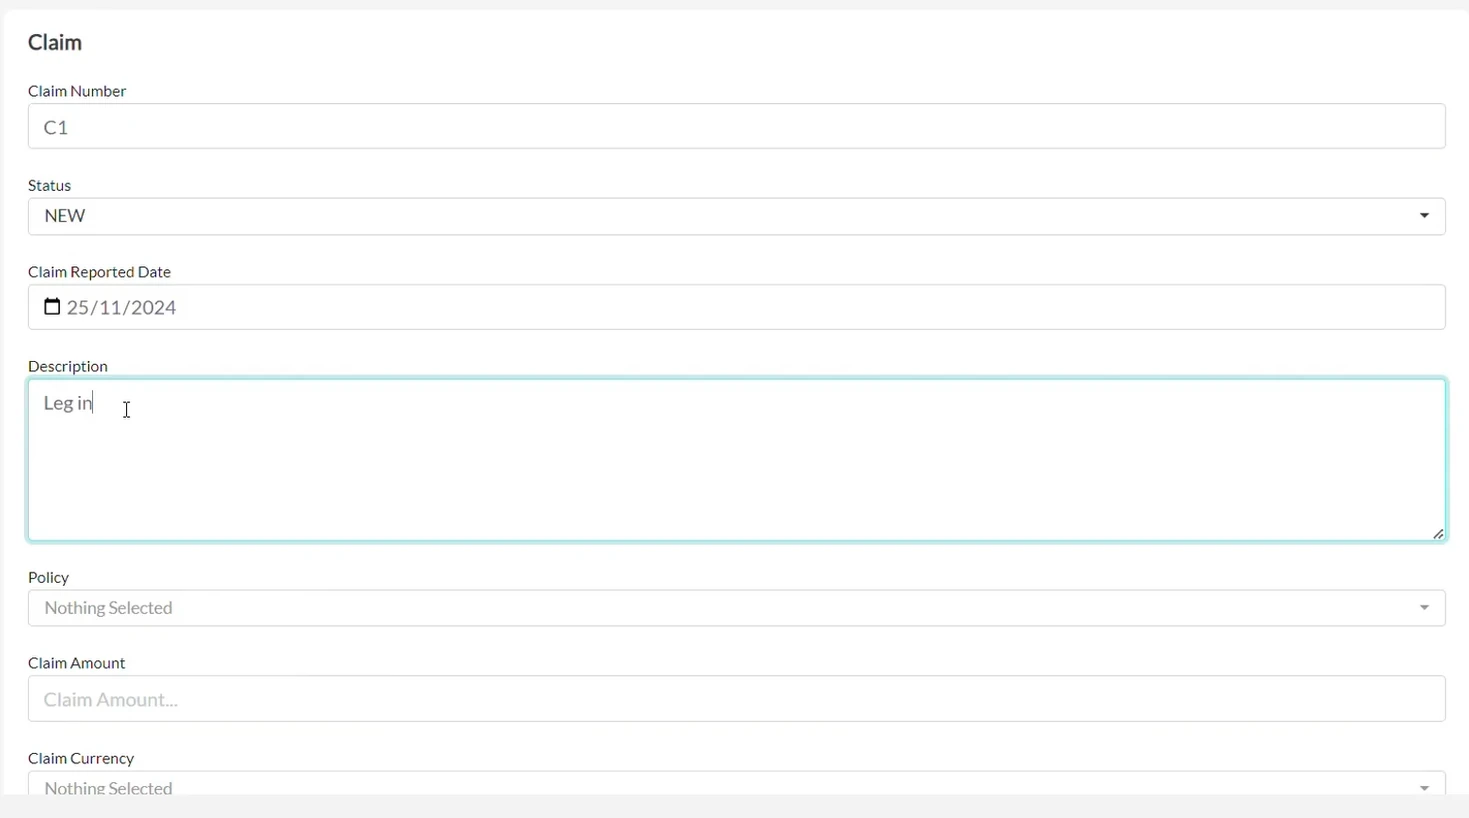
Adding a new claim in Openkoda is straightforward:
The new claim is now listed in the claims table, making it visible and accessible to authorized users.

Openkoda provides a complete set of CRUD (Create, Read, Update, Delete) actions for managing claims. Each record includes action icons that allow users to:
These features ensure full control over claim data while maintaining security and ease of use.
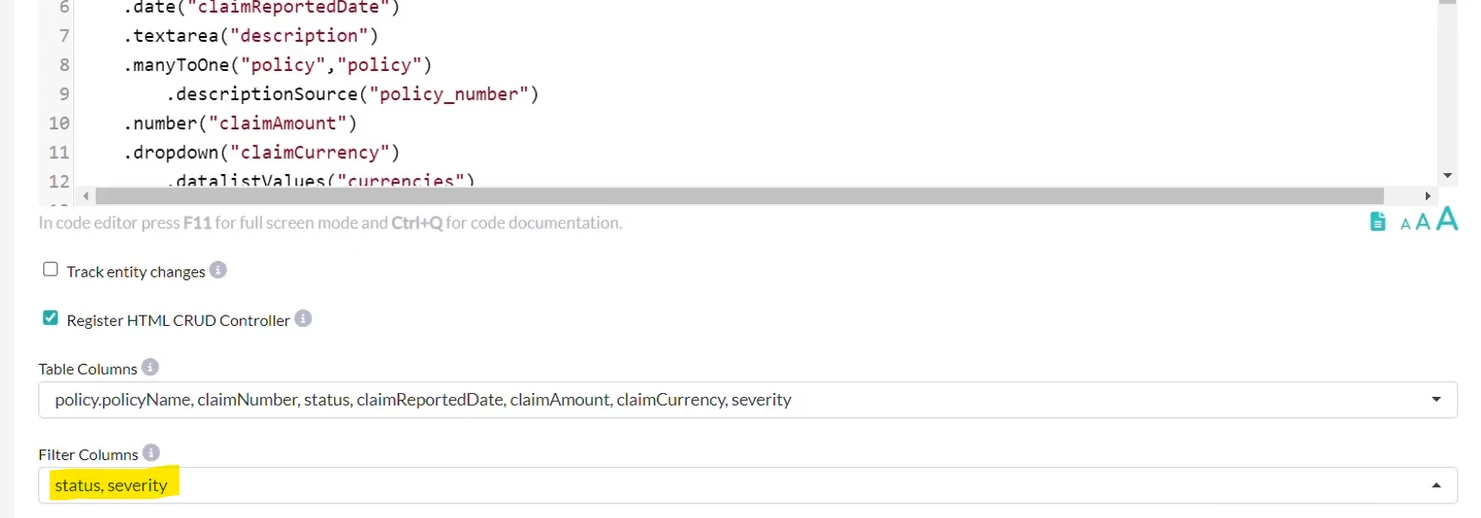
To enhance usability, you can customize the claims form further by adding filters.
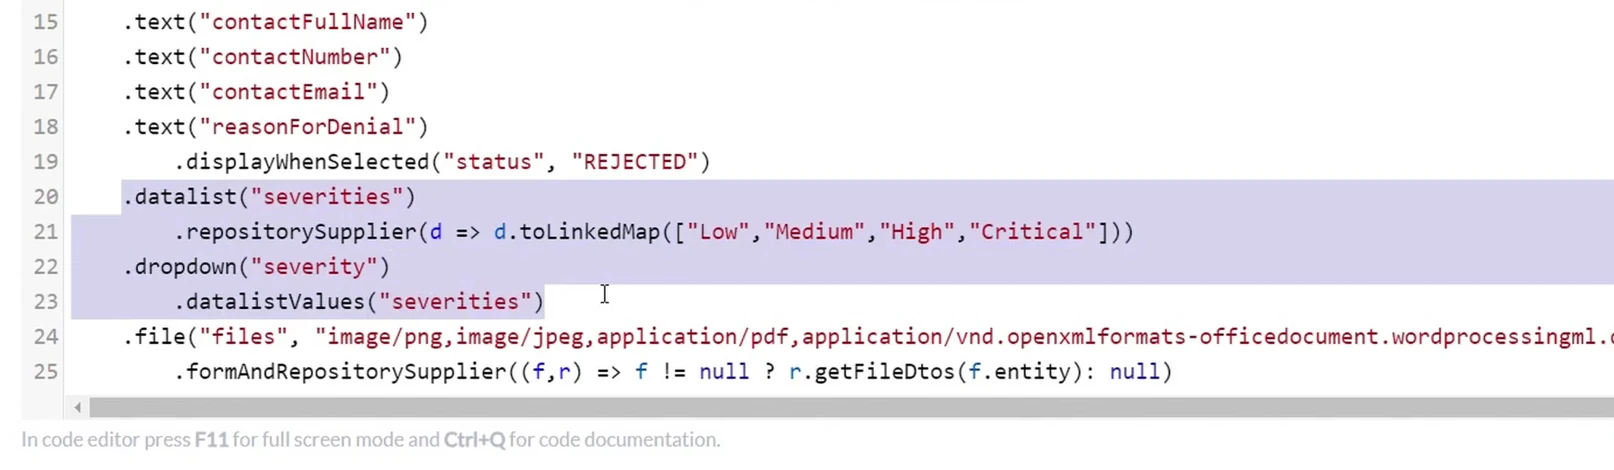
You can add any new field you need and then apply it as a filter. For example, here is a new Severity field that will be used for filtering:
And now apply two fields: Status and Severity.
These filters make it easier for users to find specific claims quickly and efficiently.
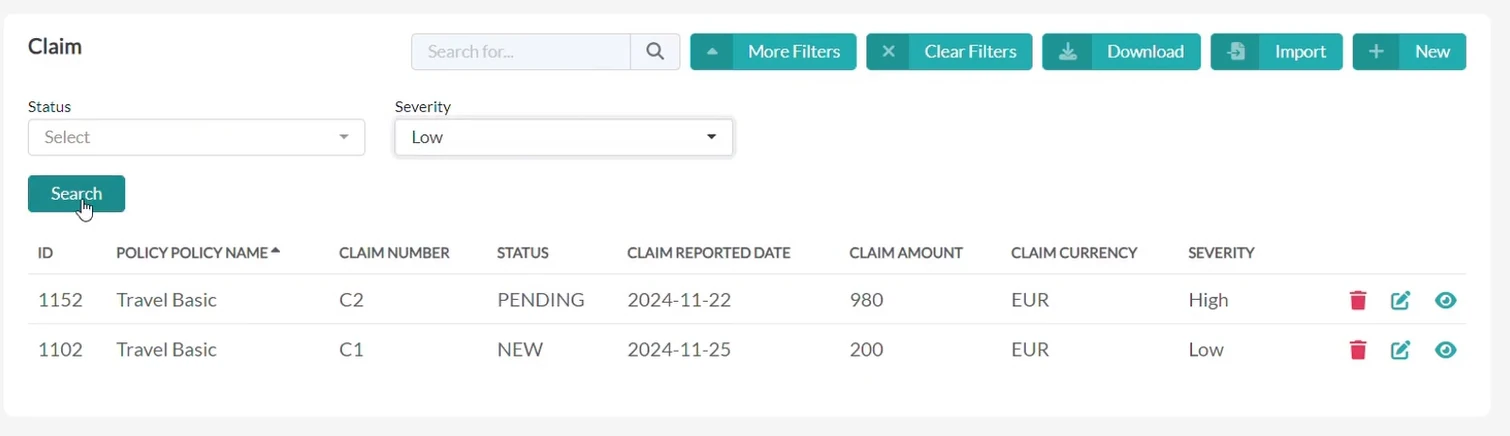
Once filters are defined, they can be applied directly to the Claims Screen. This allows users to sort and search claims based on severity, status, or any other criteria you wish.
For instance, if a user wants to see only high-priority claims, they can filter by severity and immediately find relevant cases.
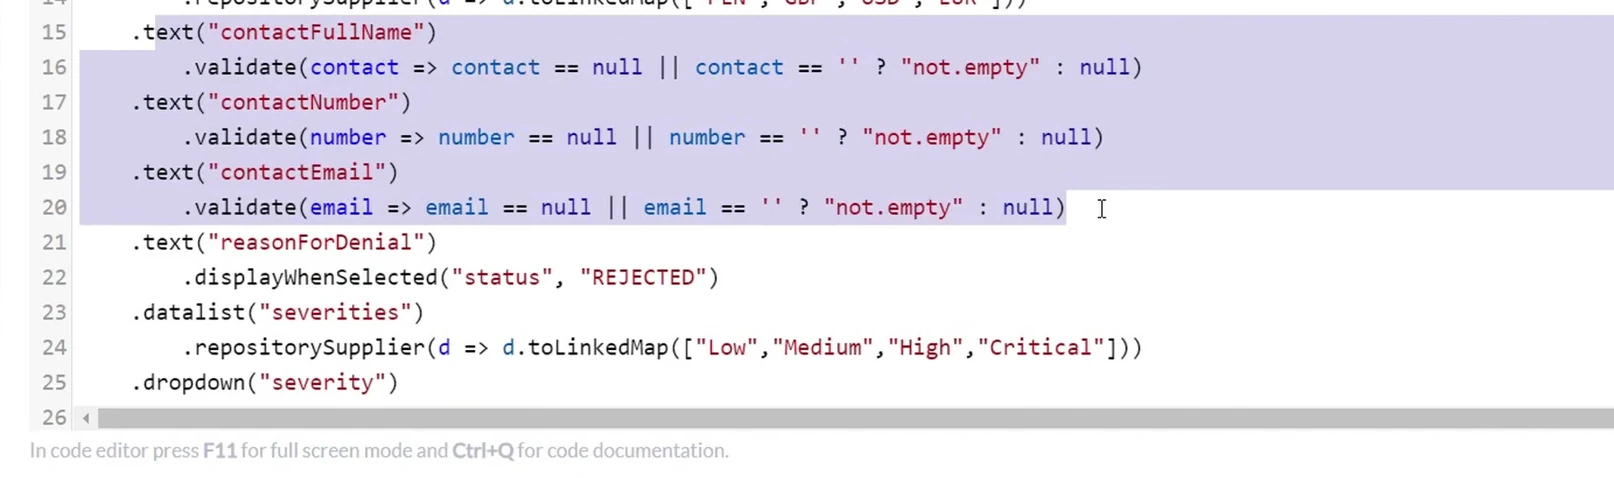
To maintain data integrity, Openkoda allows users to define validation rules. These rules prevent incomplete or incorrect data from being saved.
Example:
This is a simple snippet to insert:
By implementing validation rules, you ensure that claims data is accurate, complete, and reliable.
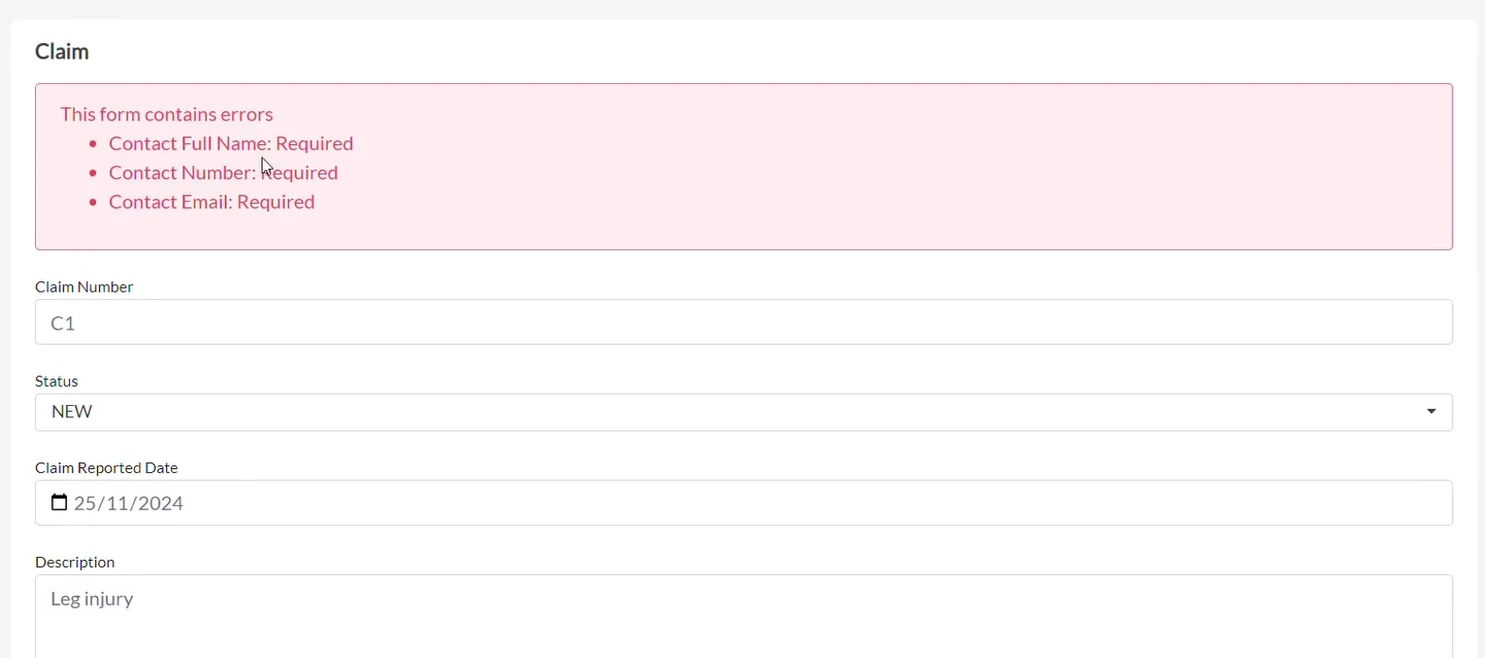
When a validation rule is in place, users receive real-time alerts if required fields are missing.
This prevents incomplete records from being submitted and helps maintain data quality.
For example, if a user forgets to enter contact information, Openkoda will display an error message and prevent the claim from being saved.
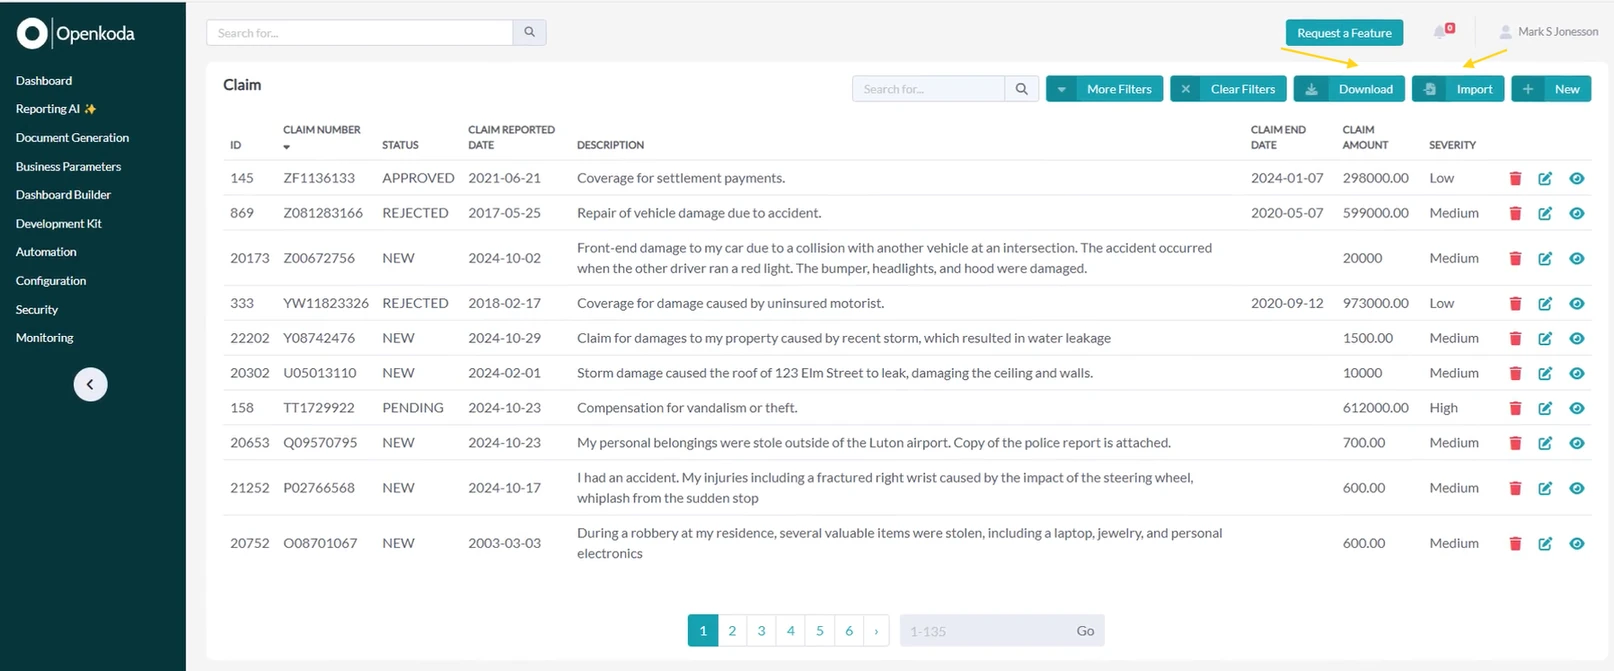
Managing large amounts of claims data is simple with Openkoda's import/export functionality. Users can:
This feature is especially useful for businesses handling a high volume of claims and needing a seamless data management process.
In just a few minutes, we've built a fully functional claims management application. No complex coding, no expensive development teams. It is a customizable insurtech system that helps businesses manage claims efficiently and effectively.
Openkoda gives you all the tools you need to streamline claims management and keep up with your insurance company needs.
With this powerful insurtech platform, you can turn your insurtech application idea into reality faster and risk-free. Thanks to a set of industry-specific built-in features, the development process is accelerated, and you don't have to build everything from scratch.
Start with Openkoda's insurance application foundation and create your own scalable insurance solution – such as embedded insurance or policy management system – that grows with your business and is always ready for further customization.
Want to try it out yourself? Get started with Openkoda today and see how easy it is to build and customize your own insurance applications. Schedule a demo.

Build a motor rating engine from four tables: derive the ages you do not store, combine the factors, add fees and tax, then price a real risk and reprice it.

Automate a claim acknowledgment end to end: a Word template with placeholders, the email that carries it, and a workflow that fires when the claim form arrives.
Build a billing desk board tile by tile, then a second one by describing it in a sentence, and make one the screen your team signs in to.
Book a live, personalized demo with our product team - tell us your use case and see the platform work with your data. No commitment.