How to Create an AI Insurance Agent Product in Openkoda PAS
Describe an AI agent as insurable attributes - pinned model version, autonomy, spending authority, guardrails - then read the cover, rules and rating built on them.
Five businesses on one installation, a role built from three ticks out of seventy-nine, and an audit log that records the walkthrough that built it.

Three different questions get filed under “security” in a policy administration system, and they have three different answers. Keeping them apart is most of the subject:
The useful distinction across all three is between what is enforced and what is configured. Tenant separation is enforced: it is in the data layer, not in a filter somebody remembered to add to a query. Privileges are enforced: the navigation a user sees is derived from them. What you configure is which tenants exist, which privileges make up which role, and who holds it.
This walkthrough goes through all three, and it changes something at each stop. It builds a role, gives it to a colleague, and then finds its own footprints in the audit log.
The whole thing is on video as well, if you would rather watch someone do it than read the steps. It covers the same nine steps in one pass; the written version below is the one to keep open in another window while you work through your own installation.
Before you start, you will need: an account with administration rights in at least one organization, and a colleague’s account to give a role to.
Settings → Organizations lists the tenants. Each has its own members, its own product catalogue, its own currency, and one of them is the one you are currently working inside.
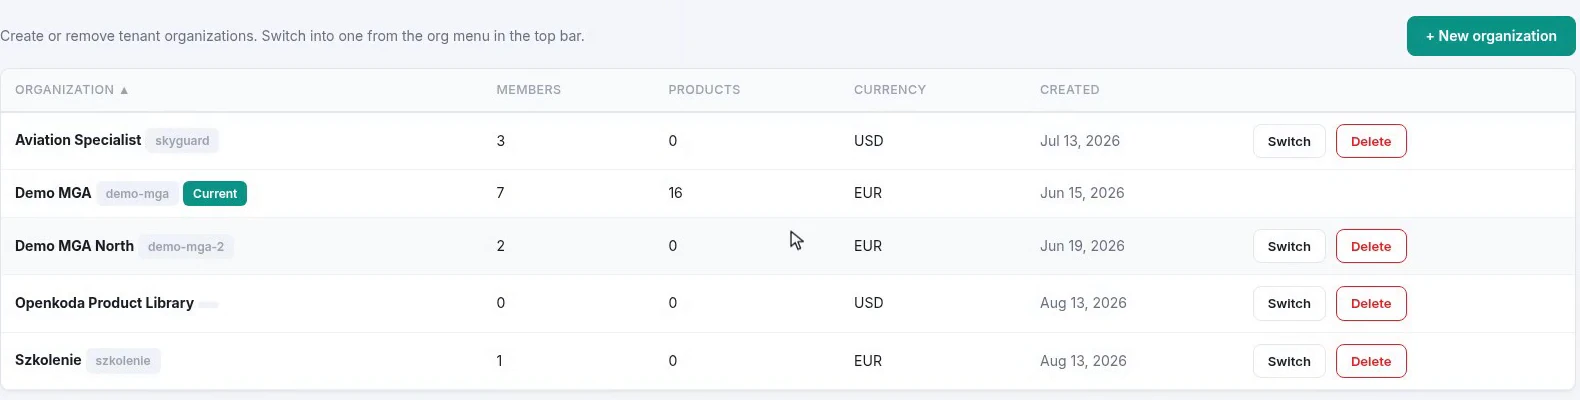
Currency per organization is the detail worth noticing. A tenant is not a folder or a label on shared records; it is far enough down that two organizations on the same installation can trade in different money. Setting them up is its own walkthrough: managing multiple insurance organizations in one platform.
Switch into another organization and open the same screen you were just on. It is not the same data filtered; it is a different tenant’s catalogue.

Two things to check when you do this on your own installation. First, the top bar: it names the organization you are inside, and it is the only thing on screen that tells you. Second, trust the screen over the summary: the Organizations table’s product count is a rolled-up figure and can lag what the catalogue actually holds, so if the two disagree, the catalogue is the one to believe.
What you cannot do from here is reach the other tenant’s data by editing the address bar or guessing an identifier. That separation is in the foundations of the platform rather than in each screen’s query, which is the difference between a system that is multi-tenant and one that merely filters.
Back in your own organization, Settings → Roles is who can do what. Seven roles ship with the system - administrator, billing, claims handler, product manager, read-only viewer, sales, underwriter - and each one reports how many privileges it contains and how many people hold it.
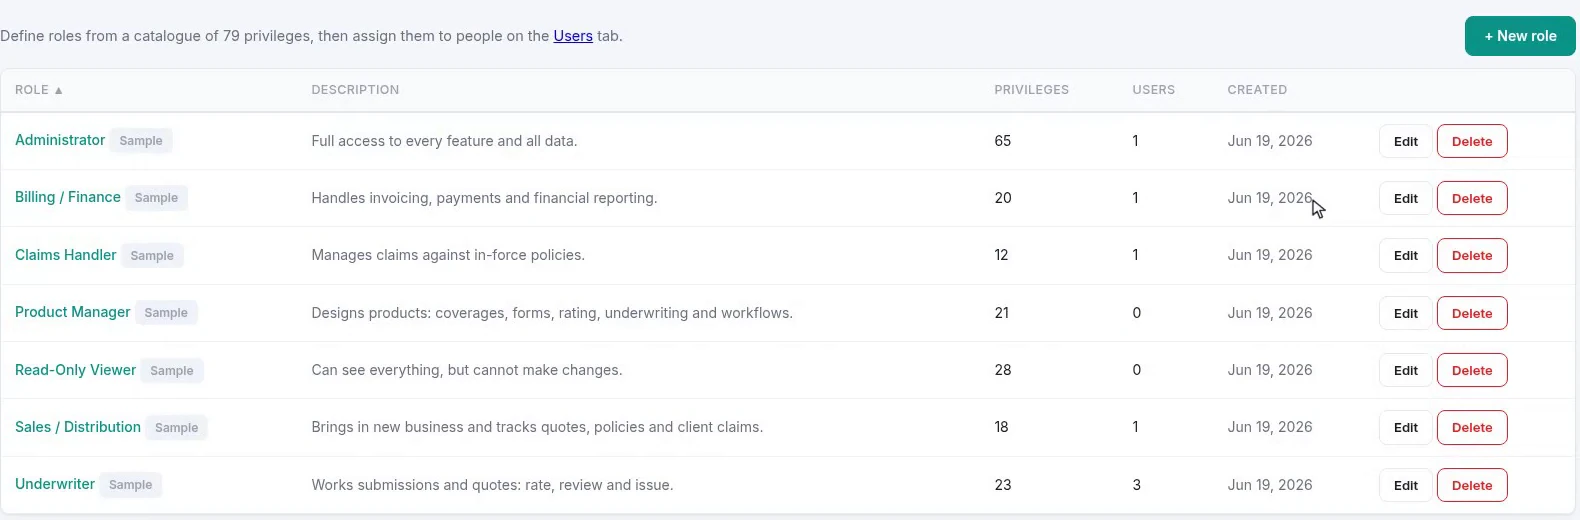
Read the privileges column before you adopt any of them. A claims handler carrying twelve privileges and an administrator carrying sixty-five is the whole design in two numbers: these are not levels on a ladder, they are different-sized bags of the same currency.
Open a new role and you see what roles are made of: 79 privileges, grouped by the area they act on - product configuration, transactions, documents, insights, data access, administration, and a pair per dashboard.
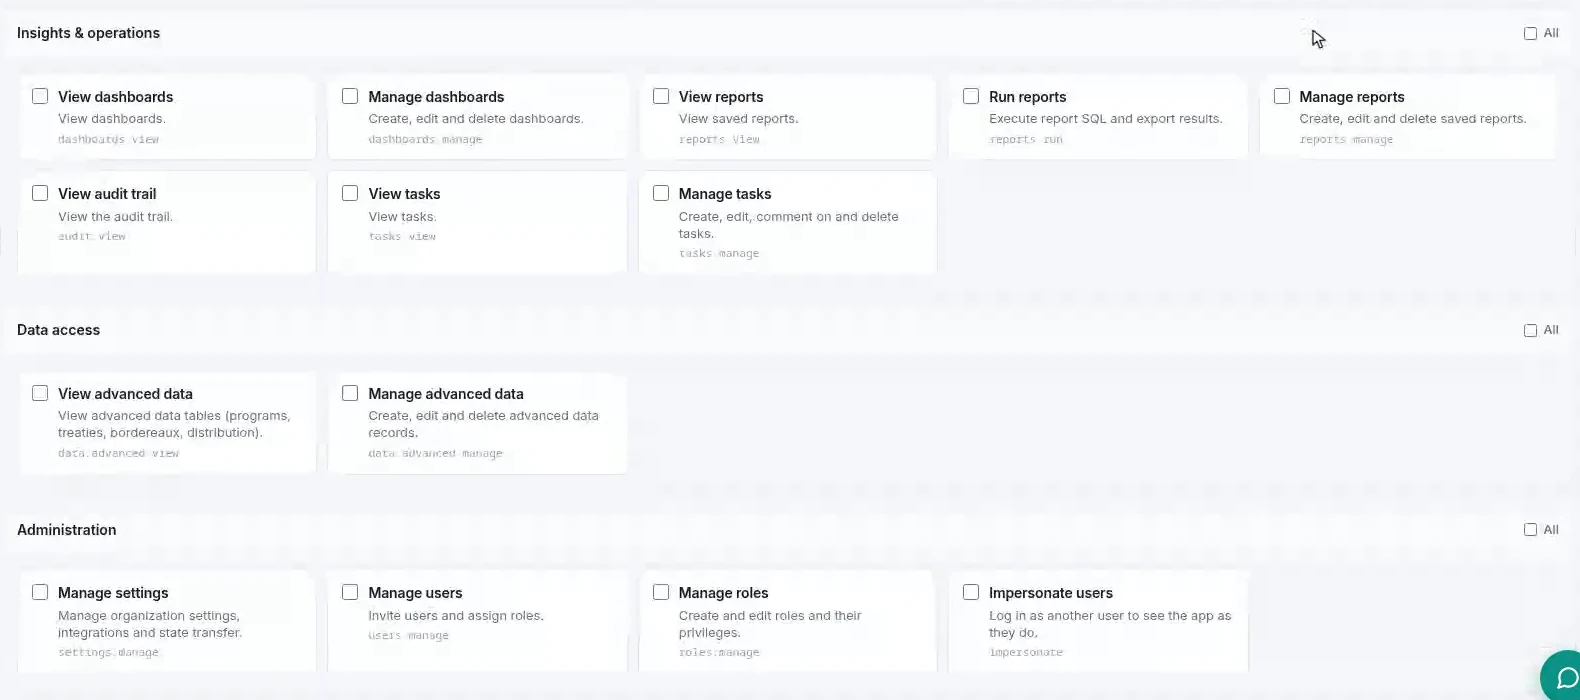
The pattern to notice is view versus manage. Almost every capability appears twice - view documents and manage documents, view dashboards and manage dashboards - which is what lets you build a role that can see everything about renewals and change none of it.
And note what is in the administration group: impersonate users is itself a privilege. The ability to see the application as somebody else is not an ambient superpower; it is a box that someone has to have ticked, which is the right way round for a capability that powerful.
Name the role, describe it, and tick the privileges the job actually requires.

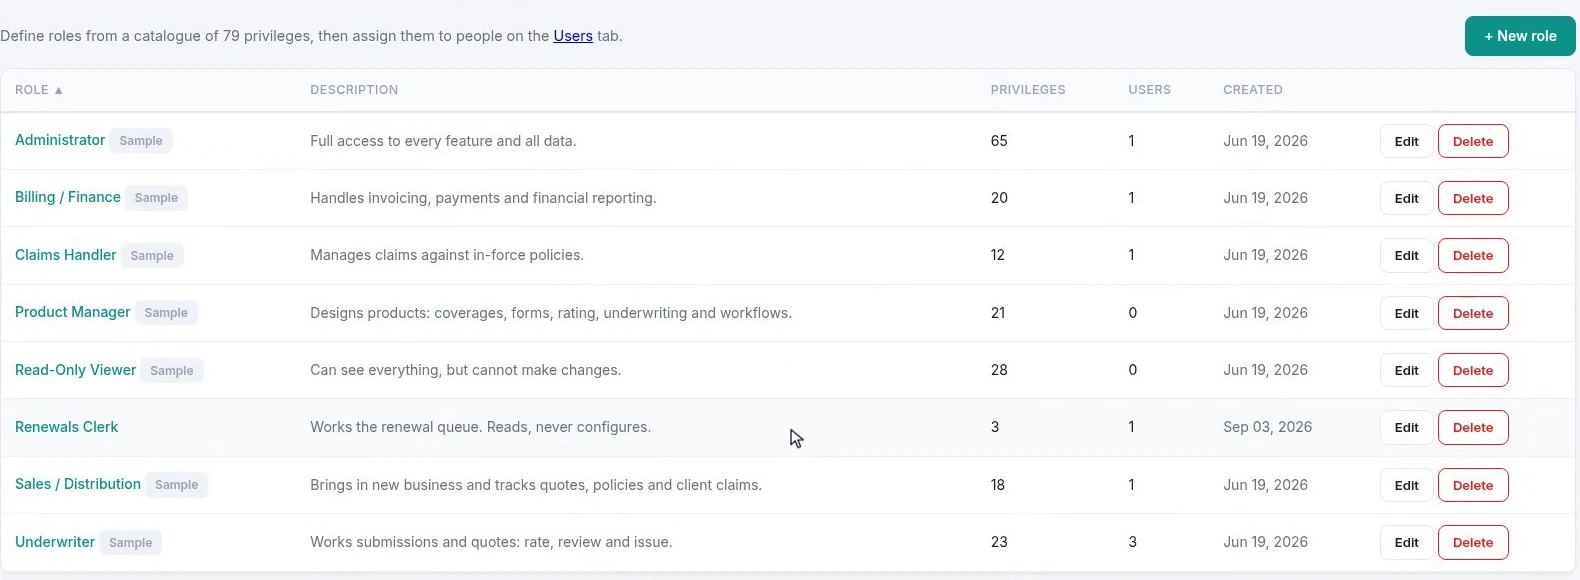
Three ticks out of seventy-nine is worth dwelling on, because it is the argument against fixed levels. A renewals clerk who reads quotes, policies and documents and changes nothing is not “read-only viewer minus some things” and not “underwriter minus some things”. It is its own small shape, and it takes about a minute to express.
Write the description as a sentence about the job, not about the ticks. “Works the renewal queue. Reads, never configures.” is what the next administrator needs to know; a list of three privilege names is already on the screen.
Settings → Users is the other half. Note that the table has separate columns for membership and roles: membership is account-level access to the organization, roles decide what a person sees once they are in. An administrator has everything regardless of roles.
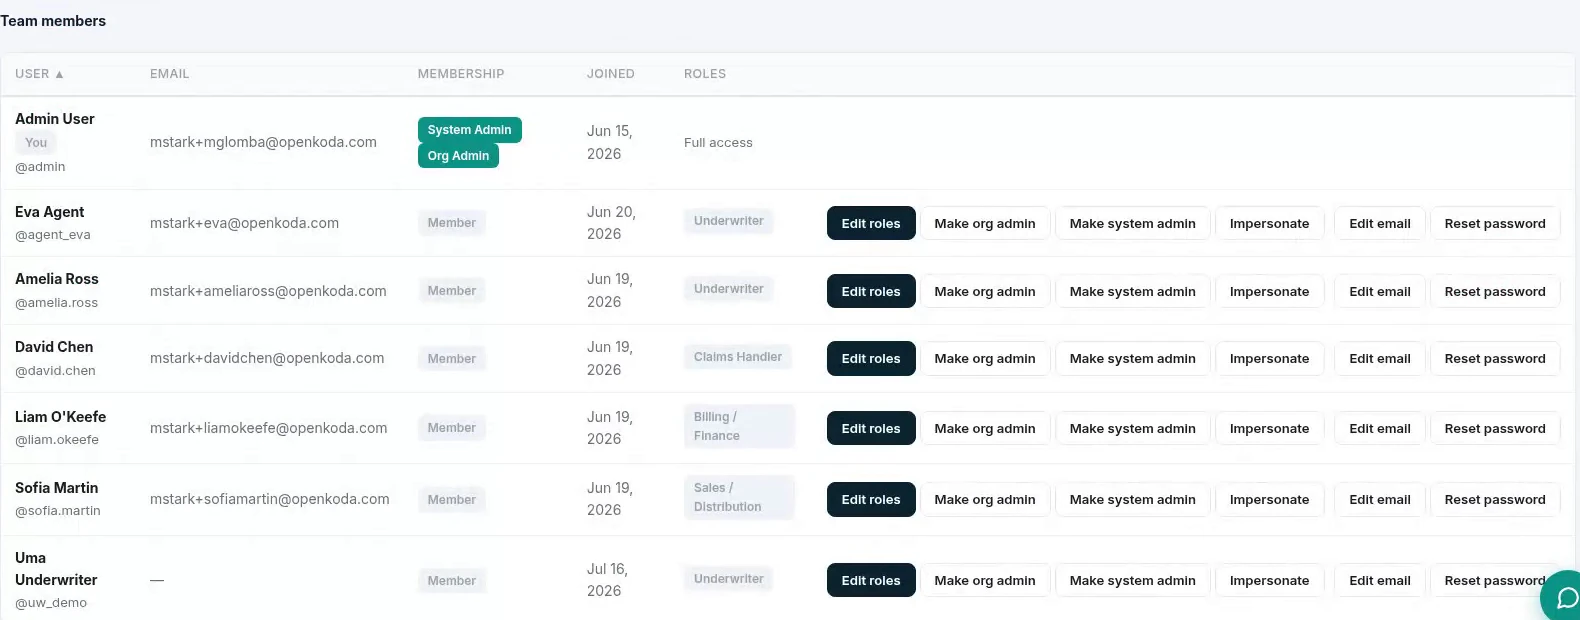
Assigning is ticking a box against a person, and it applies immediately. There is no publish step between the tick and the change in what they can reach, which is the same pattern as the wider tutorial on managing user roles and permissions.
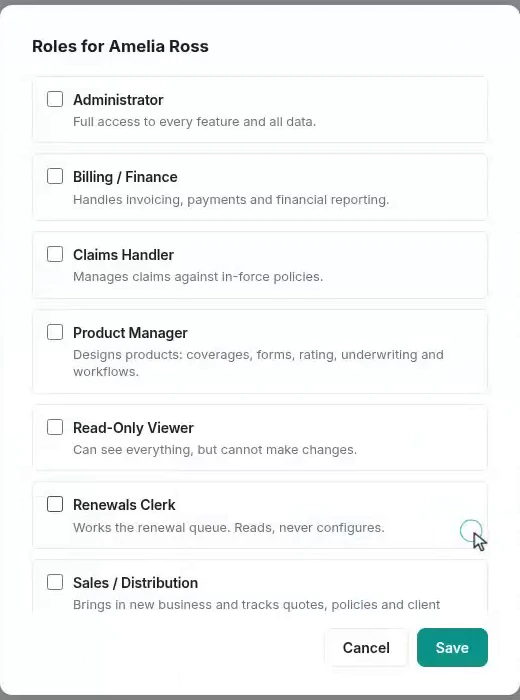
A role is a claim about what somebody will experience. The only way to know it is true is to look, and impersonation lets you look without borrowing anyone’s password.
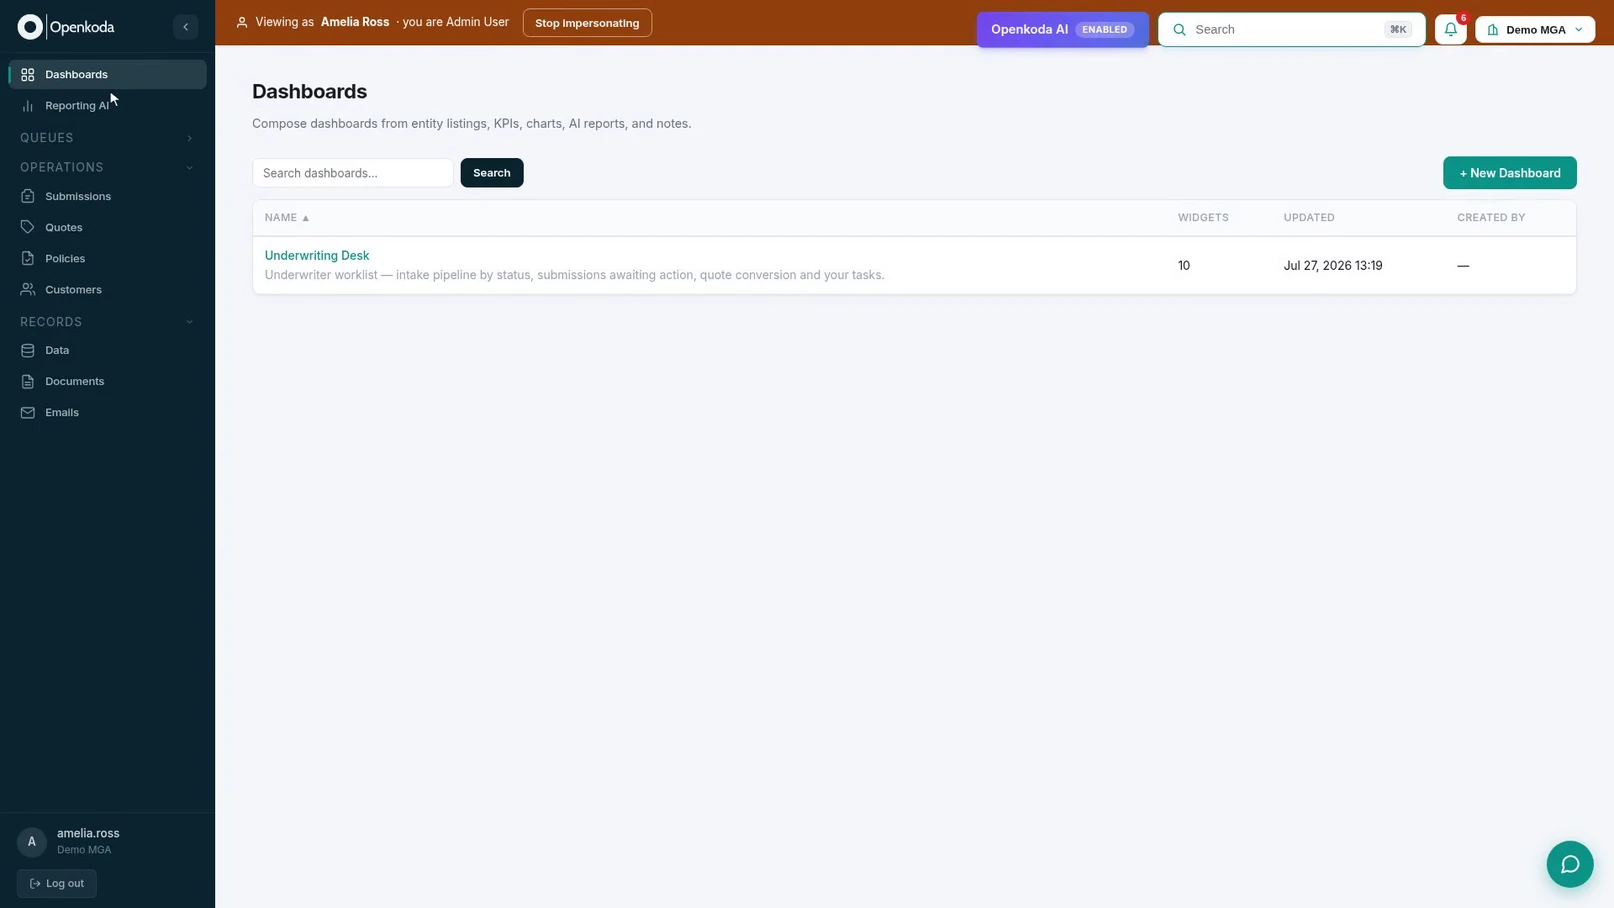
Compare that sidebar with the ones in the screenshots above: billing, claims, the whole Configure group and the whole Admin group are simply not there. Privileges are not a set of error messages you hit after clicking. They decide what is rendered, so a user does not spend their day finding locked doors.
Two properties of impersonation are worth insisting on when you evaluate any system that offers it: the banner is always visible and names both parties, and, as the next step but one shows, the whole episode is written to the audit log while it is happening.
Authentication is a per-organization choice: ordinary credentials, or a passwordless magic link emailed to the person.

Per-organization matters for exactly the reason multitenancy does: the subsidiary you onboarded last month may have a different security posture from the one you have run for a decade, and they are on the same installation.
Customers and brokers never use these at all. They arrive through their own portals, with their own accounts, scoped to their own records - a separate population from the staff users this screen governs.
Underneath everything, the log. Every record created, updated or deleted, with who did it, when, from which address, and how many fields changed.

The top of the log is the best possible demonstration, because it is this walkthrough looking back at itself: the role we created, the impersonation we started, the impersonation we ended. Nobody wrote those entries; the system wrote them as the actions happened, which is the only kind of record worth having when somebody asks months later who changed what.
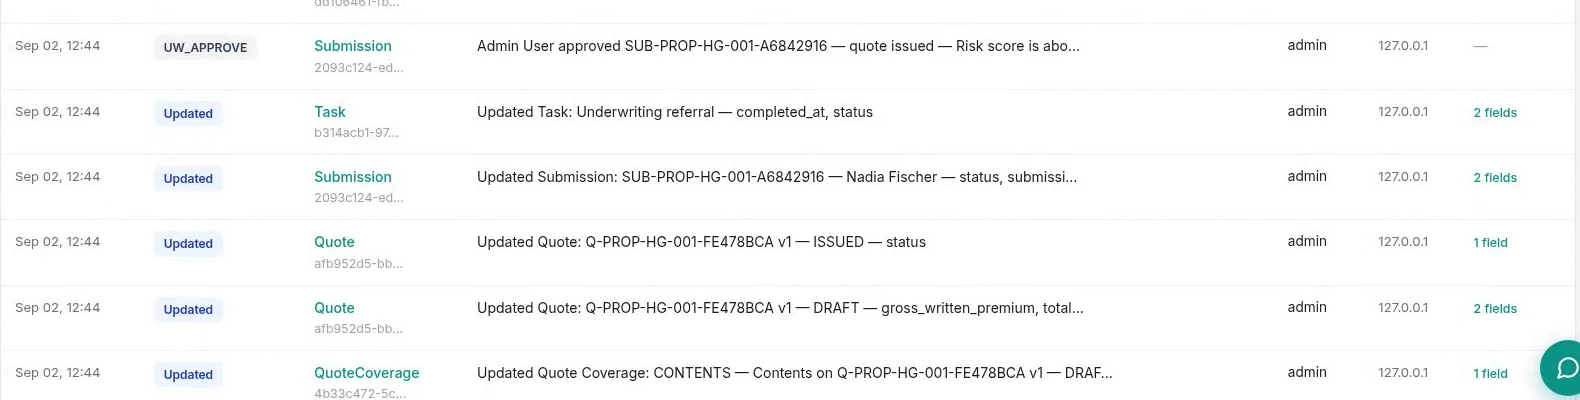
The changes column is the part auditors reach for: not just that a quote was updated, but that two fields on it were, and which. Combined with the entity id beside each row, that is a reconstruction of a record’s history rather than a list of times somebody touched it.
The three ideas in this walkthrough are usually sold as one feature and are really three: data that belongs to a tenant, access composed from privileges, and a log written by the system rather than by the person making the change. What they have in common is that they are enforced underneath the screens rather than applied by them, which is why you can check them the way this article does - by switching tenants and looking, by impersonating and looking, by reading the log and finding your own footprints in it.
And all three are configuration rather than code. New subsidiary, new job title, new person: an organization, a handful of ticks, a box against a name. None of it needs a release, which matters because org charts change far more often than software does.
Describe an AI agent as insurable attributes - pinned model version, autonomy, spending authority, guardrails - then read the cover, rules and rating built on them.
Hand a Word requirements document to the AI Product Builder, read the proposal before anything changes, then check the risk item, rating, rules and workflow it wrote.
Revise a live policy schedule in twelve steps: write the wording in Word, map the placeholders, activate the version, and let a workflow send the PDF.
Book a live, personalized demo with our product team - tell us your use case and see the platform work with your data. No commitment.