
How to Streamline Claims Processing with a Customizable Claims Management Dashboard
Handling insurance claims can feel like juggling a dozen moving parts at once.
Openkoda brings them all together in one place, allowing you to customize every screen, rule, and automation to match your business processes.
In this tutorial, you will learn how to deploy and easily customize your own tailored claims processing dashboard, bypassing the hassle of the traditional custom software development process!
Why Insurers Need Specialized Insurance Claims Dashboards?
In today’s increasingly data-driven insurance industry, insurers process thousands of insurance claims every month while juggling tight margins, regulatory pressure, and the ever-present threat of fraudulent claims.
Traditional spreadsheets and siloed core systems simply can’t keep pace.
Enter custom insurance claims dashboard.
A purpose-built claims management software platform brings every moving piece – policy details, incident data, reserves, and supporting evidence – into one real-time dashboard so claims managers can see the whole story at a glance, not in ten open windows.
Beyond visibility, dashboards let you allocate resources intelligently: routing complex cases to senior adjusters, flagging potential fraud for special investigation, and automatically surfacing bottlenecks before service-level agreements slip.
Integrated document management means photos, invoices, and medical reports are stored with the claim itself, eliminating the scavenger hunt across shared drives.
When the right data, automations, and controls live in one place, teams work faster, customers get answers sooner, and leakage shrinks—setting the stage for the hands-on workflow tutorial you’re about to explore.
Key Claims Management Software Features
A best-in-class dashboard should adapt to your unique processes, not force your team into someone else’s mold.
Here’s what you should look for when looking for the right claims management application, and what you can get out-of-the box with the Openkoda platform:
- Configurable rule-based workflows & custom notifications – automate assignments, approvals, and fraud flags without writing code.
- API-first integrations – connect core systems, CRMs, payment gateways, and data vendors in minutes.
- Automated document generation and management – capture, version, and e-sign evidence directly inside the claim.
- Automated coverage and reserve validation – enforce business logic that protects margins and compliance in real time.
- Real-time analytics & audit trails – give claims teams the actionable insights they need while keeping regulators satisfied.
Streamlining Claims Settlement Process With Customizable
With the “why” and the “what” covered, it’s time to see how it all fits together in practice.
In this tutorial we’ll walk you through every stage of a claim – intake, validation, cost estimating, reserving, and settlement – inside the Openkoda dashboard, and show you it’s customization capabilities so that you can tailor your dashboards precisely to your needs.
Follow the steps below or watch our video tutorial:
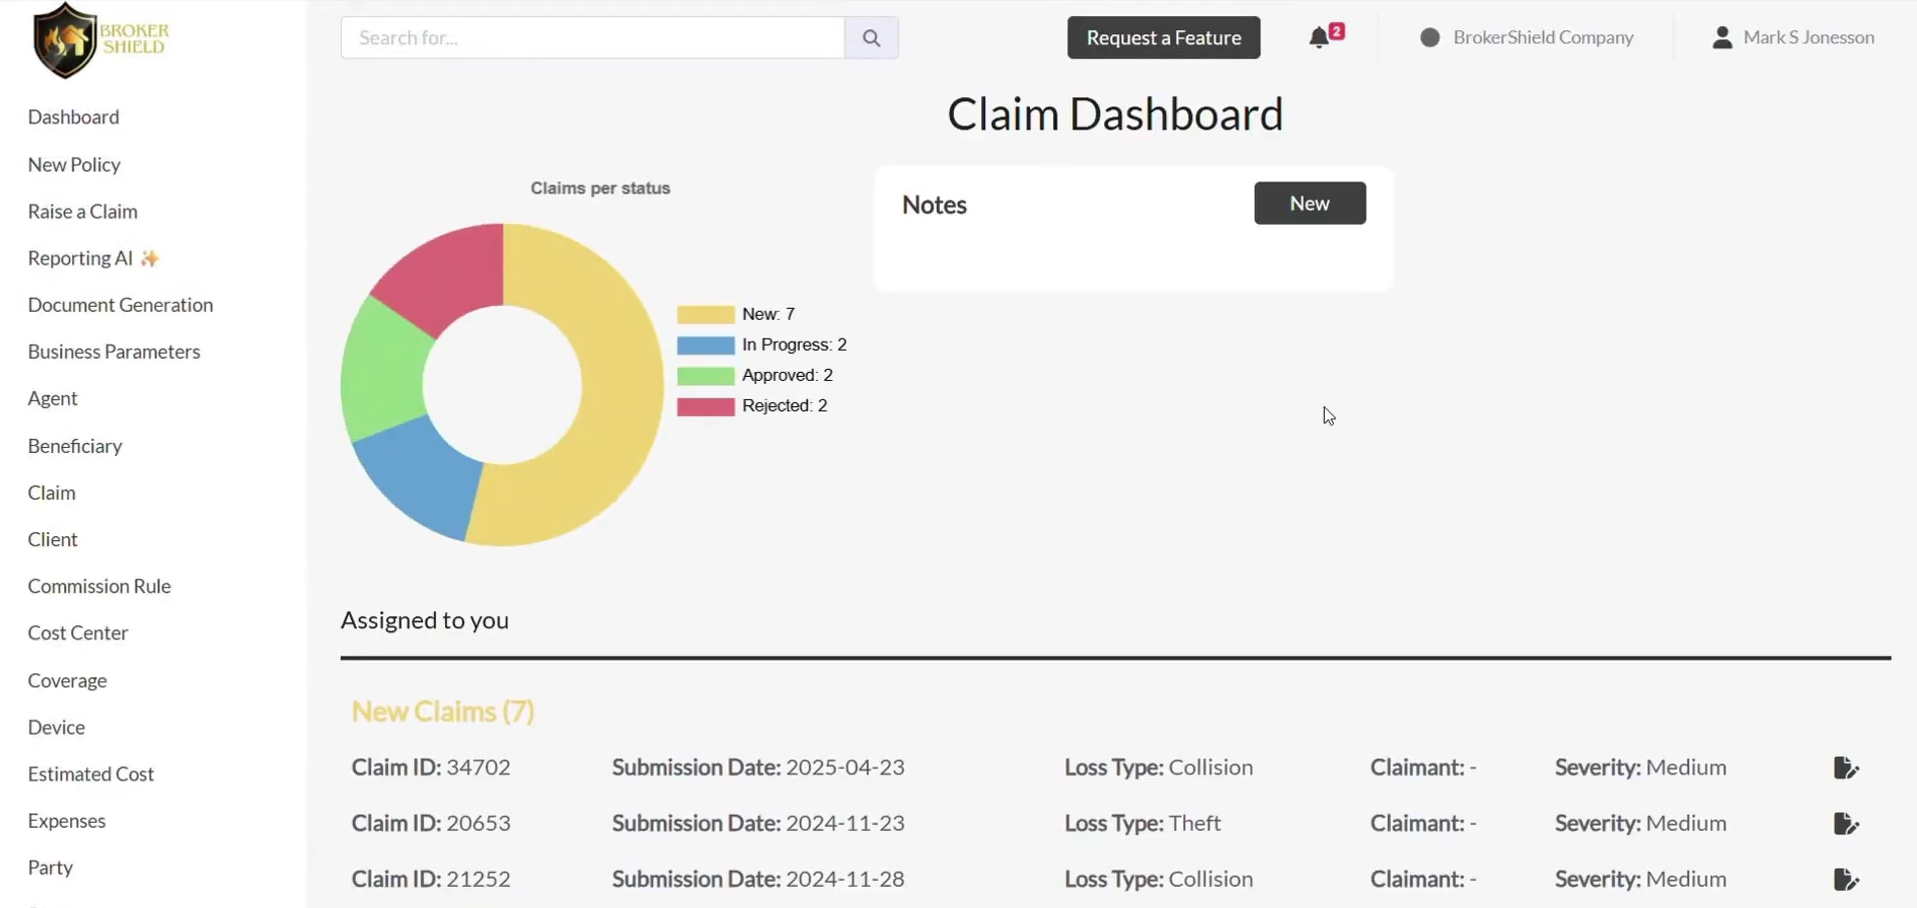
Step 1: Navigating the Claims Dashboard
Start by logging into the Openkoda platform and heading over to the Claims Dashboard.
This is your central hub for monitoring all active claims, their statuses, and any key updates.
The dashboard gives you a real-time overview, but what’s displayed here is completely up to you. You can customize the layout to show different status filters, internal notes, KPIs, or other widgets tailored to your workflow.
Pro Tip: Add filters to prioritize urgent claims or highlight those requiring manager attention.
Step 2: Opening and Reviewing a Claim
Click any row to open the Summary panel.
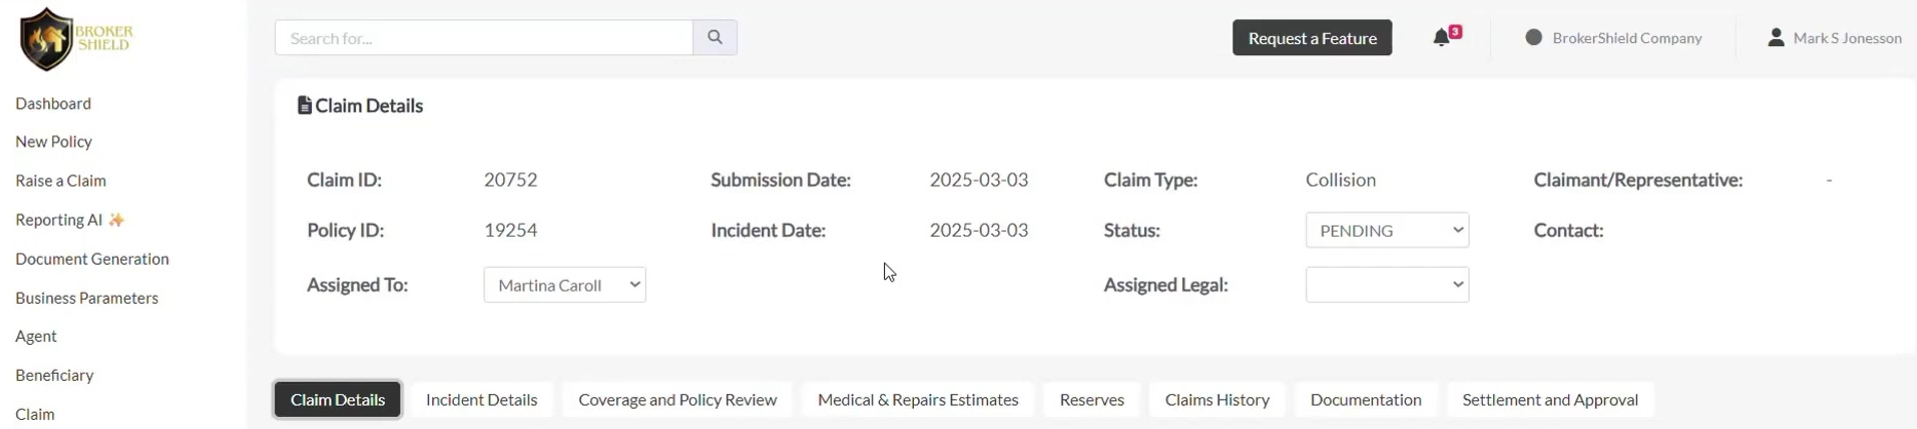
This screen consolidates key information for claims management process in one place, such as the:
- Submission date
- Claims data type
- Assigned user
- Current status
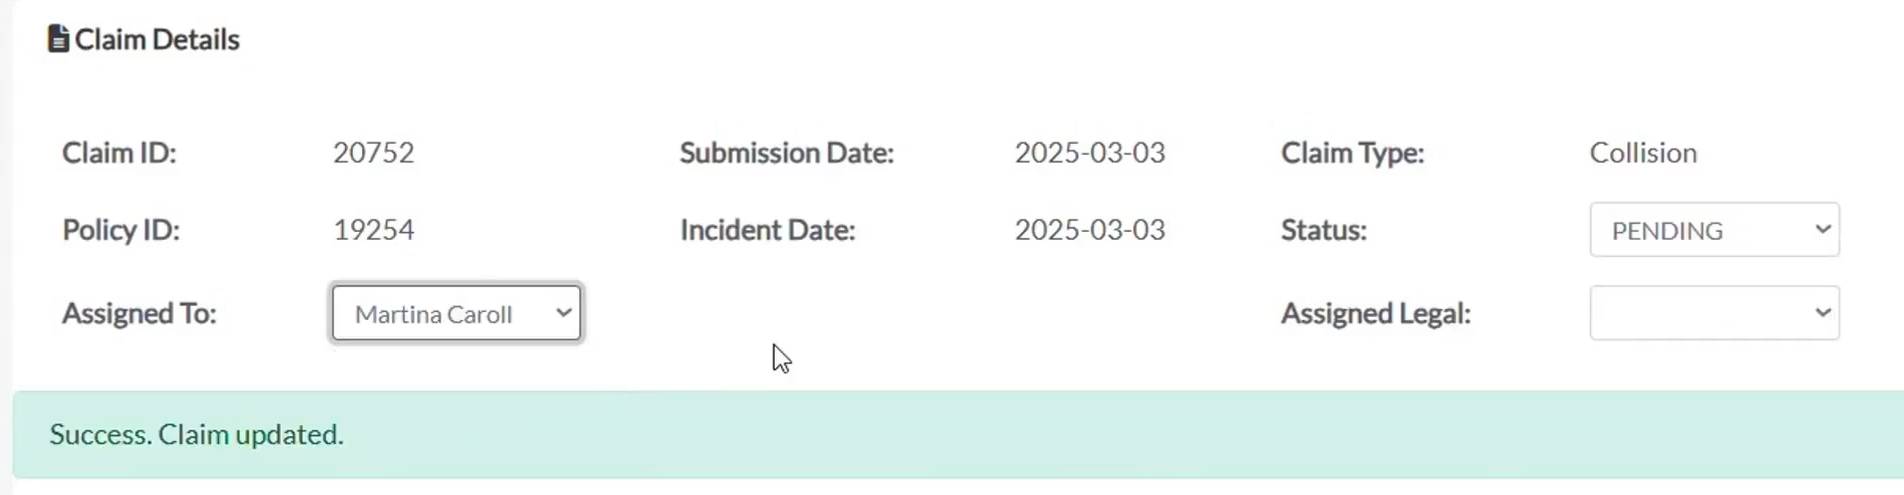
Two common actions happen here:
- Change status (e.g., New → In review → Settled).
- Assign owner so the right adjuster or handler gets notified.
Once a claim is reassigned, Openkoda automatically notifies the new handler – keeping your team aligned and responsive through the entire claims process.
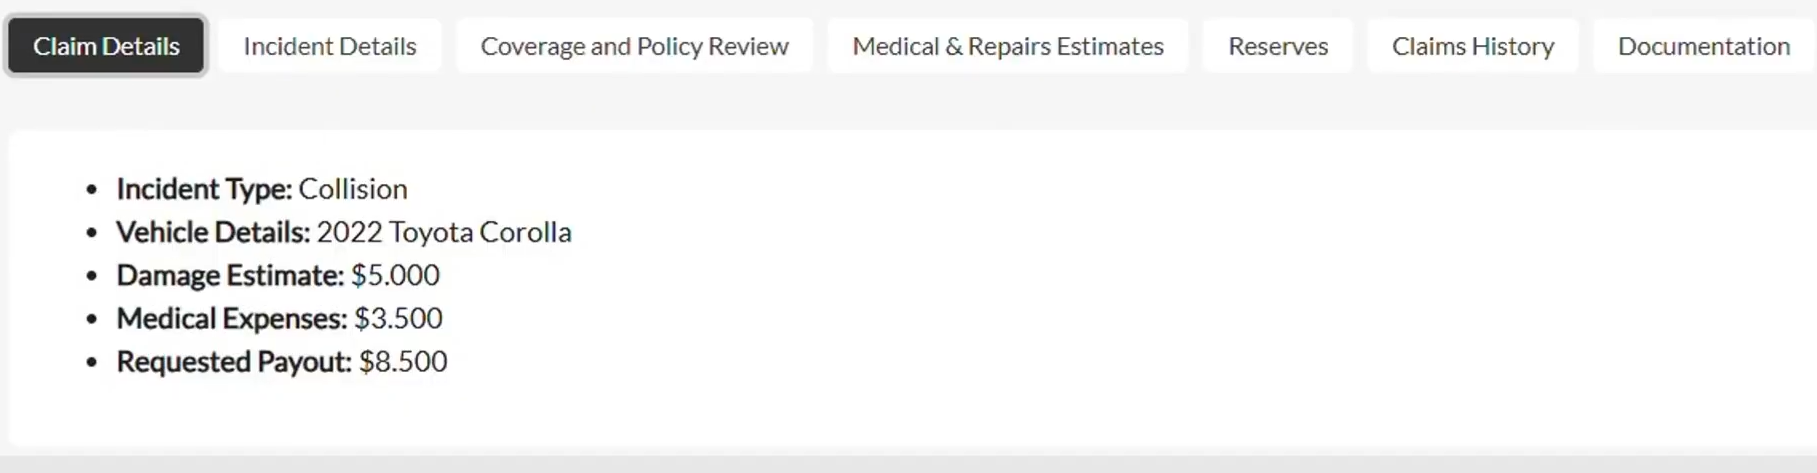
Step 3: Exploring Claim Details
Let’s now move on to navigate through the structured tabs within the claim for a deep dive into the data and start with the basic claims details.
Claim Details Tab
Here you’ll find the core data captured at submission — claimant contact info, claim type, and more. All fields and tabs can be tailored to match your organization’s data model.
Incident Details Tab
This tab includes information submitted via a web form: incident type, date and time, vehicle information, and more. If your FNOL web form feeds Openkoda directly, you’ll see that payload here the second the claim is logged.
You can also enrich the claim using internal insights, such as adjuster comments or other notes.

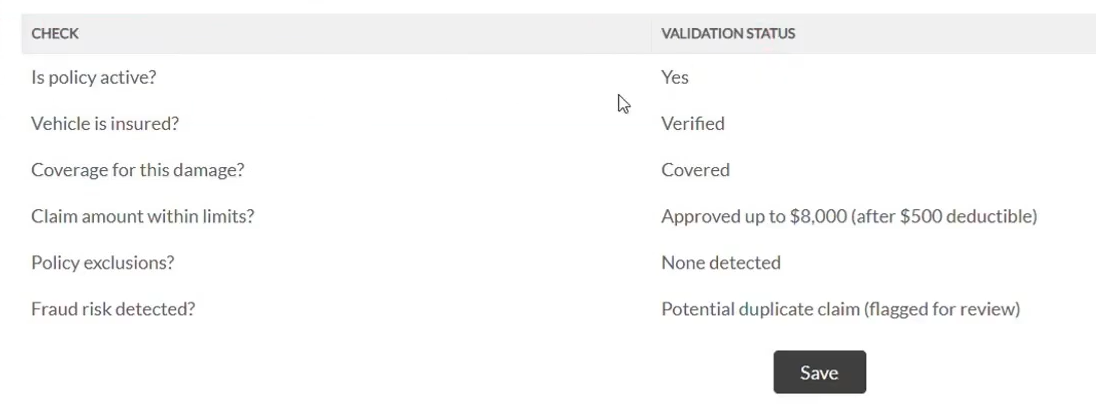
Step 4: Reviewing Policy and Automating Validations
In the Coverage and Policy Review tab, you can validate the policy linked to the claim.

This can be done via:
- Manual check: Use the built-in search to pull the policy record, then flip a status (Expired → Active) if necessary.
- Automated check: Create a Validation Rule (“Reject if policy.status ≠ ‘Active’”) and let Openkoda flag discrepancies instantly.
Example: If a claim is linked to an expired policy, you can update the policy’s status and instantly see claim validations update in real time — no extra steps required.
Remember that these rules can be customized according to your needs for maximum customer satisfaction.
Step 5: Estimating Costs and Sending Approvals
Next, head to the Medical and Repair Estimates tab to review and manage all claim-related costs.
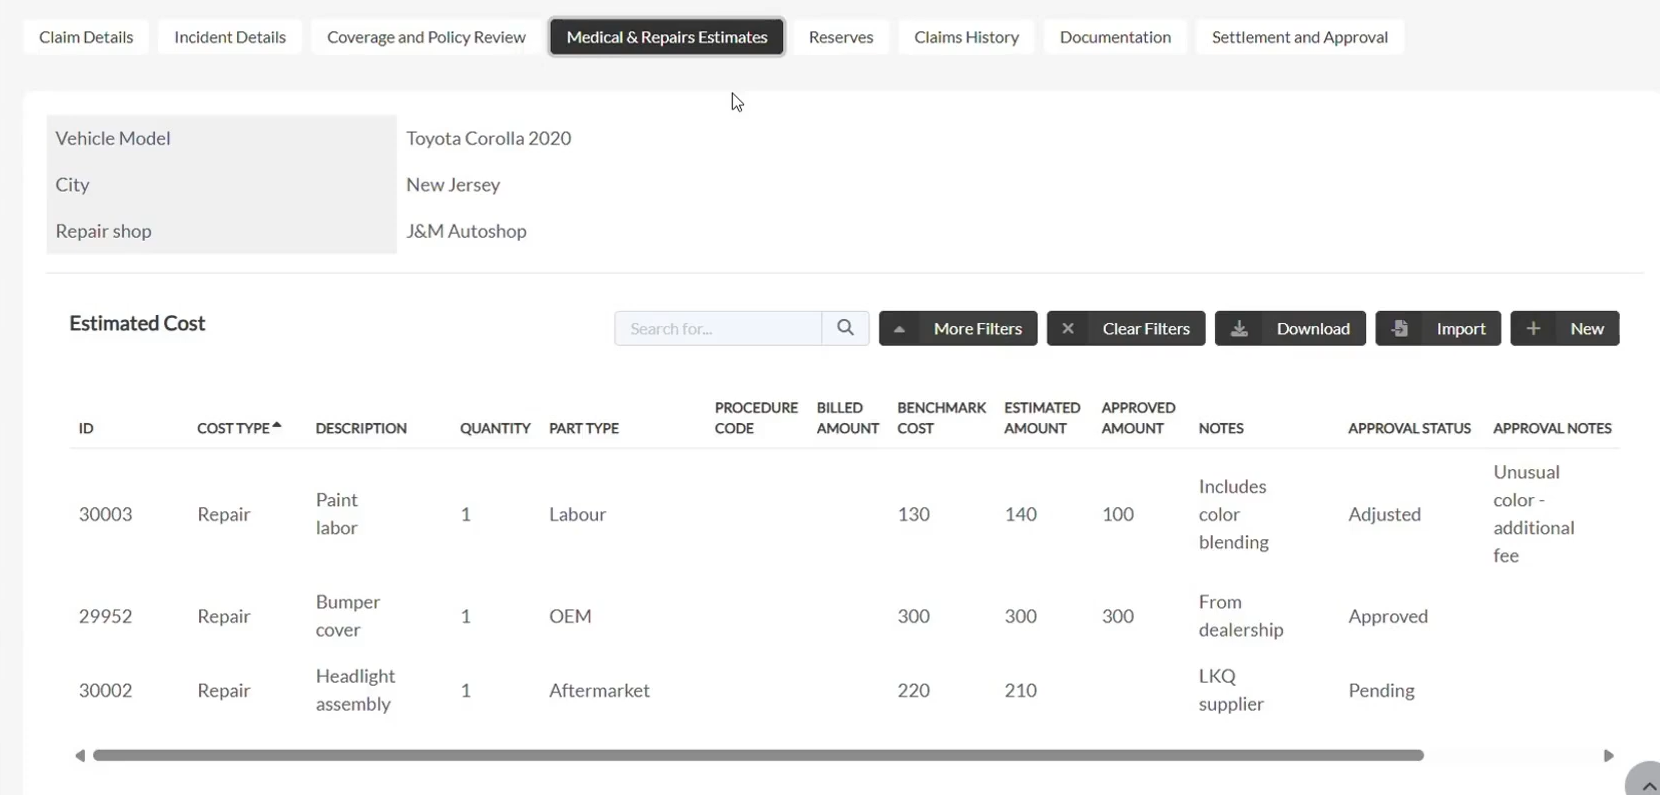
Inside this tab you can:
- Import vendor estimates (CSV, API, or typed manually).
- Add individual line items—choose cost type, write a description, tag the provider.
- Benchmark numbers against industry databases.
Once totals are in, set up an automation to email a summarized CSV to repair shops or internal finance for approval – no more spreadsheets flying around Outlook.
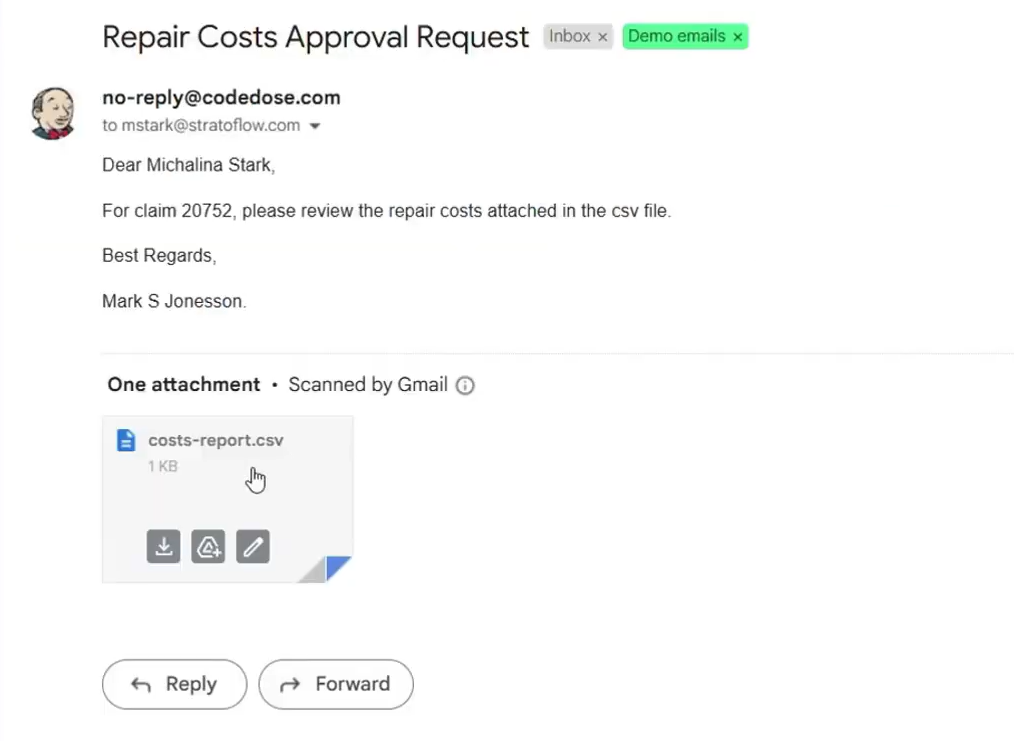
Openkoda also enables automated cost approval emails.
In this case, the system generates a document with a CSV summary and sends it to a repair shop or internal approvers instantly.
Step 6: Setting Financial Reserves
Use the Reserves Tab to define financial reserves allocated to a claim.
You can:
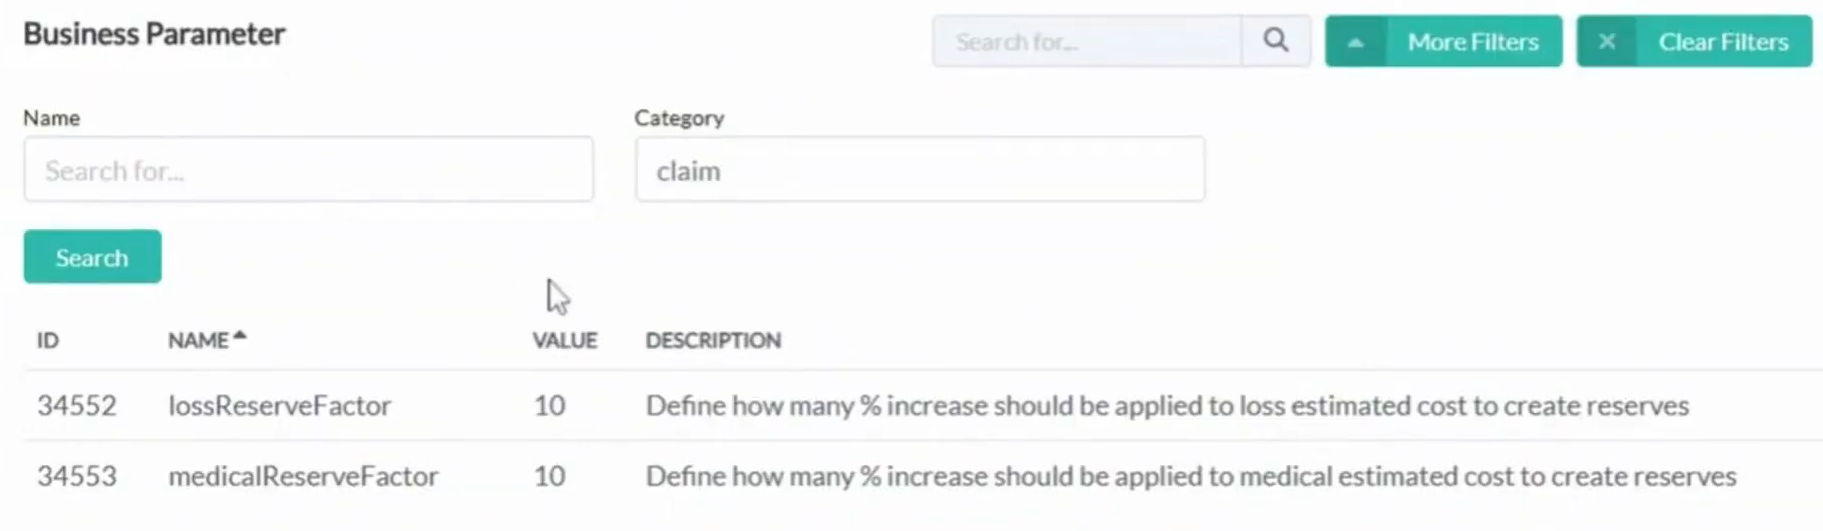
- Manually add or adjust reserve amounts
- Apply automated rules — e.g., add 10% to total cost estimates
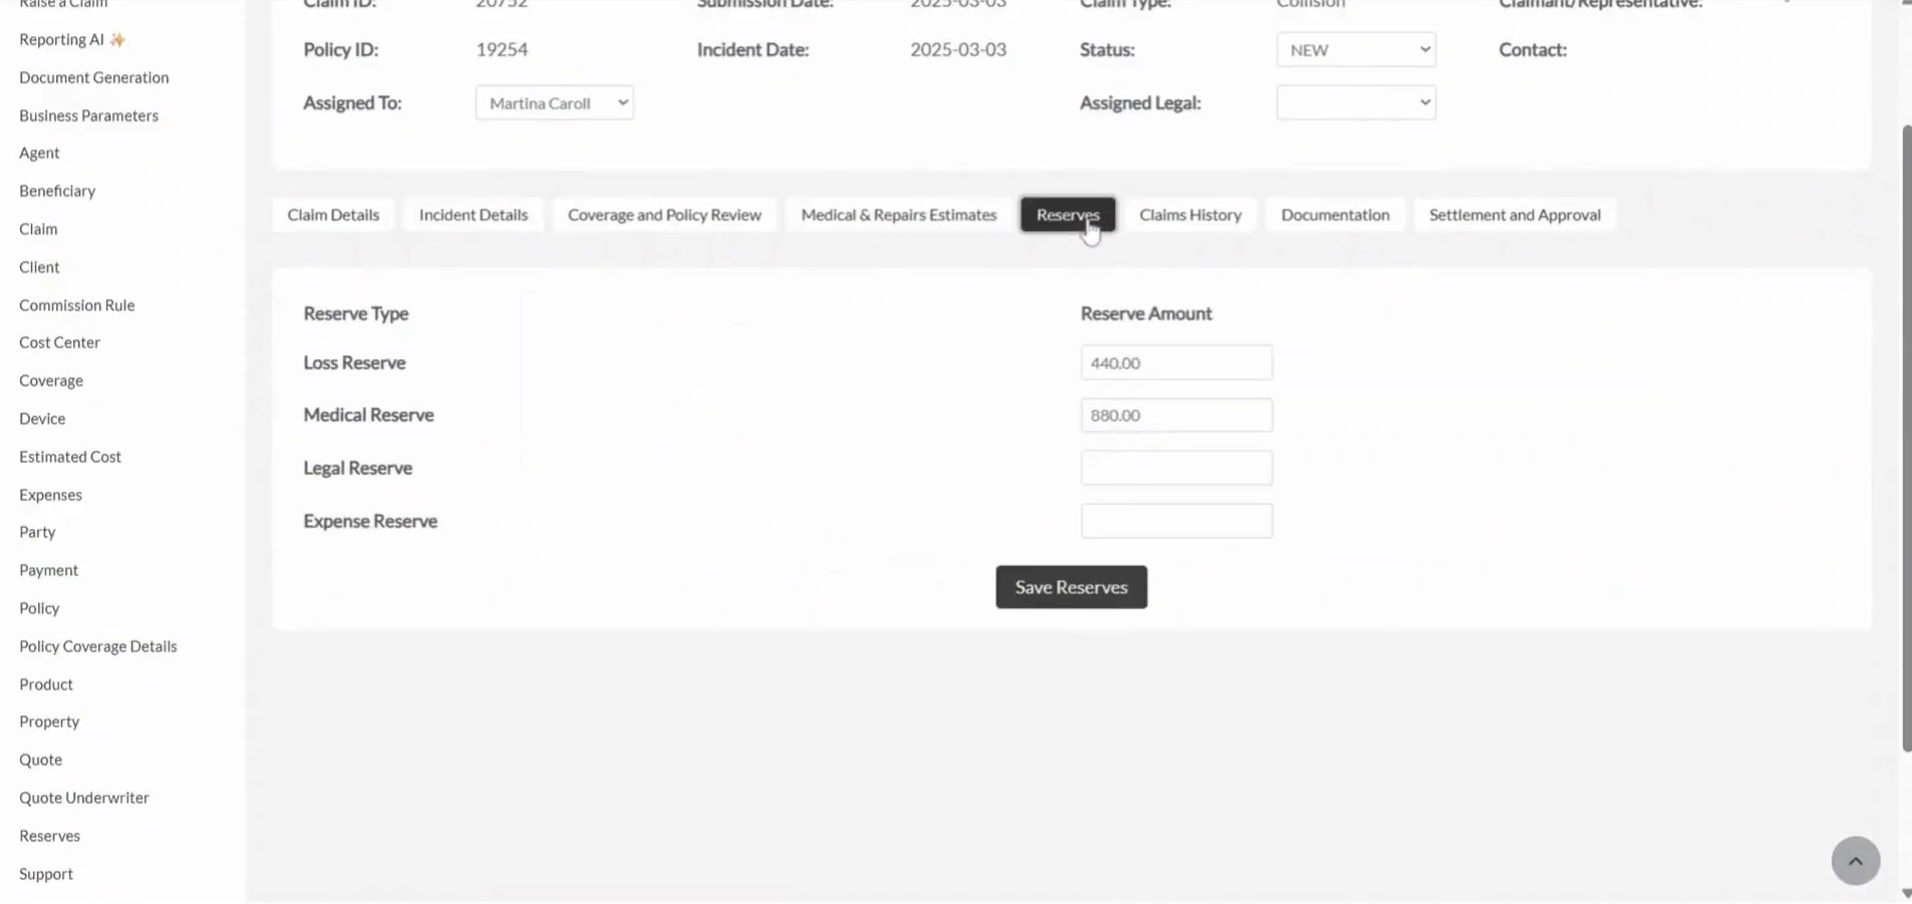
Like everything else in Openkoda, reserve logic is customizable to match your company’s accounting standards or regulatory requirements.
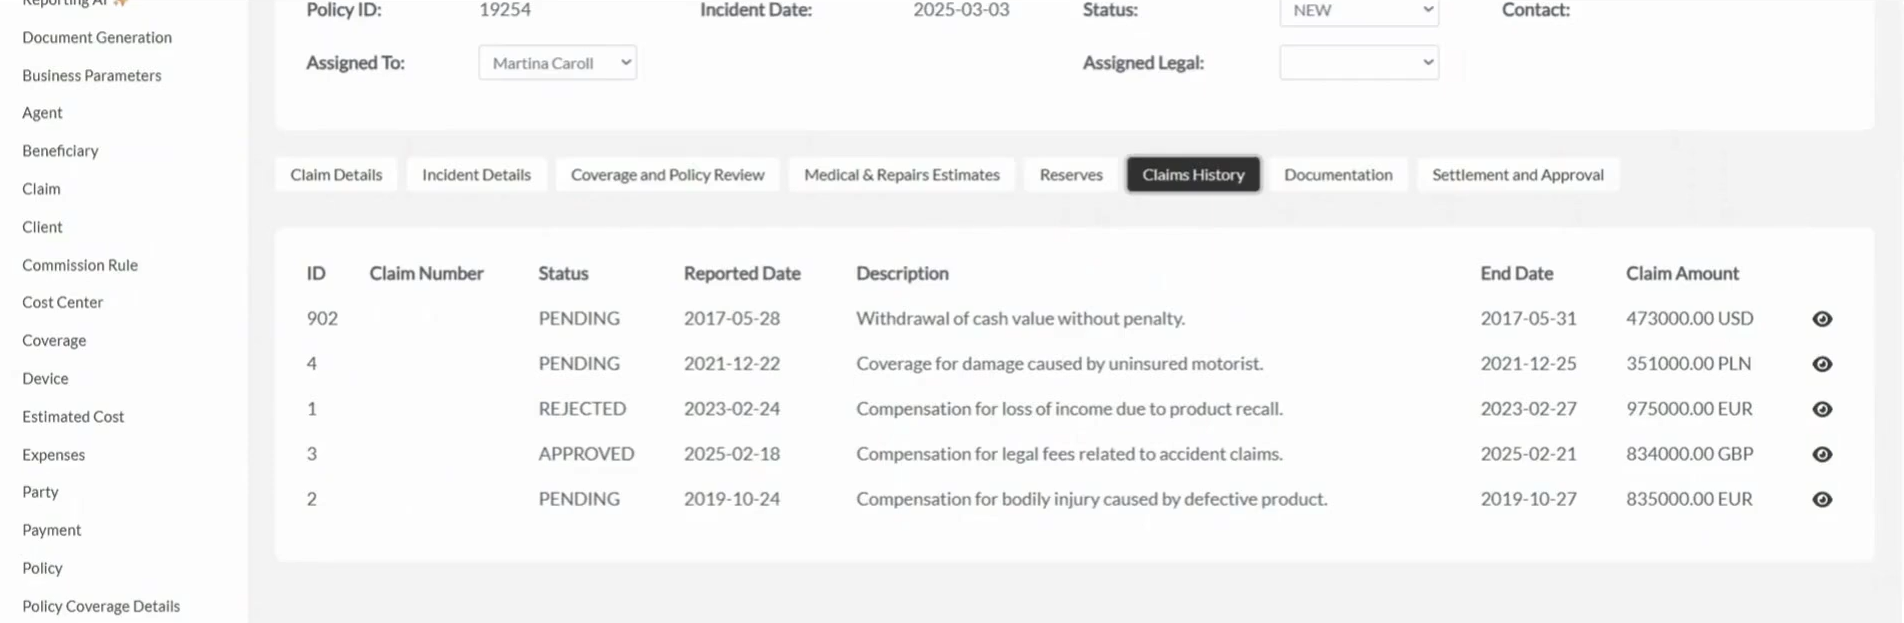
Step 7: Reviewing Historical Claims
The Claim History tab provides access to all past claims related to a client, policy, or vehicle. You can track trends, spot recurring issues, or simply double-check old case data.
This historical data can come from internal systems or external sources integrated via API.
Step 8: Managing Documentation
In the Documentation Tab, you can view all uploaded documents — invoices, photos, medical reports, and more.
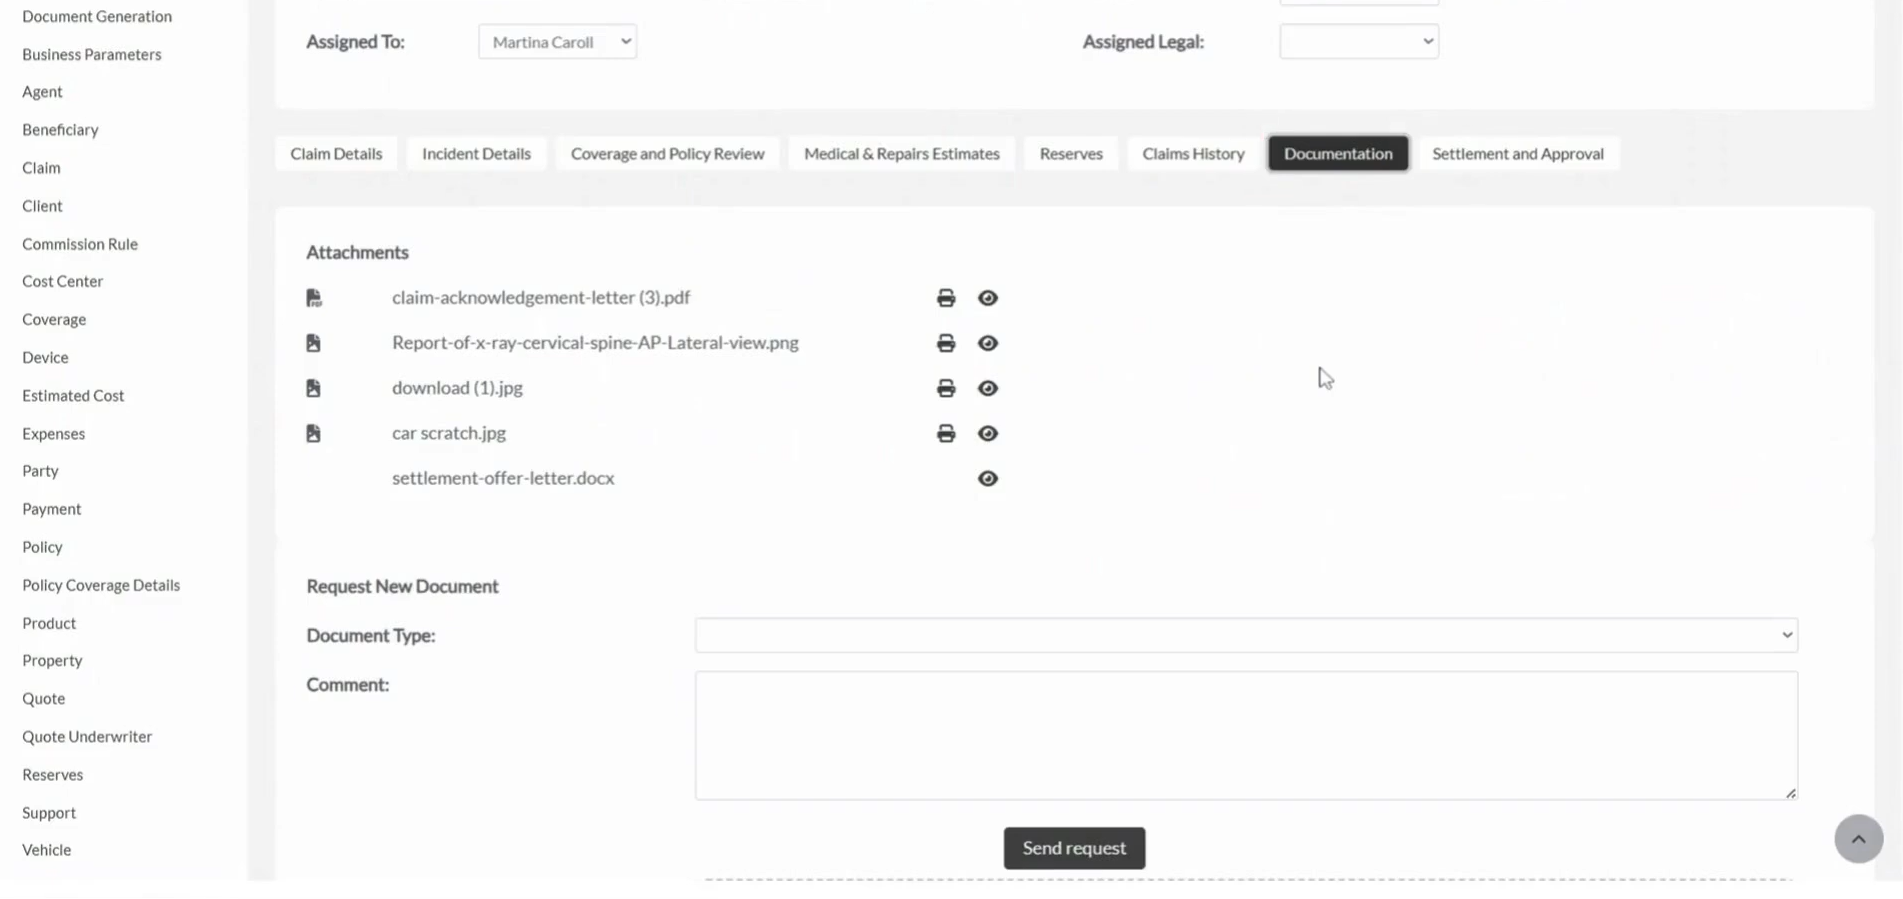
You can also:
- Upload new files directly
- Request missing documentation from clients or partners
It’s a centralized space that ensures all claim evidence is stored, searchable, and secure.
Step 9: Completing Settlement and Approvals
Wrap up the claims handling process in the Settlement and Approval tab.
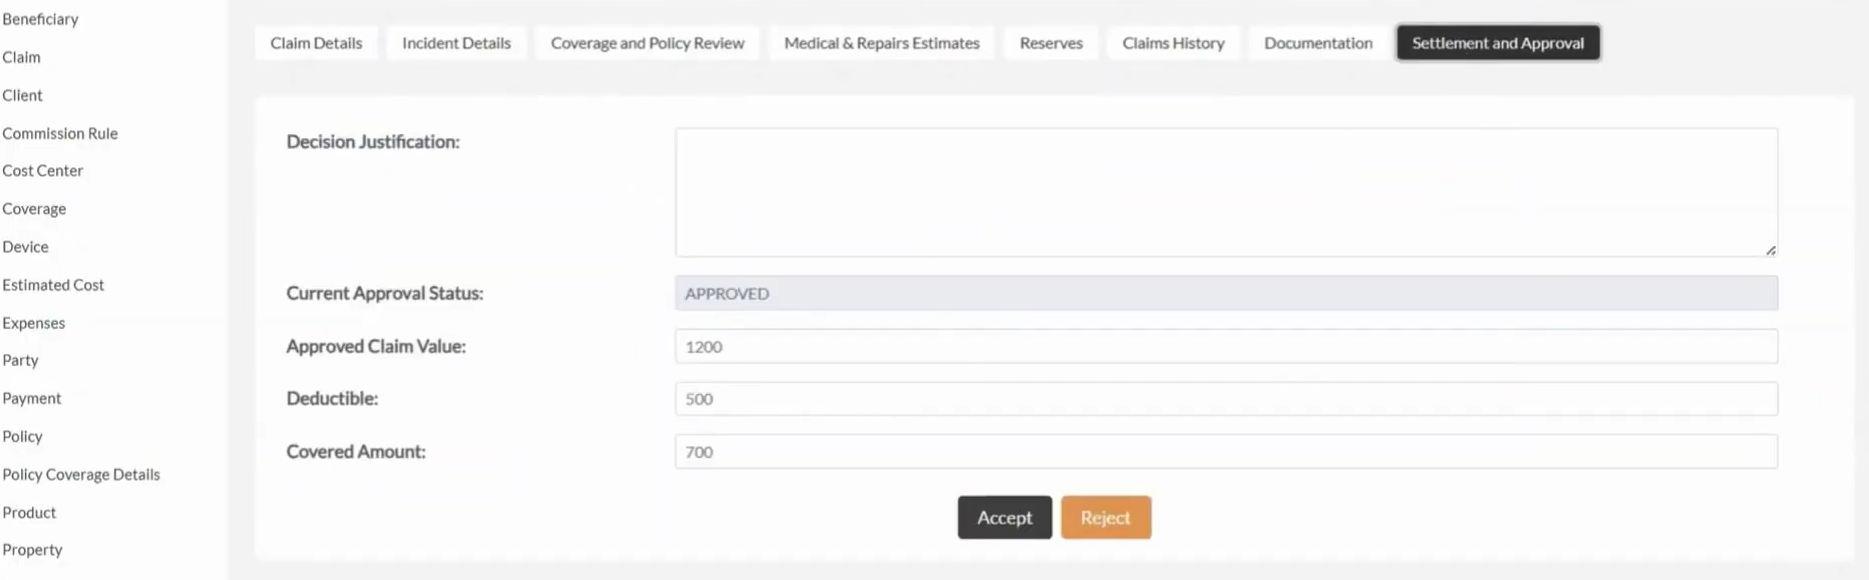
This is where you:
- Confirm payable amount (claim value − deductible ± adjustments).
- Kick off approvals based on role, authority limits, or claim type.
- Approve or reject—triggering an automated notification to the insured.
Once a decision is made, the platform sends an automated email to notify the client of the outcome. You can even integrate with payment gateways so indemnity flows straight to a bank or repair vendor once approvals land.
Step 10: Customize Everything Further to Fit Your Needs
What makes Openkoda especially powerful is the level of customization available at every stage:
- Layouts and data fields
- Workflow rules and validations
- Notifications and automated actions
- Integrations with internal and third-party systems
This means the claims dashboard isn’t a fixed template — it’s a dynamic workspace shaped to your unique processes and regulatory needs.
[Read also: 6 Best Claims Management Software Solutions in 2025]
Final Thoughts
With Openkoda’s customizable insurance claims software, you can:
- Centralize all claims activity in one place
- Automate repetitive tasks like notifications and validations
- Maintain full visibility and control across every step
- Easily adapt the platform to your specific workflows
Whether you’re an insurer handling thousands of claims monthly or a niche provider needing specialized workflows – Openkoda gives you the flexibility and efficiency to scale.