
How to Streamline Quote Analysis With Customizable Underwriter Dashboard
In modern insurance, speed and accuracy hinge on the tools underwriters use.
Let’s discover why specialized, highly customizable software is essential and walk you, step by step, through a configurable underwriting dashboard that unifies data, calculations, and decision-making.
By the end, you’ll see how flexible platforms transform scattered information into clear underwriting decisions while ensuring compliance and empowering business users.
Why Underwriters Need Specialized Software Tools?
Underwriting has always been equal parts art and science when trying to make the best insurance or credit risk assessments.
But in today’s market the science dominates: hundreds of data points, real-time risk scores, and ever-tightening regulations all heavily influence every decision.
Combining an underwriting workbench and advanced analytics into a single automated underwriting dashboard sounds ideal – until you try to find an off-the-shelf product that ticks every box and fits neatly into your existing workflow.
Truth is, “one-size-fits-all” rarely fits anyone.
The smarter middle ground is a highly customizable, adaptable platform where you assemble your own underwriting dashboards, rules, and data feeds into a single platform.
You keep the unified experience while tailoring every panel, field, and calculation to your line of business.
Customizability: Key in Underwriting Software
No two carriers rate risk in quite the same way, and even within one company the formula can shift when a new dataset, regulation, or appetite change lands on your desk.
A platform that you can quickly and efficiently modify is thus crucial for both profitability and maintaining competitiveness.
That same flexibility should extend to the workspace itself – adding or hiding data fields, swapping widgets, and re-ordering tabs must be simple, not limited by rigid front-end templates.
When the layout is truly adaptive, every underwriter can tailor the view to show only what matters to their line of business.
Equally important is pricing logic that moves with the market.
A configurable underwriting engine lets you introduce new rating factors, cap discounts, or launch promotional surcharges while still ensuring compliance with internal guidelines and external regulations.
In short, easy modification of rules, data, widgets, and models turns software from static tool into a crucial part of the underwriting team, delivering sharper underwriting insights every time the market shifts.
Streamlining Quote Analysis With Automated Underwriting System: Step-by Step Guide
If you’re looking for an underwriting software solution that offers a solid foundation of ready-made features and can be quickly and efficiently customized in a matter of days, not months, this guide is for you!
Whether you’re a traditional insurer, an MGA, a digital-first insurtech, or a niche provider of specialized coverage, a custom underwriting dashboard can streamline operations and improve decision-making.
Follow the steps below or watch our video tutorial:
Step 1: Navigate to the Underwriter Dashboard
Start by opening the Underwriter Dashboard in Openkoda.
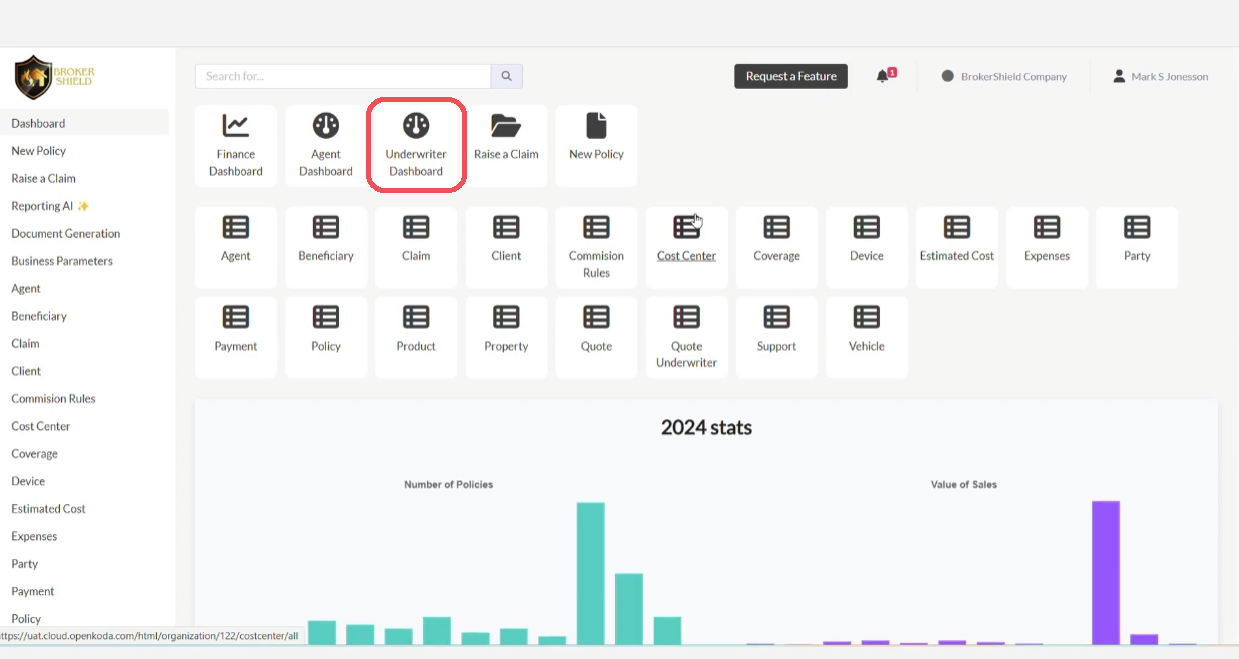
Here, you’ll see all quote requests assigned to you, organized by status — such as New, Under Review, or Approved. This lets you easily focus on what requires your attention.
For example:
- A widget showing quote statuses
- Notes widget for internal communication
Select a quote from the list to start the review process.
Bear in mind that this is just a sample insurance business dashboard. You can customize the layout using widgets to suit your workflow.

Step 2: Review Quote Details
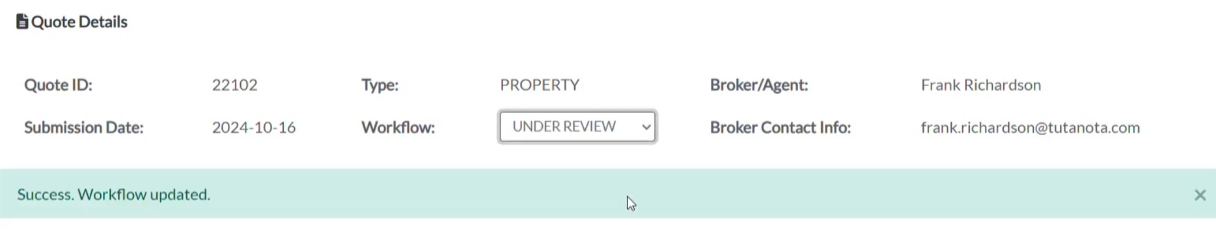
In the Quote Details tab, you’ll find all key information related to the quote.
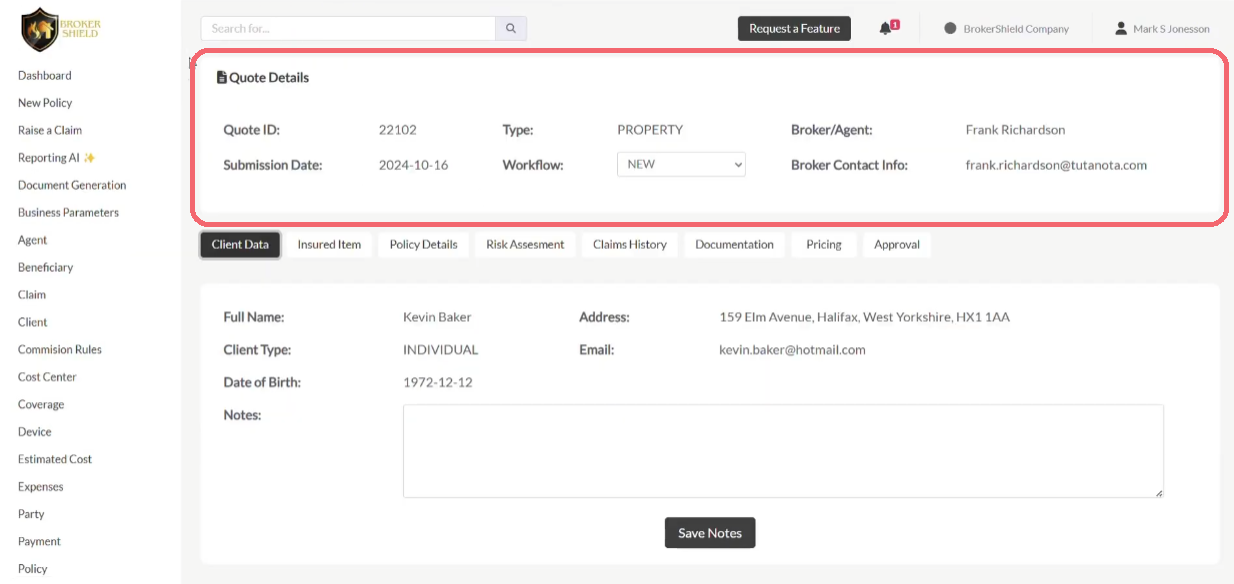
You can:
- View and update the quote’s status or add new data
- Access broker contact details
- Customize which fields are shown
This section is fully configurable, so you can display only the information relevant to your underwriting process.
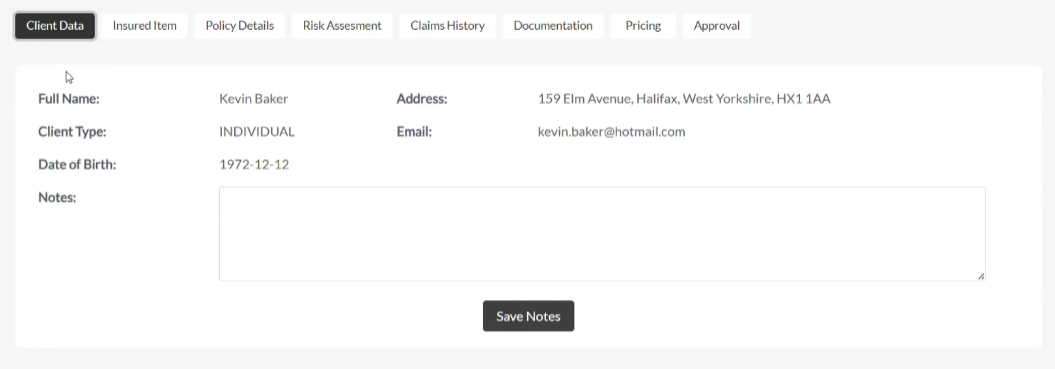
Step 3: Analyze Client Data and Add Notes
Go to the Client Data tab.
This section displays all details submitted by the client through the application form.
You’ll also find an Internal Notes area where you can:
- Record insights or decisions
- Leave instructions for colleagues
- Track follow-ups
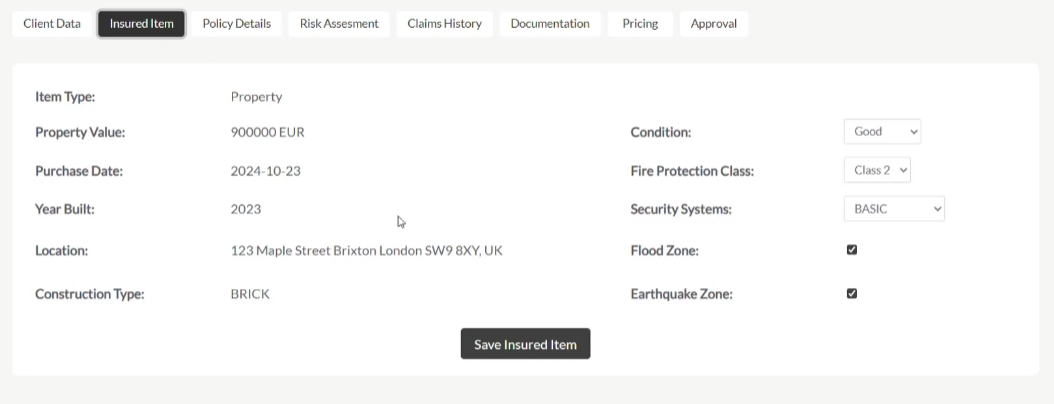
Step 4: View Insured Item and Policy Information
In the Insured Item tab, you can view and edit data about the item being insured – whether it’s a vehicle, property, or equipment.
- Left-hand columns: typically read-only reference data
- Right-hand columns: editable fields for your risk analysis
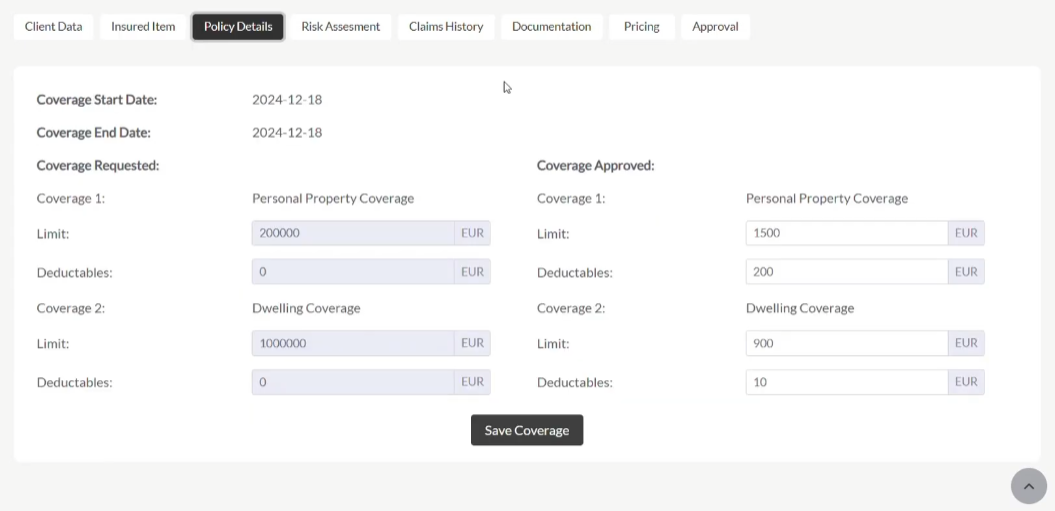
Switch to the Policy Details tab to review or adjust coverage terms:
- Compare the client’s requested coverage with your own suggested limits
- Add or edit deductibles and other conditions
Step 5: Perform Risk Assessment Calculations
Next, open the Risk Assessment tab.
Here, you’ll see the quote’s calculated risk score based on various underwriting factors and underwriting rules.
Here you can:
- Implement custom pricing logic
- Add custom underwriting rules
- Use formulas aligned with your internal risk model
- Include individual weighted risk factors, all dynamically calculated
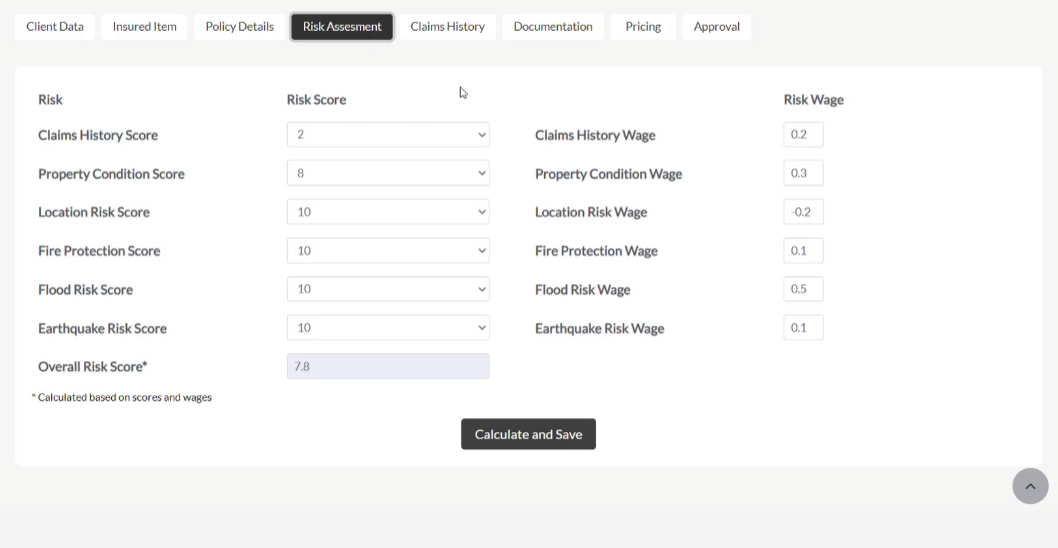
This section can also integrate third-party data sources via API to further enrich your analysis.
Step 6: Check Claims History
The Claims History tab offers a consolidated view of past claims related to the client or the insured item.
This information can either be pulled from internal systems or fetched via external APIs for full data accessibility.
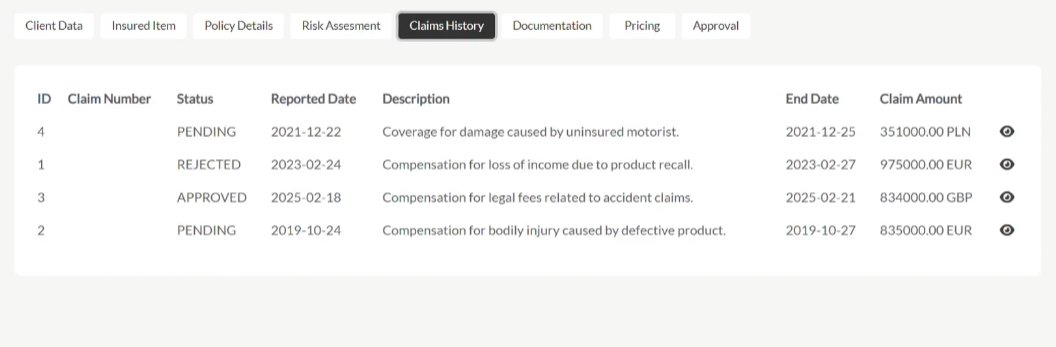
Having claims data in one place speeds up the risk evaluation process by eliminating the need to switch systems.
Step 7: Manage Documents and Requests
In the Documentation tab, all quote-related files are stored and accessible.
Here you can:
- View and download submitted documents and relevant data
- Request missing documents directly from the system

To request a document:
- Click Request Document
- Add a note
- The client or broker receives an automatic email with your request
Step 8: Adjust Pricing
Use the Pricing tab to apply:
- Discounts
- Surcharges
- Custom rate adjustments

This section is highly flexible to suit every risk scenario.
In this tab, you can:
- Set base premiums
- Configure rate factors
- Apply new business rules (e.g., max discount thresholds)
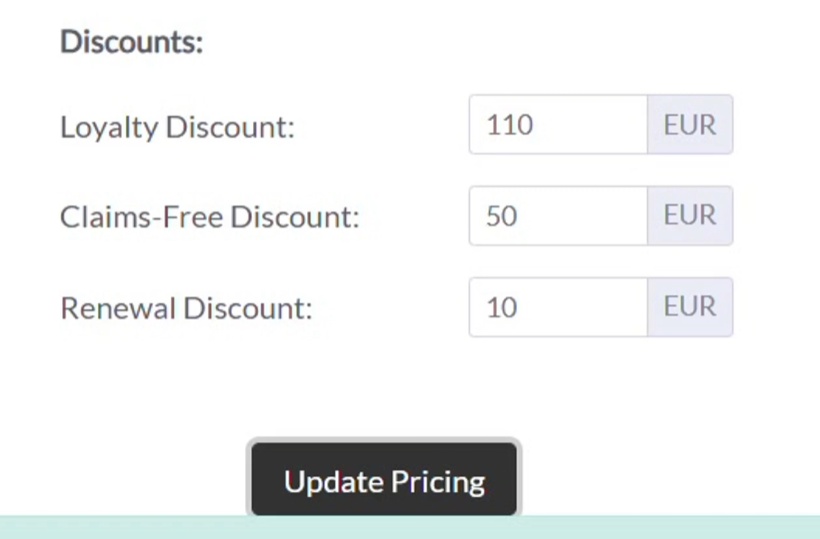
The system automatically validates your entries and dynamically updates the final premium.
Step 9: Finalize the Approval Decision
In the Approval tab, you finalize your underwriting decision.
- Select Approve or Reject
- Add final comments if needed
- Trigger automated notifications to the broker or client
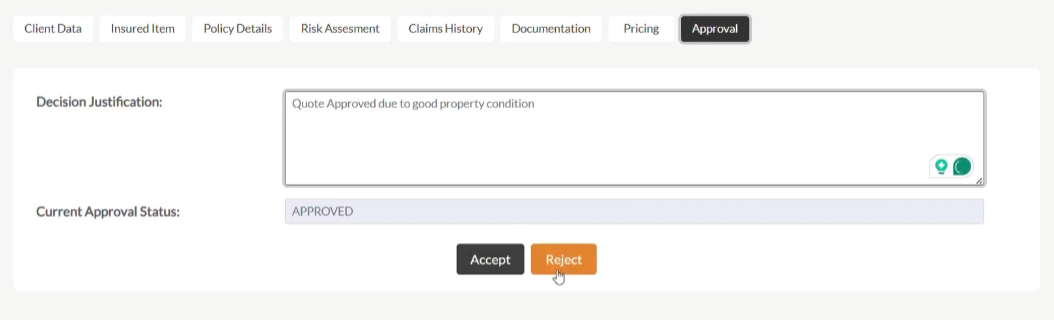
All buttons and underwriting operations workflow actions are fully customizable.
Step 10: Customize Your Dashboard for Smooth Underwriting Operations
Every element of this dashboard – tabs, underwriting rules, fields, widgets, layouts – can be tailored to fit your team’s unique process.
Whether you need different configurations for various product lines or just to personalize your application interface, Openkoda makes it easy to:
- Modify layouts
- Add or remove fields
- Adjust logic with minimal effort
Build Fast, Customize & Innovate Without Limits
With the right platform, you can go beyond generic tools and build underwriting solutions tailored to your exact needs, faster than ever.
Openkoda empowers your team to launch quickly, adapt effortlessly, and scale with confidence.
Say goodbye to rigid systems and vendor lock-in. It’s time to innovate at your own pace, with no limits.