How to Build a Personalized Insurance Policy Dashboard
Every insurance company needs it. A single place where critical policy data is just a click away – accessible, organized, and tailored to their exact needs. A personalized policy dashboard isn’t just a convenience; it’s an essential component of any effective policy management application.
With Openkoda, you can easily create a custom dashboard that’s intuitive and seamlessly integrated into your workflow. It gives you control and insight, simplifies your tasks, and makes your work easier.

What is a Personalized Insurance Policy Dashboard
A personalized policy dashboard is a centralized hub designed to give you quick access to key policy data and support informed decision-making.
Custom dashboards allow insurers to track and manage important metrics such as: claims processing times, premium collection status, policy renewal rates, client demographics, payment schedules, or any other metric. Openkoda Insurance Policy Management Software lets you personalize your dashboard to focus on the data most relevant to your specific operations.
Using this approach, you can create your own best policy management software that is tailored to your needs, but at a fraction of the cost.
This guide will walk you through the steps to create a dashboard that enables you to make smarter, faster decisions using real-time data.
Follow the steps below or view a video tutorial:
Step 1: Creating a New Dashboard
Start by entering the Dashboard Builder in Openkoda and selecting the ‘Add New Dashboard’ option.
In Openkoda you can add as many new dashboards as you want.
This will create a dedicated space for displaying critical policy data, tailored to your operations.

In the Dashboard Builder configurator, you can decide what types of information should be placed in your dashboard. It makes sure that all key policy metrics are easily accessible in one place and reduces the time spent searching for information.
Step 2: Selecting Widgets for the Dashboard
Now, we need to populate your dashboard by selecting widgets that display the information you want to monitor.
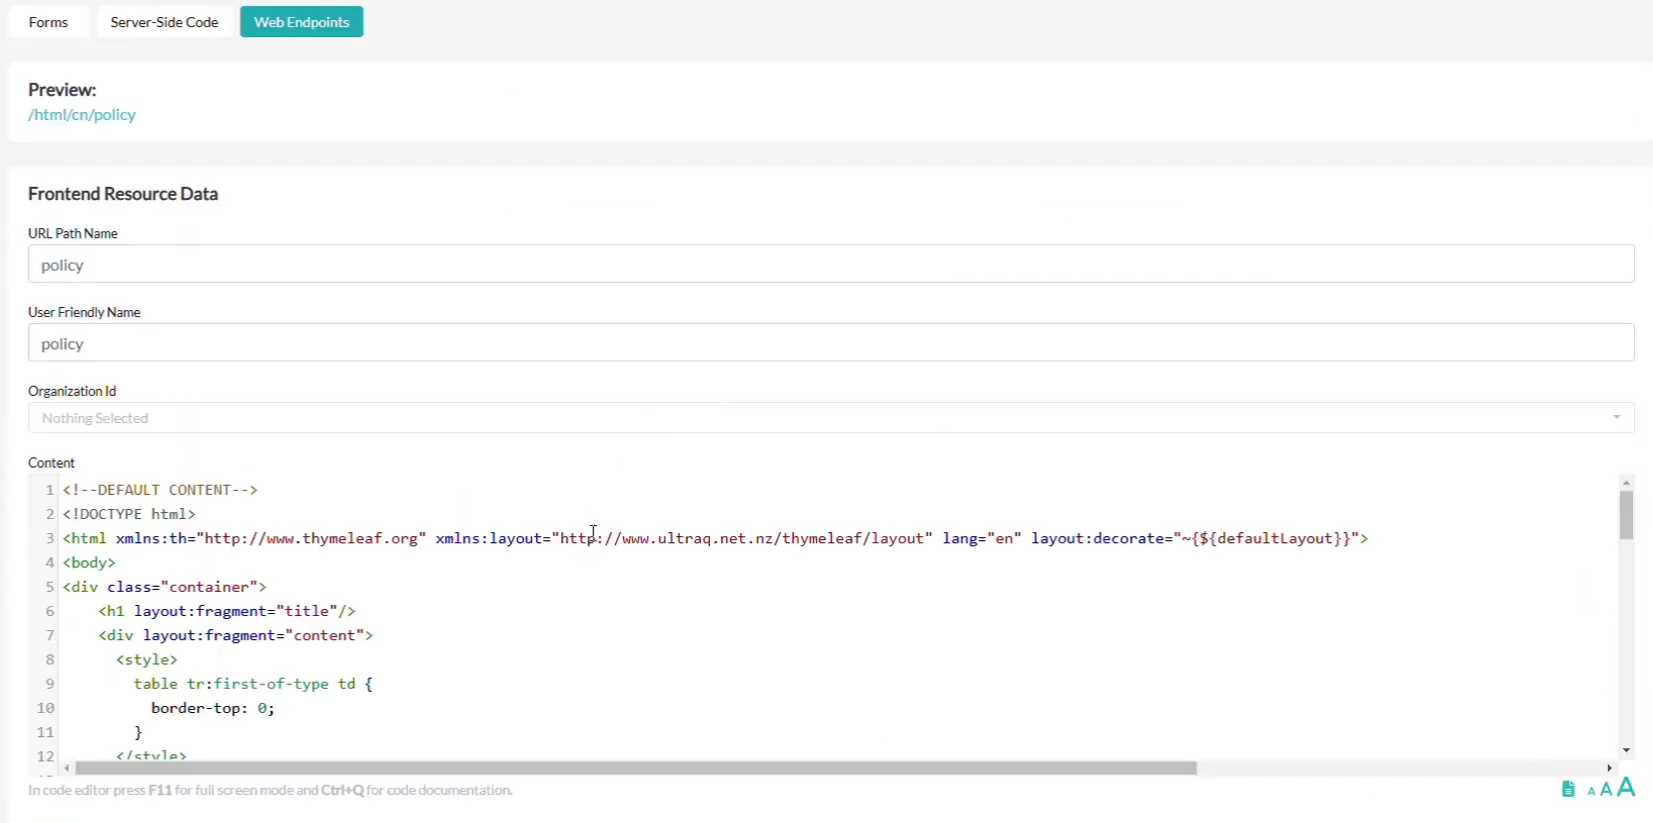
Openkoda offers a variety of customizable widgets available in the web endpoints table, such as:
- Attachments – to easily access and manage the documentation related to a given policy
Notes – to allow users to add useful notes and reminders about policies - Policies – to view a summary of a basic policy metrics
- Upcoming Payments – to track upcoming payment dates and send automatic reminders to clients
- Client Data – to view client profiles
- Claims – to review the claims’ history for the policy
- Beneficiary Information – to easily view beneficiary share details and contact information
And any custom widget you can think of.

Here you can create, define and customize these widgets directly in Openkoda to fit your needs.

By customizing the dashboard with relevant widgets, you can improve the decision-making process and operational efficiency.
[Watch also: How to Create a Custom Policy Management Application in 5 Minutes]
Step 3: Adding Widgets to the Dashboard
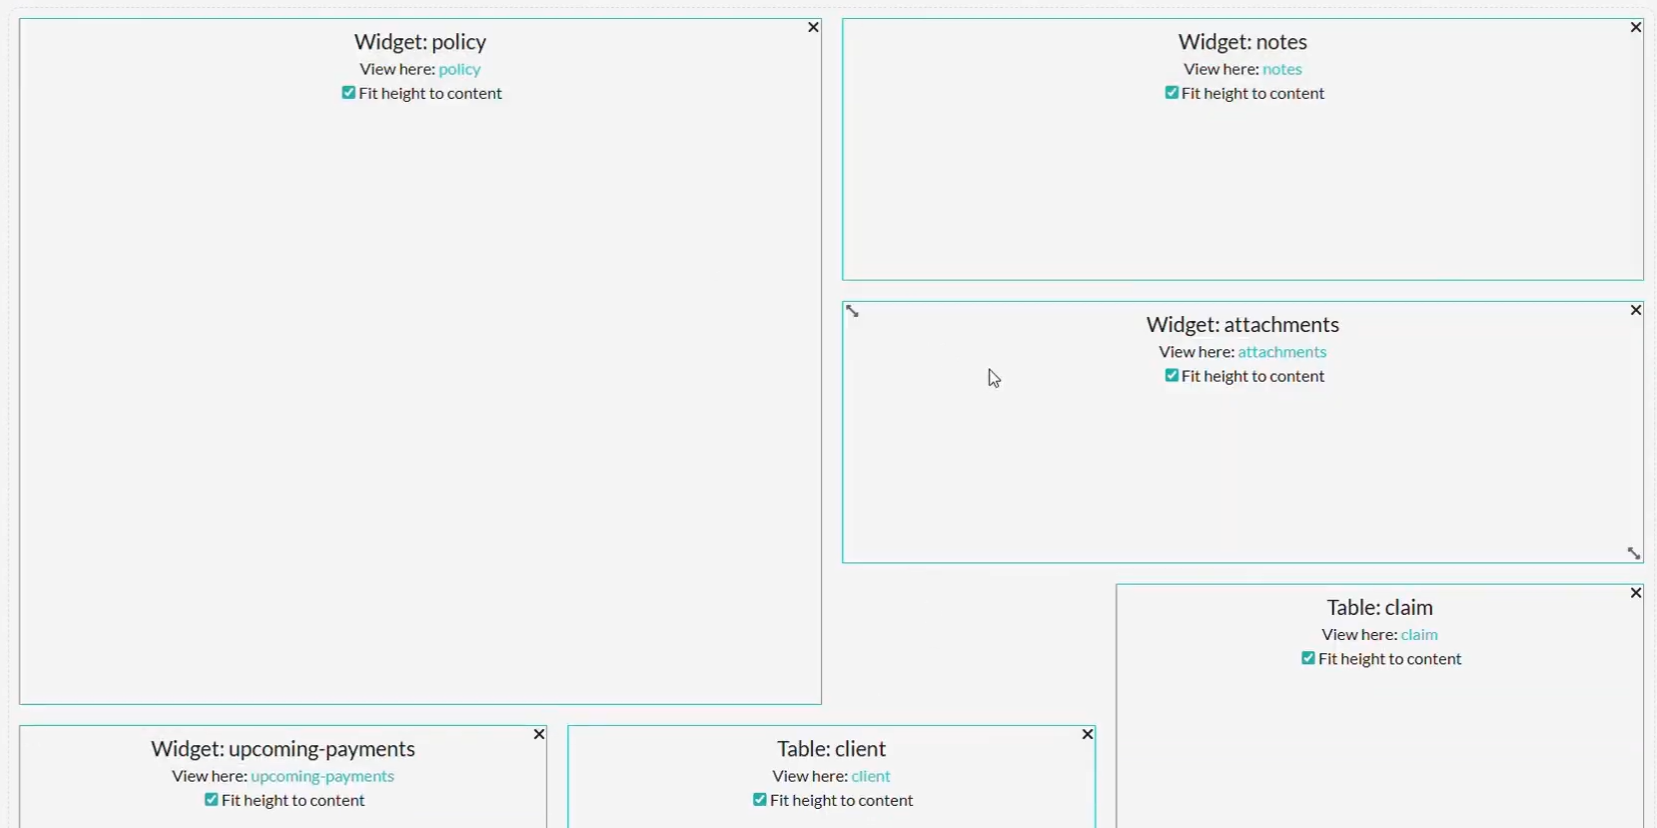
Go to the Dashboard Builder and select the widgets and tables you want.
In this case, we select widgets such as: attachments, notes, policies, and upcoming payments, as well as a table with beneficiary, claim, and client information.
All of this data will appear on my dashboard.

Step 4: Personalize the Layout of Your Dashboard
Use the drag-and-drop functionality to arrange the selected widgets and tables on your dashboard.
This flexibility allows you to organize the layout in a way that best suits your workflow.

An intuitive layout enhances productivity by enabling quick access to frequently used data and ensuring that the dashboard supports your specific workflow.
Step 5: Linking the Dashboard to Policy View
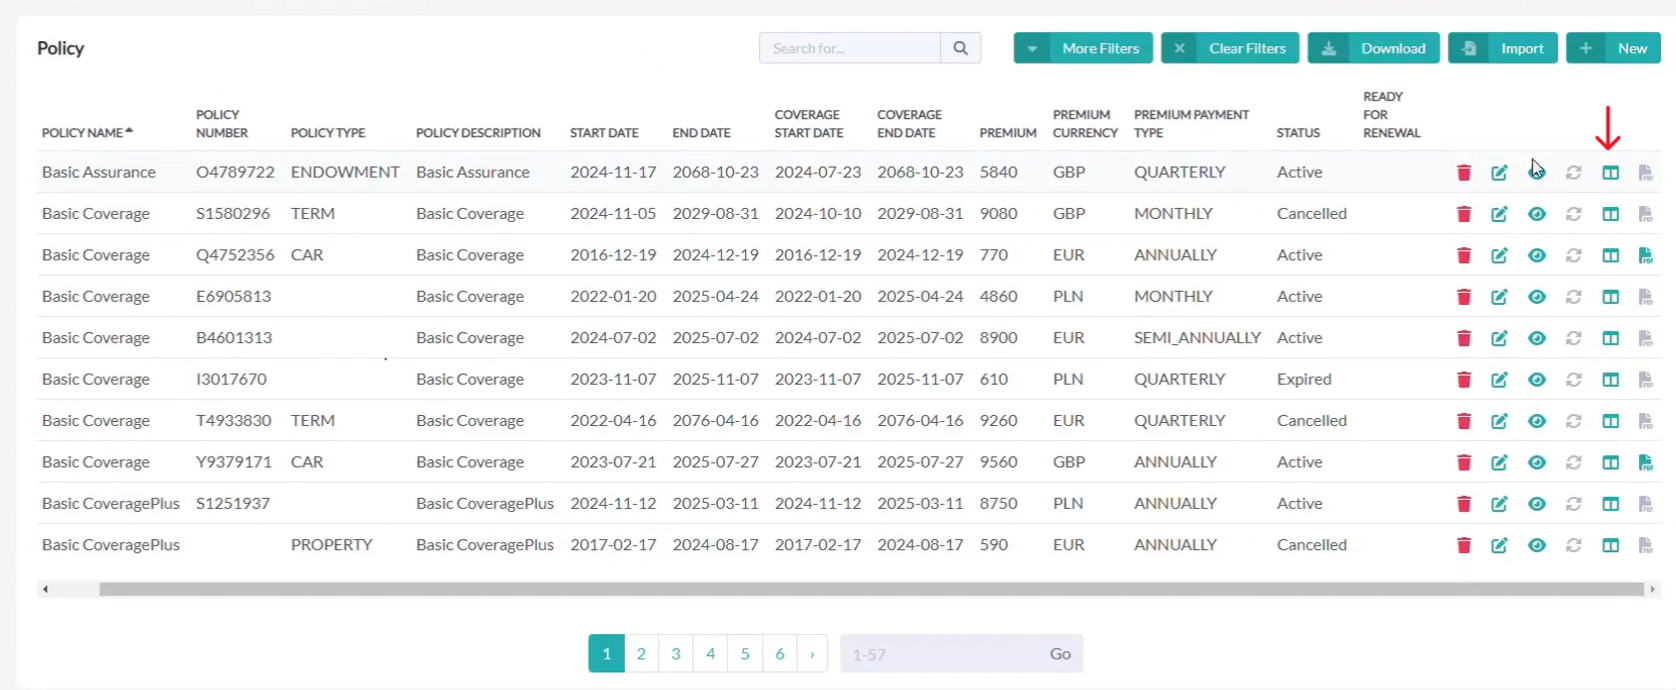
To ensure easy access, add an icon with a direct link to your new dashboard from the policy screen.
This allows users to navigate seamlessly between individual policies and the dashboard.


Step 6: Viewing the Policy Dashboard
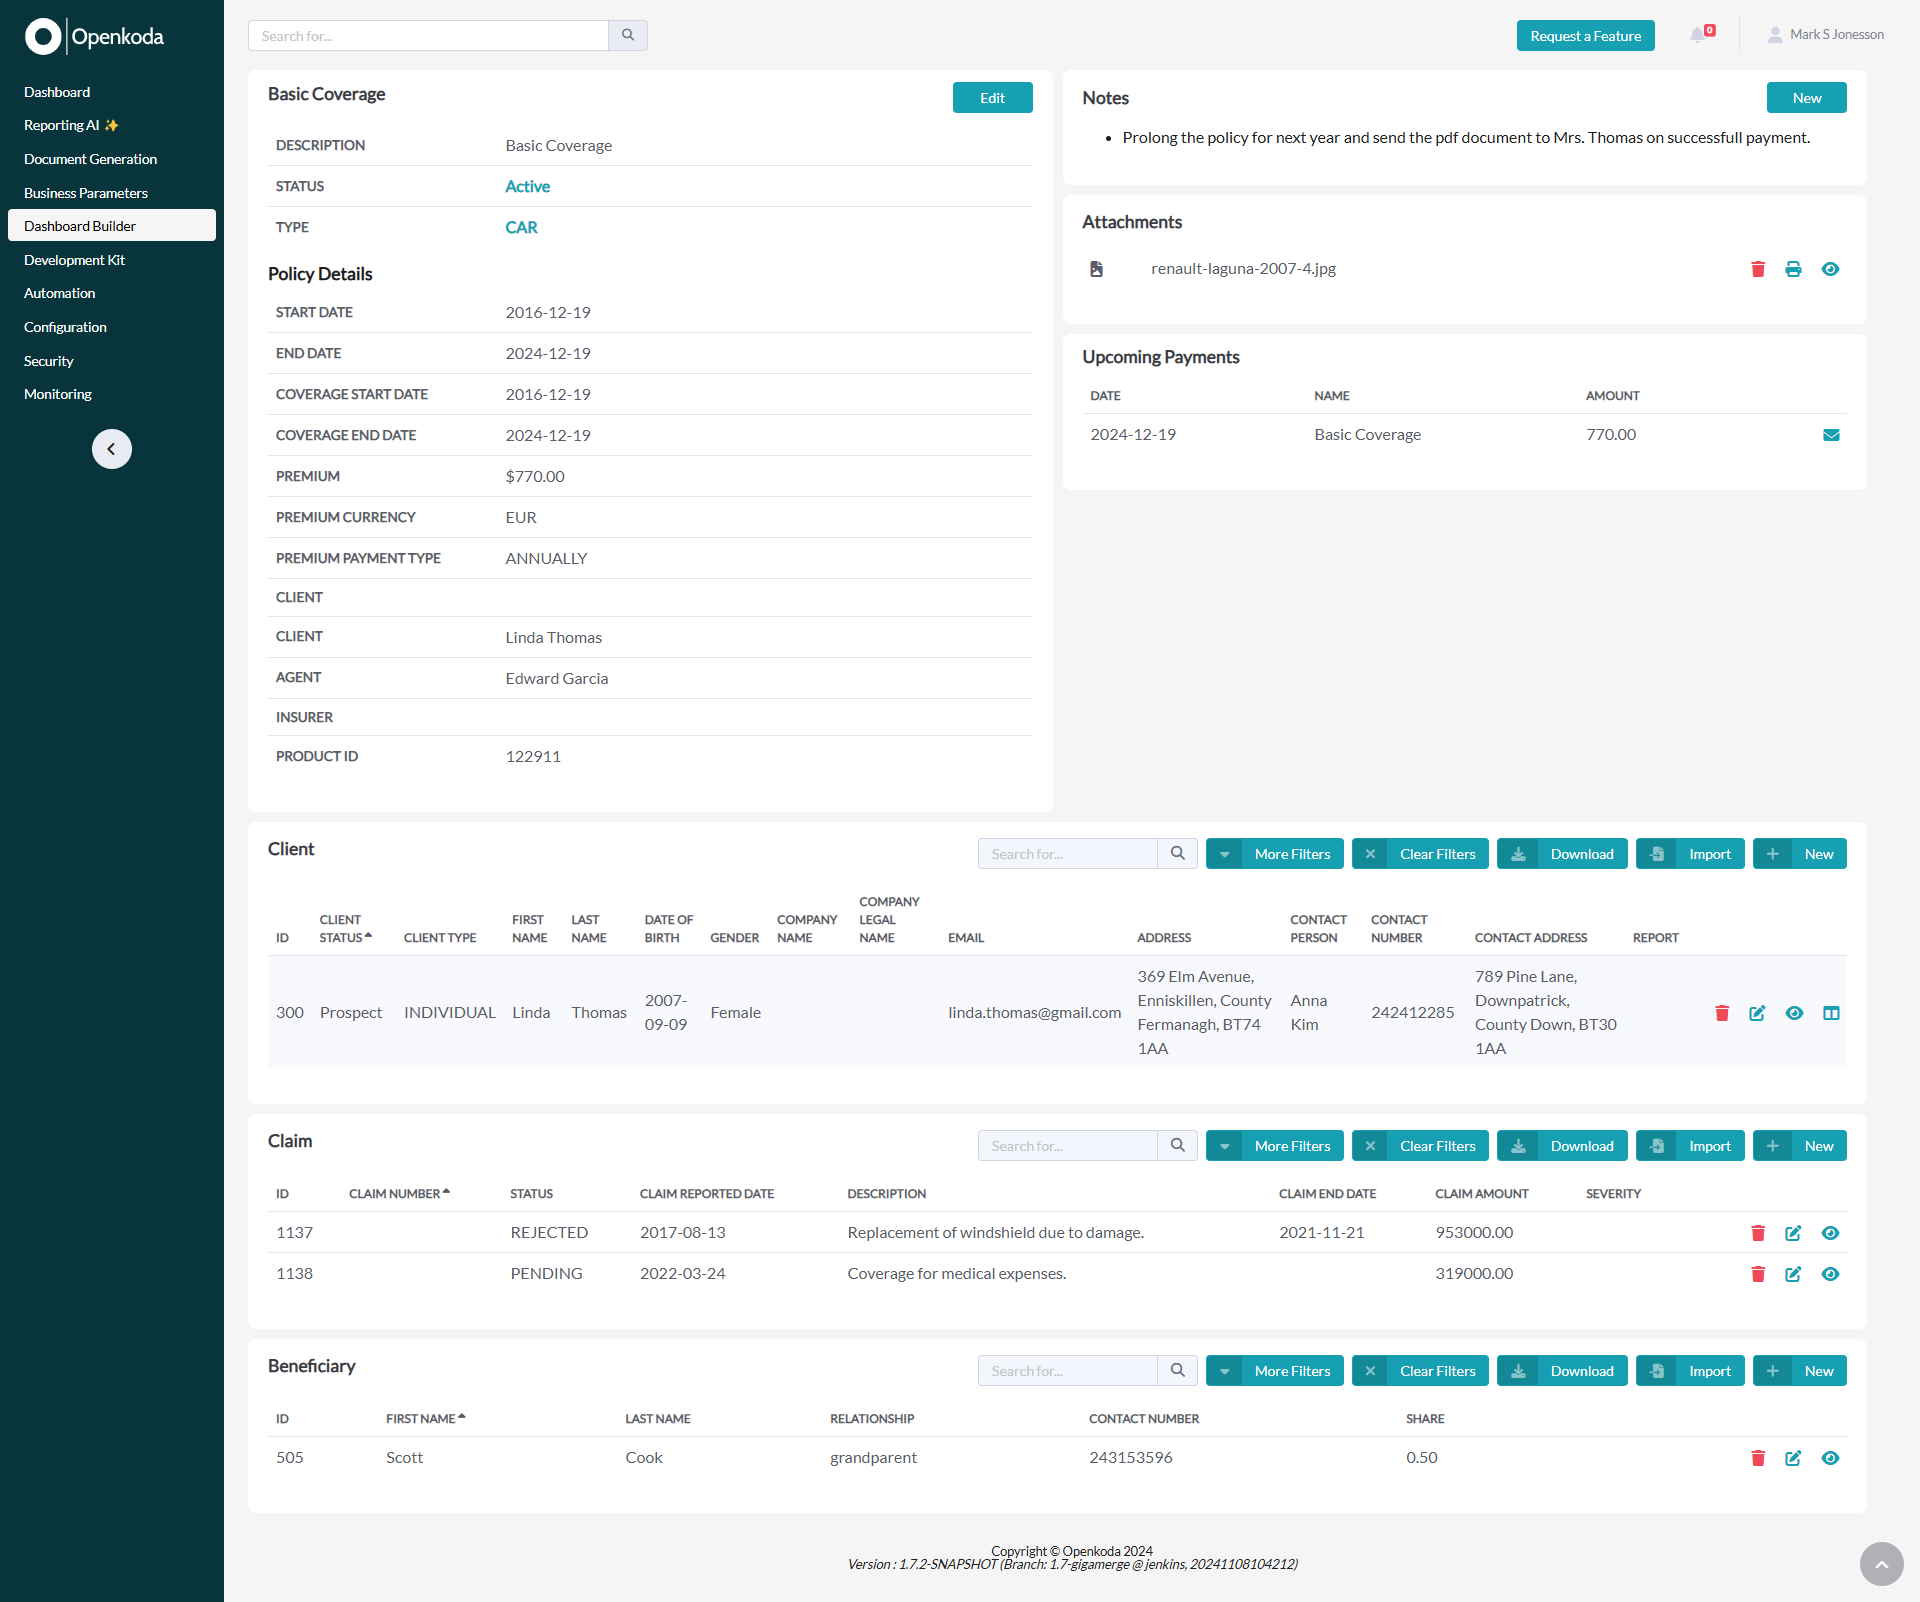
Click on the new icon to open the dashboard you’ve just created.

Here, you can see all the data displayed in real-time, offering a clear and comprehensive view of important policy information at a glance which is a solid starting point for building your own custom policy management software.
Real-time insights provide the clarity needed to make informed decisions, enabling proactive policy management and improved customer satisfaction.
The customization options for the dashboard are endless in Openkoda.
Watch: How to Monitor and Optimize Your Insurance Business With Custom Dashboards to learn how to build an agent dashboard that includes typical sales metrics such as KPIs, conversion rates, sales pipeline progress, and any other metrics you need.
Build Your Custom Policy Dashboard with Openkoda
Building a personalized insurance policy dashboard in Openkoda is a straightforward process. By centralizing key metrics and providing real-time insights, this dashboard improves efficiency, decision-making, and overall policy management. Ready to streamline your insurance workflow? Book a personal demo to learn even more.
Related Posts
- How to Automate Insurance Policy Renewal Reminders?
- How to Personalize Your Openkoda Interface to Match Your Brand
- How to Create Custom Notifications for Your Application
- How to Manage User Roles and Create Custom Permissions in Your Application
- How to Generate Insurance Documents with Customizable Templates