
How to Create Custom Notifications for Your Application
Clear communication and timely updates are essential for running a successful insurance business. Whether you’re managing policies, processing claims, or assisting clients, it’s important to make sure the right people get the right information at the right time. This not only keeps tasks moving smoothly but also helps your team work more efficiently and effectively. In this article, we will show you how to make custom notifications in Openkoda.
Custom Notifications for Insurance Application
The in-app notifications feature of Openkoda helps insurance professionals stay informed about critical updates in real time, reducing delays, improving collaboration, and streamlining workflows.
For instance, in a policy management application, timely notifications can alert agents to updates or approvals, ensuring smooth processing.
Follow the steps below to create custom notifications in Openkoda, or watch our video tutorial:
Step 1: Assign a Claim to a Specific User
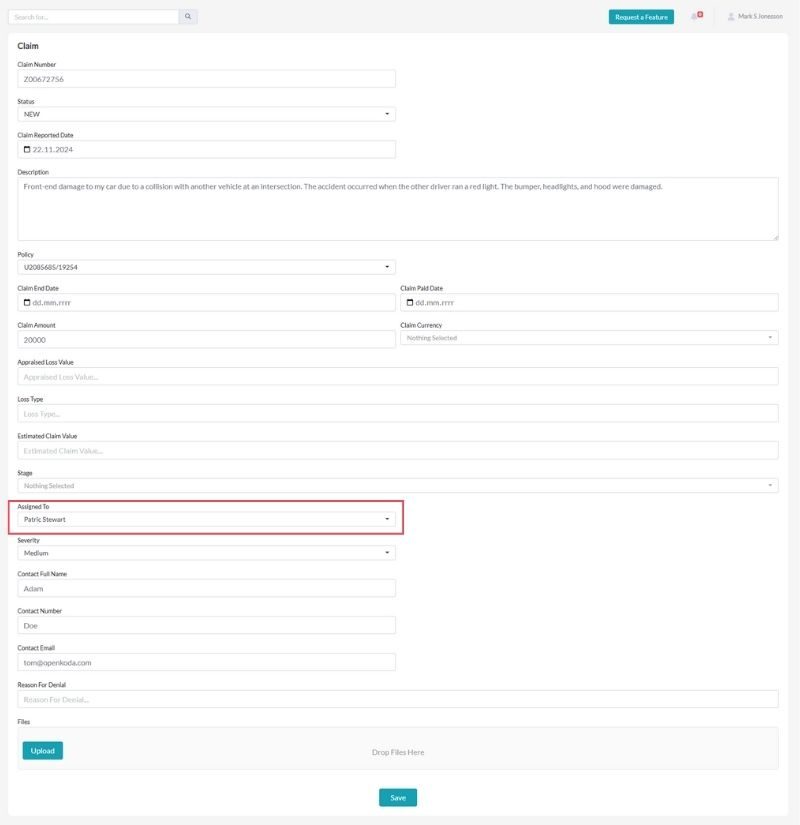
Start by entering the claims table in Openkoda.
It’s a centralized feature where claims are assigned to the person responsible for handling them.
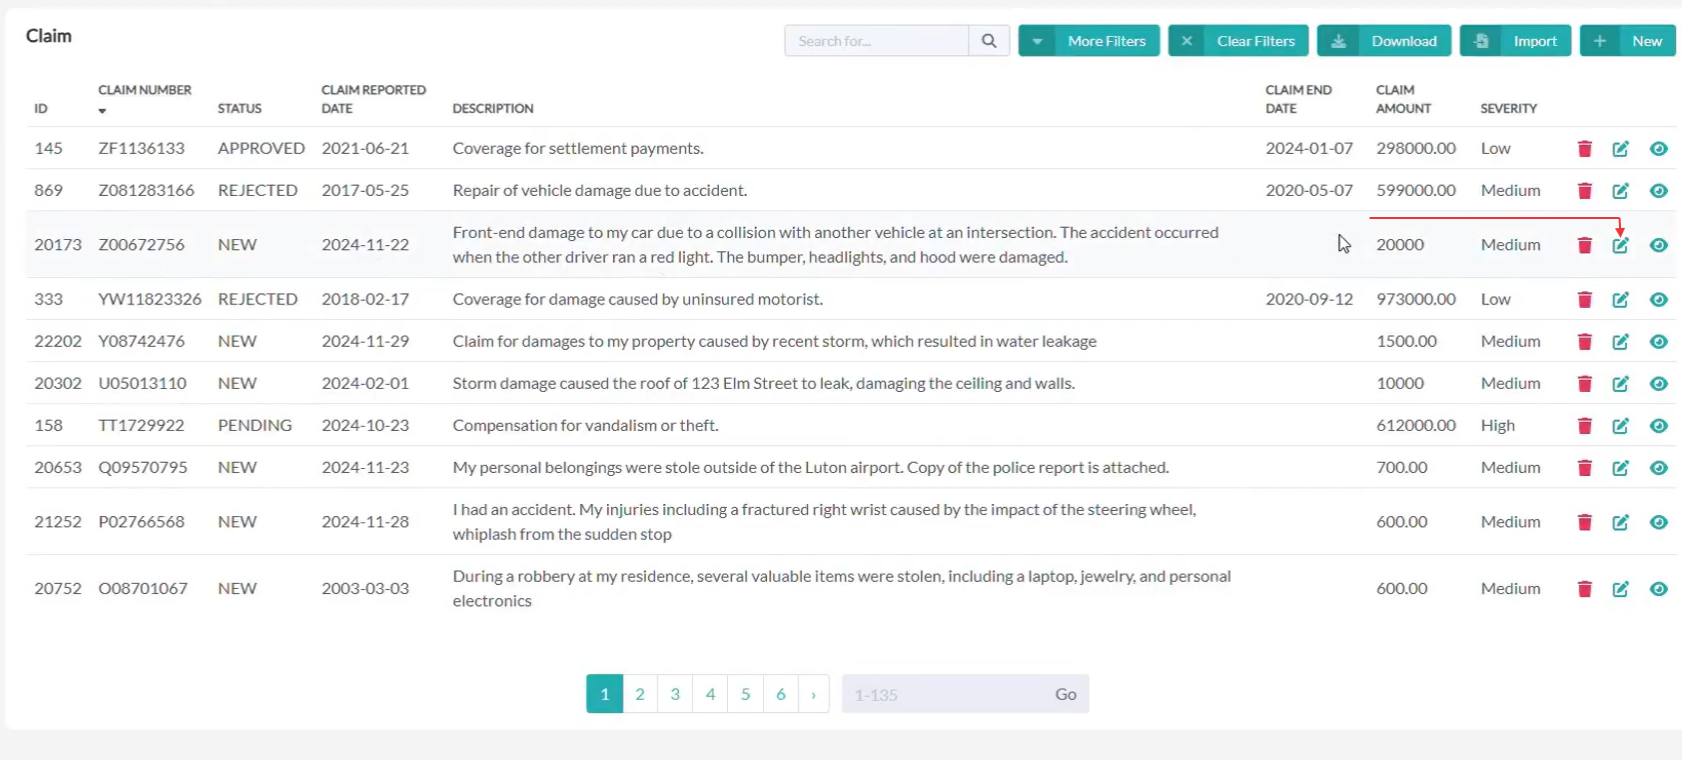
We click edit and assign a claim to a specific user who is responsible for it.
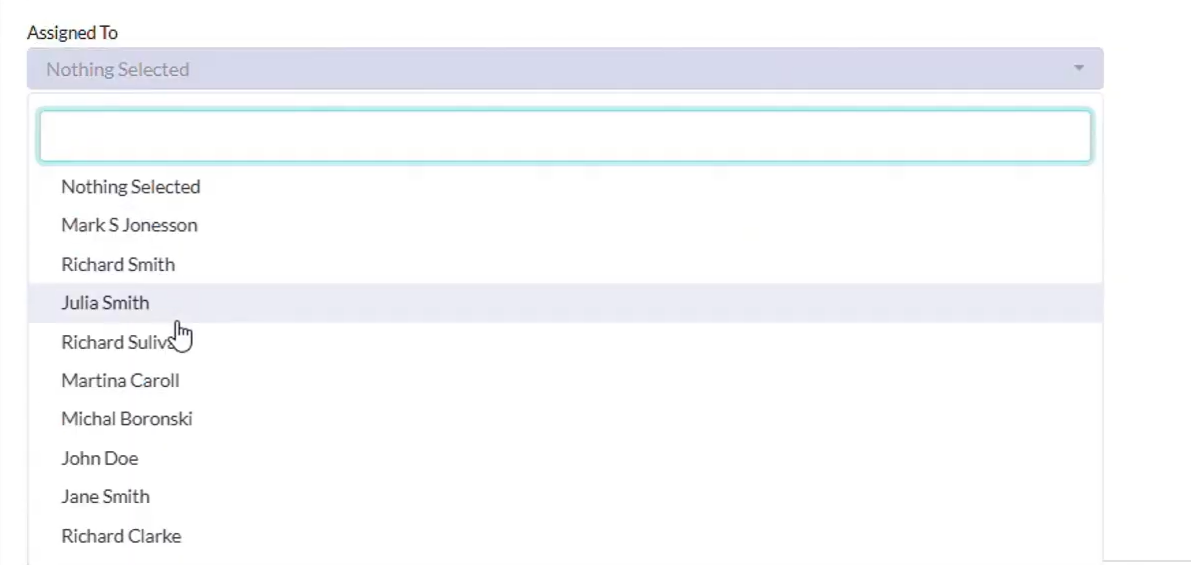
Next, we’ll implement a custom event that alerts users when a claim is delegated to them.
Step 2: Add Custom Events
In Openkoda, every data table comes with pre-configured custom events.
These events track critical changes, such as creating, modifying, or deleting records.
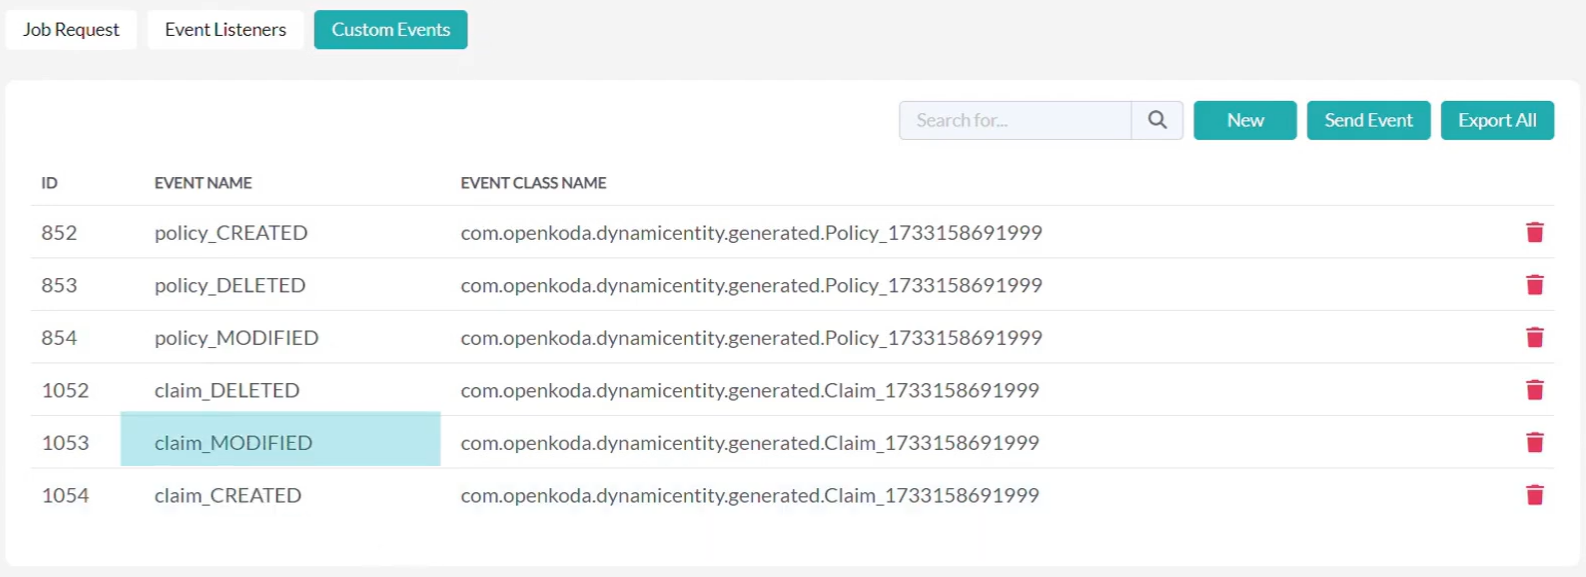
For this tutorial, we’ll focus on the Modification event, which will send notifications when a user is assigned to a claim.
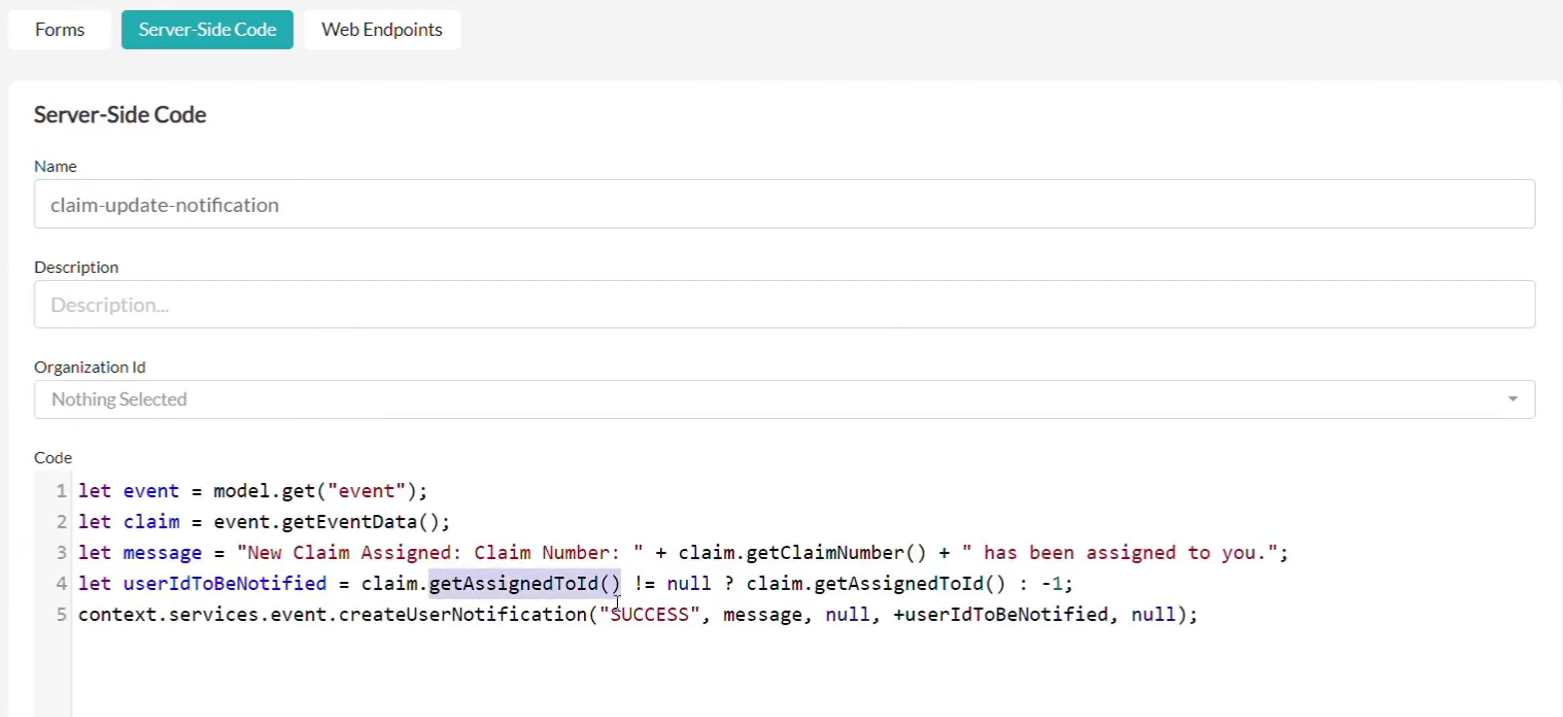
Step 3: Write Short Server-Side Script
Next, we create a server-side script called “claim-update-notification”.
The role of the script is the following:
- Defines the content of the notification message
- Identifies the recipient, specifically, the user assigned to the claim.
Step 4: Set Up the Event Listener
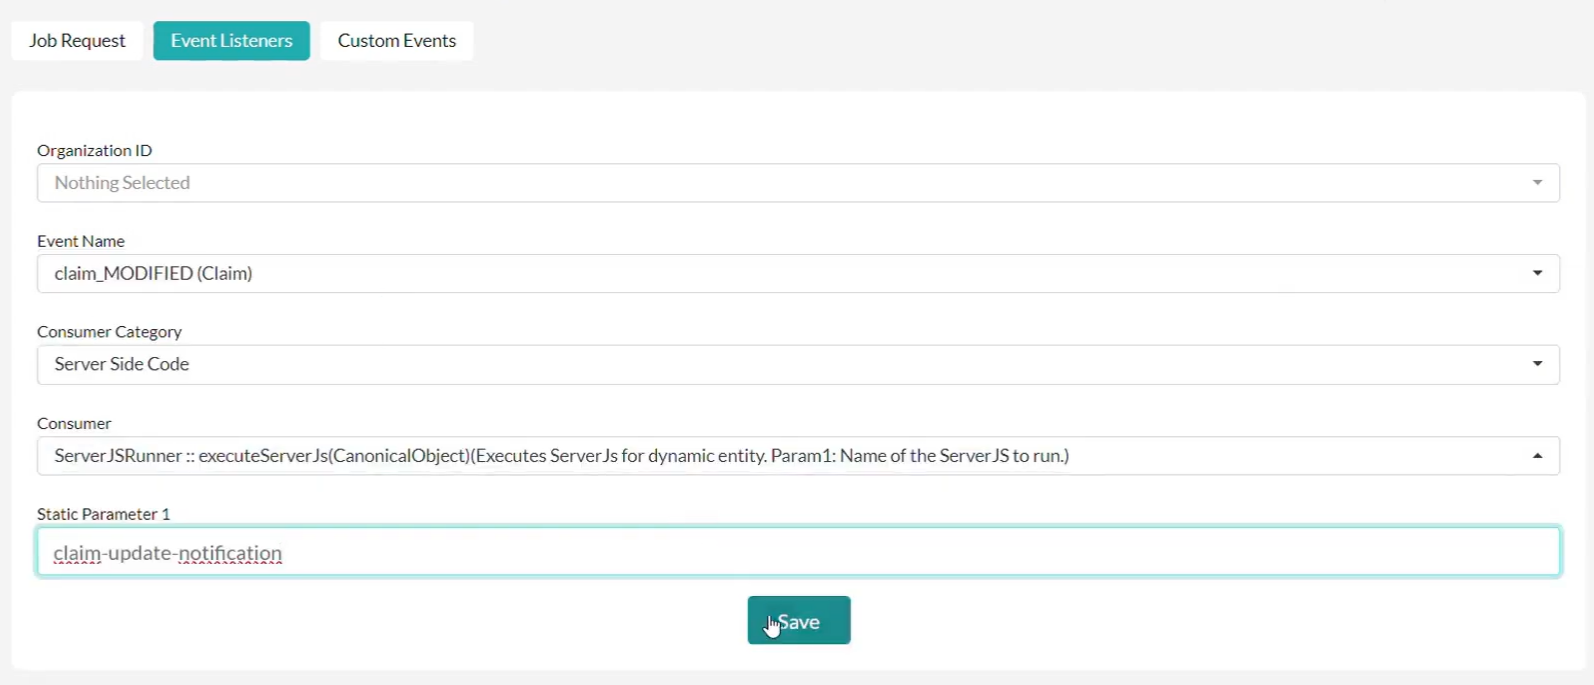
Once the script is ready, we configure an event listener.
This listener monitors changes to the claim’s “assignedTo” attribute and triggers the custom notification whenever an update occurs.
Step 5: Test the Notification System
To demonstrate the impact of this feature, we compare the system’s behavior before and after implementing custom notifications.
Before: The user Patrick Stewart has no notifications.

Action: Update the claim by changing its status and assigning it to Patrick.
After: The system now generates a notification for Patrick, ensuring they are immediately informed about the new assignment.
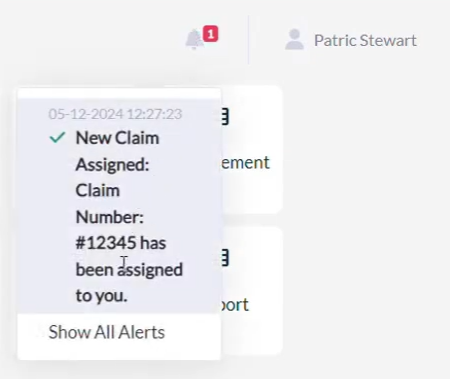
All in-app notifications are conveniently accessible within your Openkoda account:

Custom notifications foster collaboration and transparency. By keeping everyone informed, you enable your team to respond quickly to updates, enhancing overall business agility and service quality.
Custom Notifications with Openkoda
Custom notifications are a simple yet powerful way to improve communication within your organization. With Openkoda, setting up these notifications is seamless and flexible, allowing you to address changes in real-time without the need for manual updates.
Learn more about Openkoda features.
Openkoda’s innovative tools are designed to streamline operations and provide practical solutions for insurance companies.
Book a personal demo today to see how Openkoda can support your business needs and drive efficiency.
Related Posts
- How to Automate Insurance Policy Renewal Reminders?
- How to Personalize Your Openkoda Interface to Match Your Brand
- How to Manage User Roles and Create Custom Permissions in Your Application
- How to Build a Personalized Insurance Policy Dashboard
- How to Generate Insurance Documents with Customizable Templates