
How to Build a Custom Insurance Client Portal
Providing your clients with a secure, self-service portal is a game-changer for efficiency and client satisfaction in the insurance industry.
In this guide, we’ll walk you through the steps to build a custom client portal using Openkoda.

What is Client Portal?
In today’s insurance industry, customers expect the same level of convenience they get from their favorite banking or shopping apps.
This is exactly where insurance portals come in.
A client portal is essentially a secure, digital space where policyholders can log in and take care of most of their insurance needs on their own. From updating contact details and downloading insurance documents to tracking claims or scheduling premium payments, these portals give customers the tools to manage their insurance products whenever and wherever they want.
For insurance providers, building a custom insurance portal can be seen as strategic investment.
Why?
Through thoughtful insurance portal development, insurers can design self-service experiences that reduce the workload on insurance agents, streamline business processes, and ultimately increase operational efficiency.
Instead of handling routine requests, teams can focus on more complex cases and building stronger relationships with clients.
At its core, a modern client portal is about balance: giving customers the freedom of self-service while ensuring that providers maintain control, security, and compliance.
Done right, it becomes a win-win – policyholders feel empowered and cared for, while insurers gain a more scalable way to deliver services.
Key Features of Custom Insurance Portals
The real value of insurance portals comes from tailoring the experience to fit both business goals and customer expectations
Here are some of the essential features every modern solution should include:
- Multi-factor authentication (MFA): Adds an extra layer of security to help protect sensitive data and build customer trust.
- Easy access to all insurance policies: gives policyholders full transparency into their coverage details while reducing repetitive requests to insurance agents.
- Policy renewals: Simplifies the renewal process with reminders and self-service options, ensuring customers never miss an important deadline.
- Customizability: Allows insurers to adapt the portal to their unique business processes, branding, and evolving needs.
- Easy-to-understand UI: A clean and intuitive design that ensures policyholders can quickly navigate the portal without confusion.
Insurance Portal Development with Openkoda
Now that we’ve covered what client portals are and why they matter, let’s dive into the practical side: building one.
With the Openkoda platform, creating a custom insurance portal is faster and easier than you might expect.
Thanks to its prebuilt components and a flexible, customizable core, you can put together a working prototype in no time. Instead of starting from scratch, you’ll be assembling ready-to-use building blocks – dashboards, widgets, and privilege settings – that can then be tailored to match the specific needs of any insurance provider.
Follow the steps below or view a video tutorial:
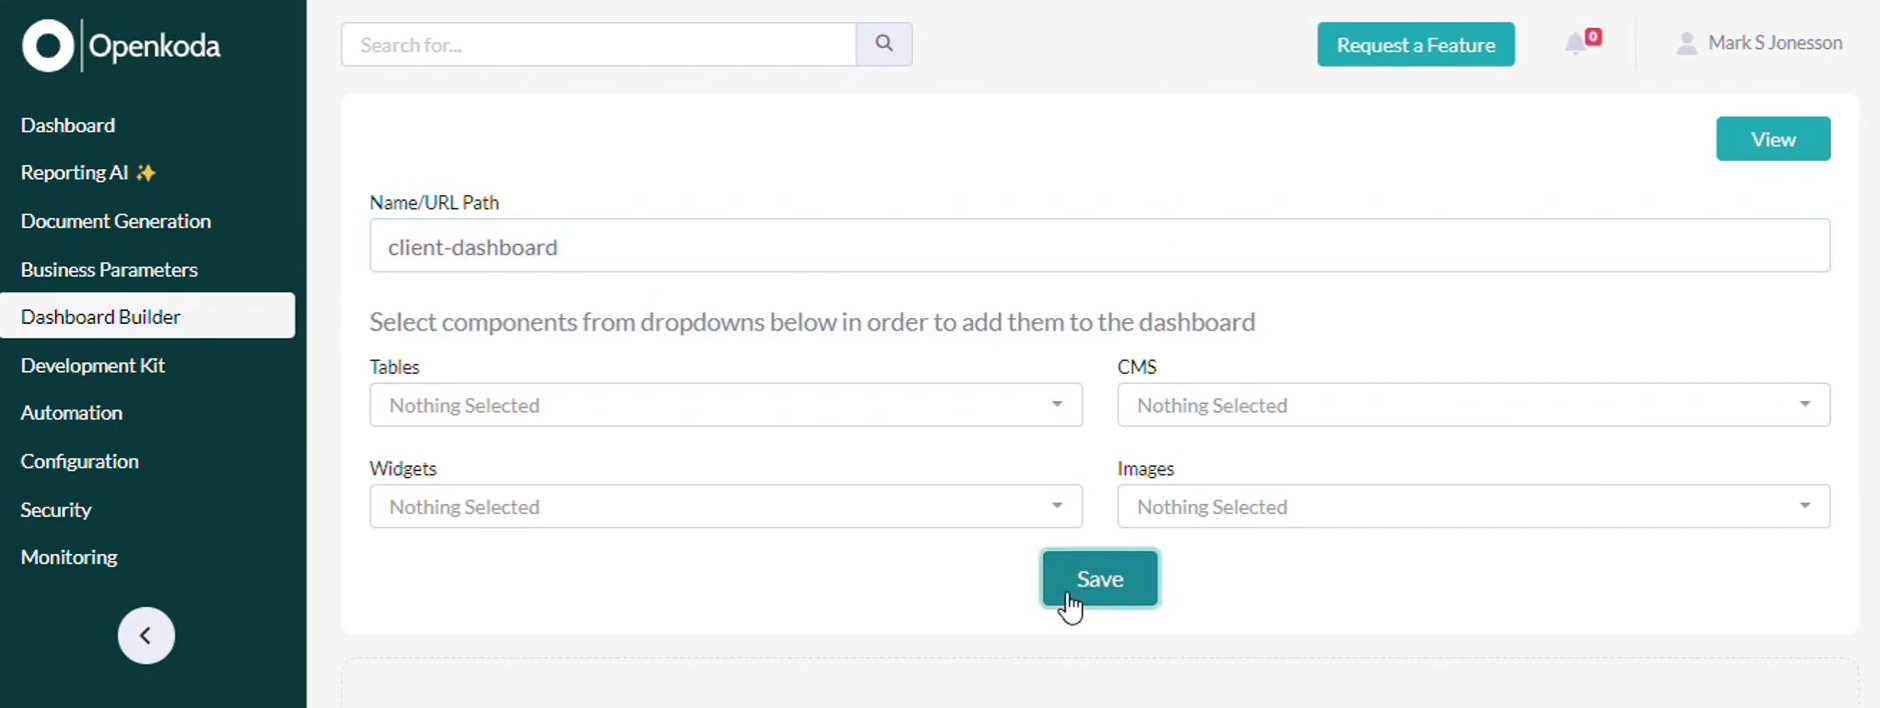
Step 1: Create a New Dashboard
Start by selecting the Dashboard Builder in Openkoda and clicking ‘Add New Dashboard.’
This dashboard becomes the foundation of your insurance customer portal, where client-specific insights, policies, and activities are displayed in one place.
By centralizing access to customer data and policy information, a dashboard significantly improves operational efficiency. Clients can directly view the information they need, reducing the number of customer service calls and freeing up insurance agents to focus on more complex tasks.
Step 2: Choose Widgets
Now, define what kind of information your clients will see in their modern insurance portal.
Each widget represents a building block of the customer experience you want to achieve:
- Personal details: Allows clients to view and update their contact information.
- Policies: Displays a clear list of owned policies, including coverage details.
- Claims: Shows a comprehensive history of submitted claims with real-time status updates.
- Attachments: Provides access to insurance documents such as policy contracts, claim forms, or additional documentation. Clients can also upload new files.
- Upcoming payments: Highlights premium payments and their due dates to ensure customers never miss an installment.

All these widgets can be modified and adjusted directly in Openkoda.
We will add these customizable widgets to the dashboard, which will retrieve data from web endpoints directly into Openkoda.
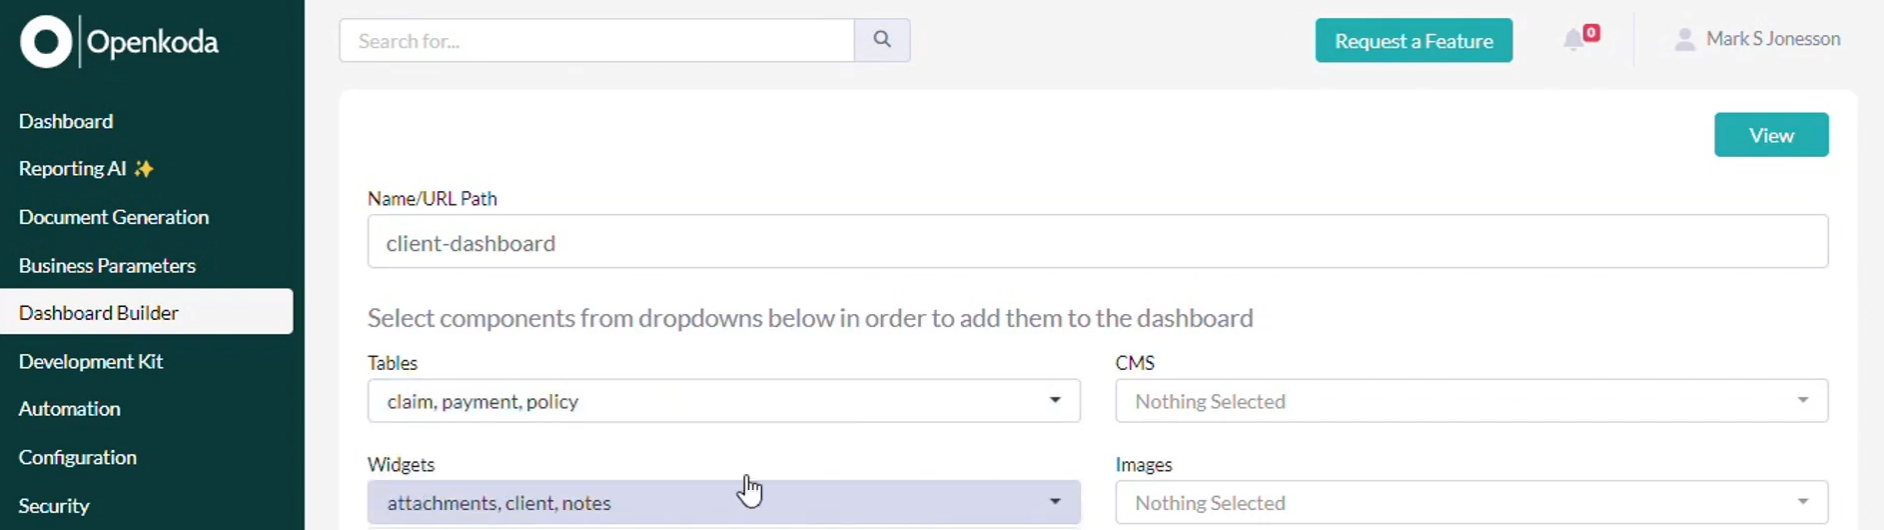
Step 3: Adding Widgets to the Dashboard
Go back to the Dashboard Builder and arrange the widgets you selected.
Use the drag-and-drop functionality to create a clean, user-friendly layout that mirrors the structure of your insurance customer portal.

A well-organized dashboard not only improves the user experience but also helps streamline business processes, making it easier for clients to navigate their portal and access the right information quickly.
Step 4: Set Up Client Access
After designing the portal, it’s time to define who can use it.
Create a custom privilege set in Openkoda specifically for Client users. This ensures that they can only access their personal information and insurance documents, while being restricted from other system areas.
This ensures that they only see their personal data and are restricted from other areas of the application.
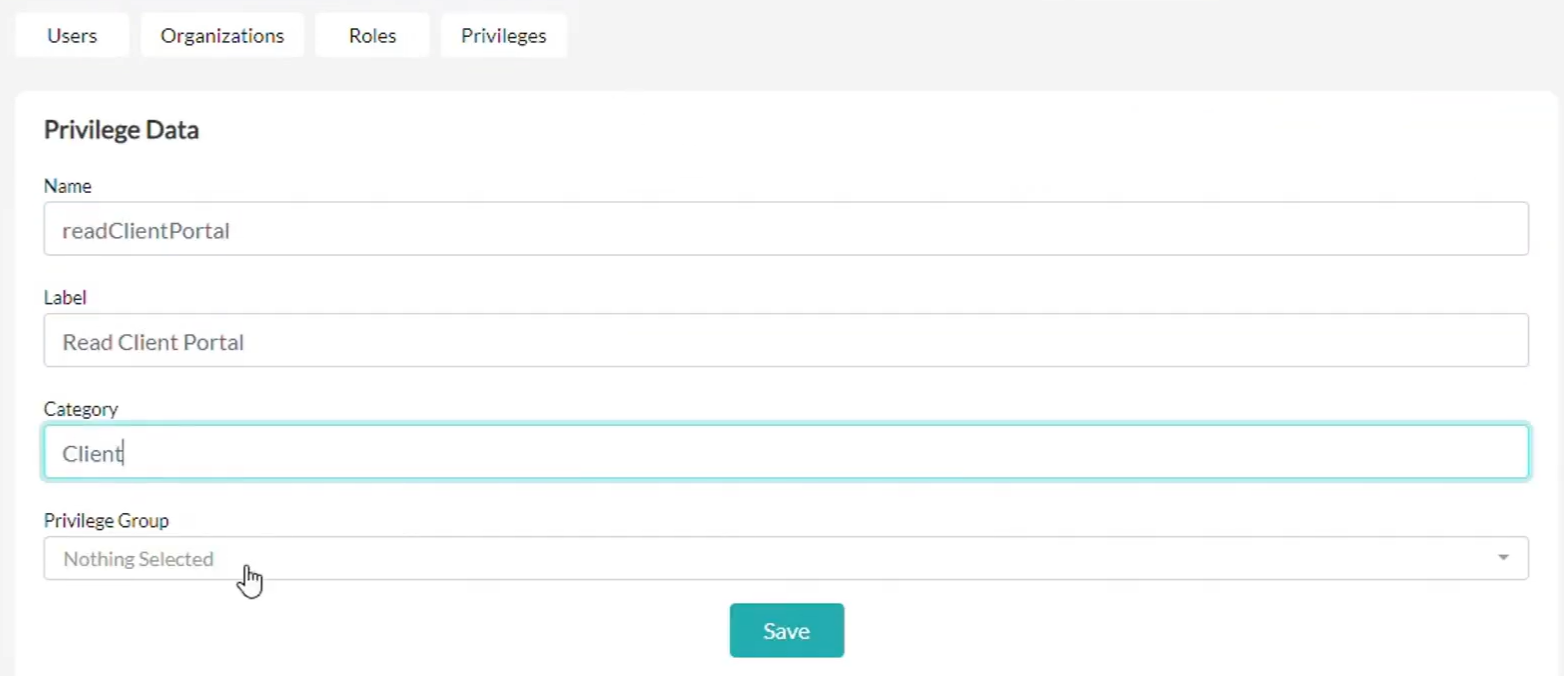
Restrict access to sensitive data to build trust and comply with data protection rules.
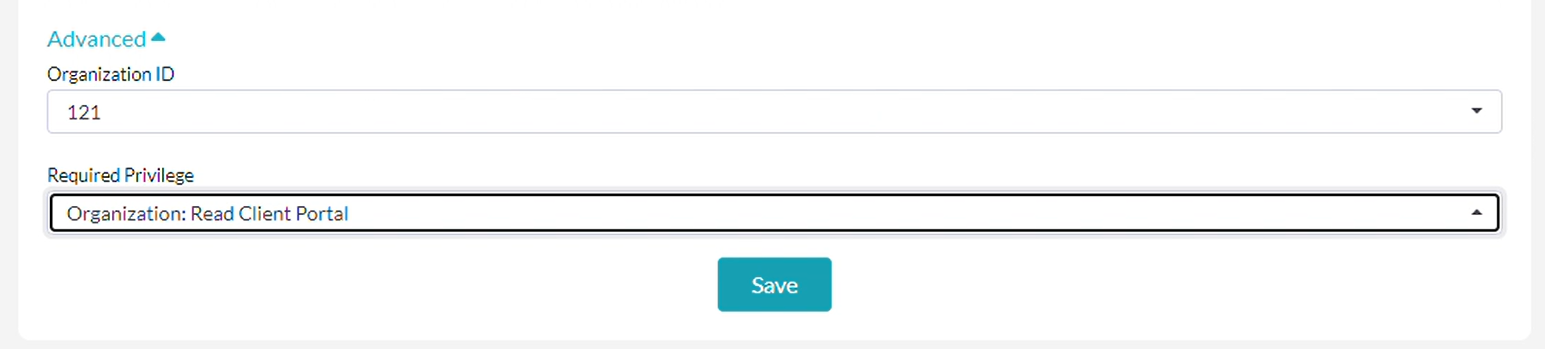
Step 5: Set up access for a Client
Next, we’re going to set up all the privileges our users with the Client role will have.
A Client role includes access to the Client Portal.
The Client role provides access only to the insurance customer portal and the user’s own customer data. They won’t be able to view internal system areas or other users’ records.

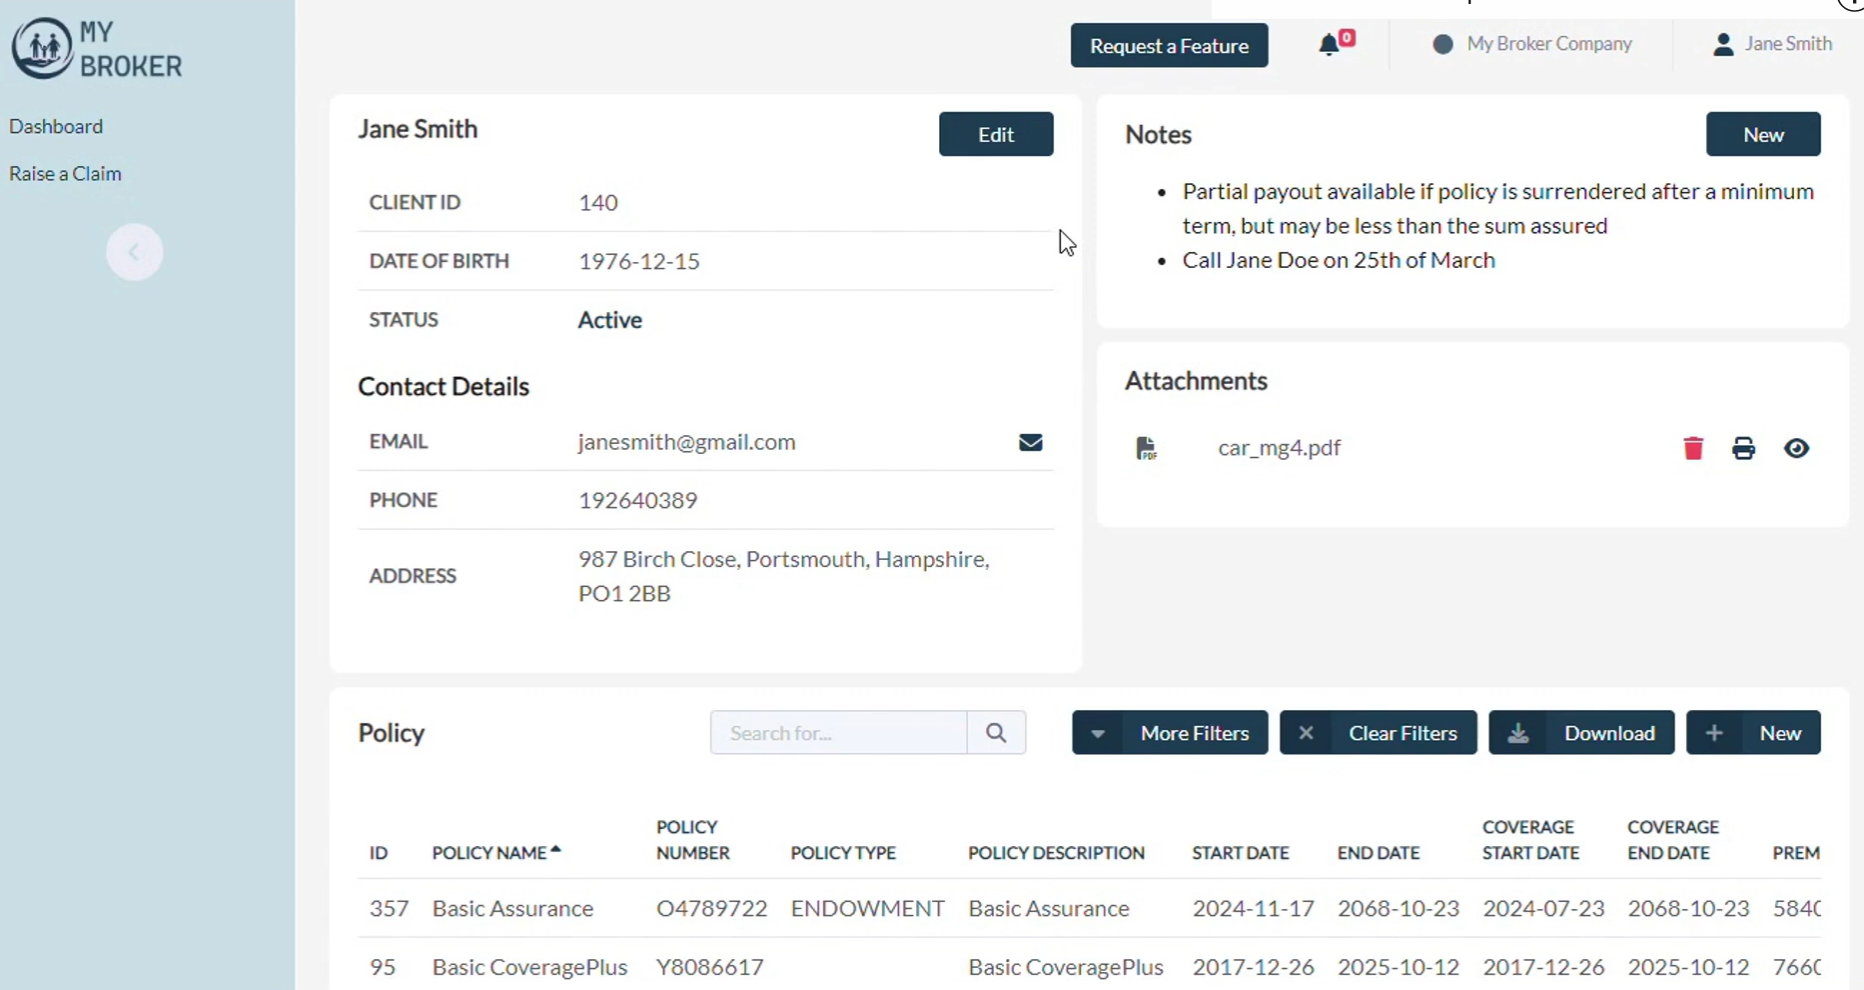
Now, let’s see some details of our client’s data:
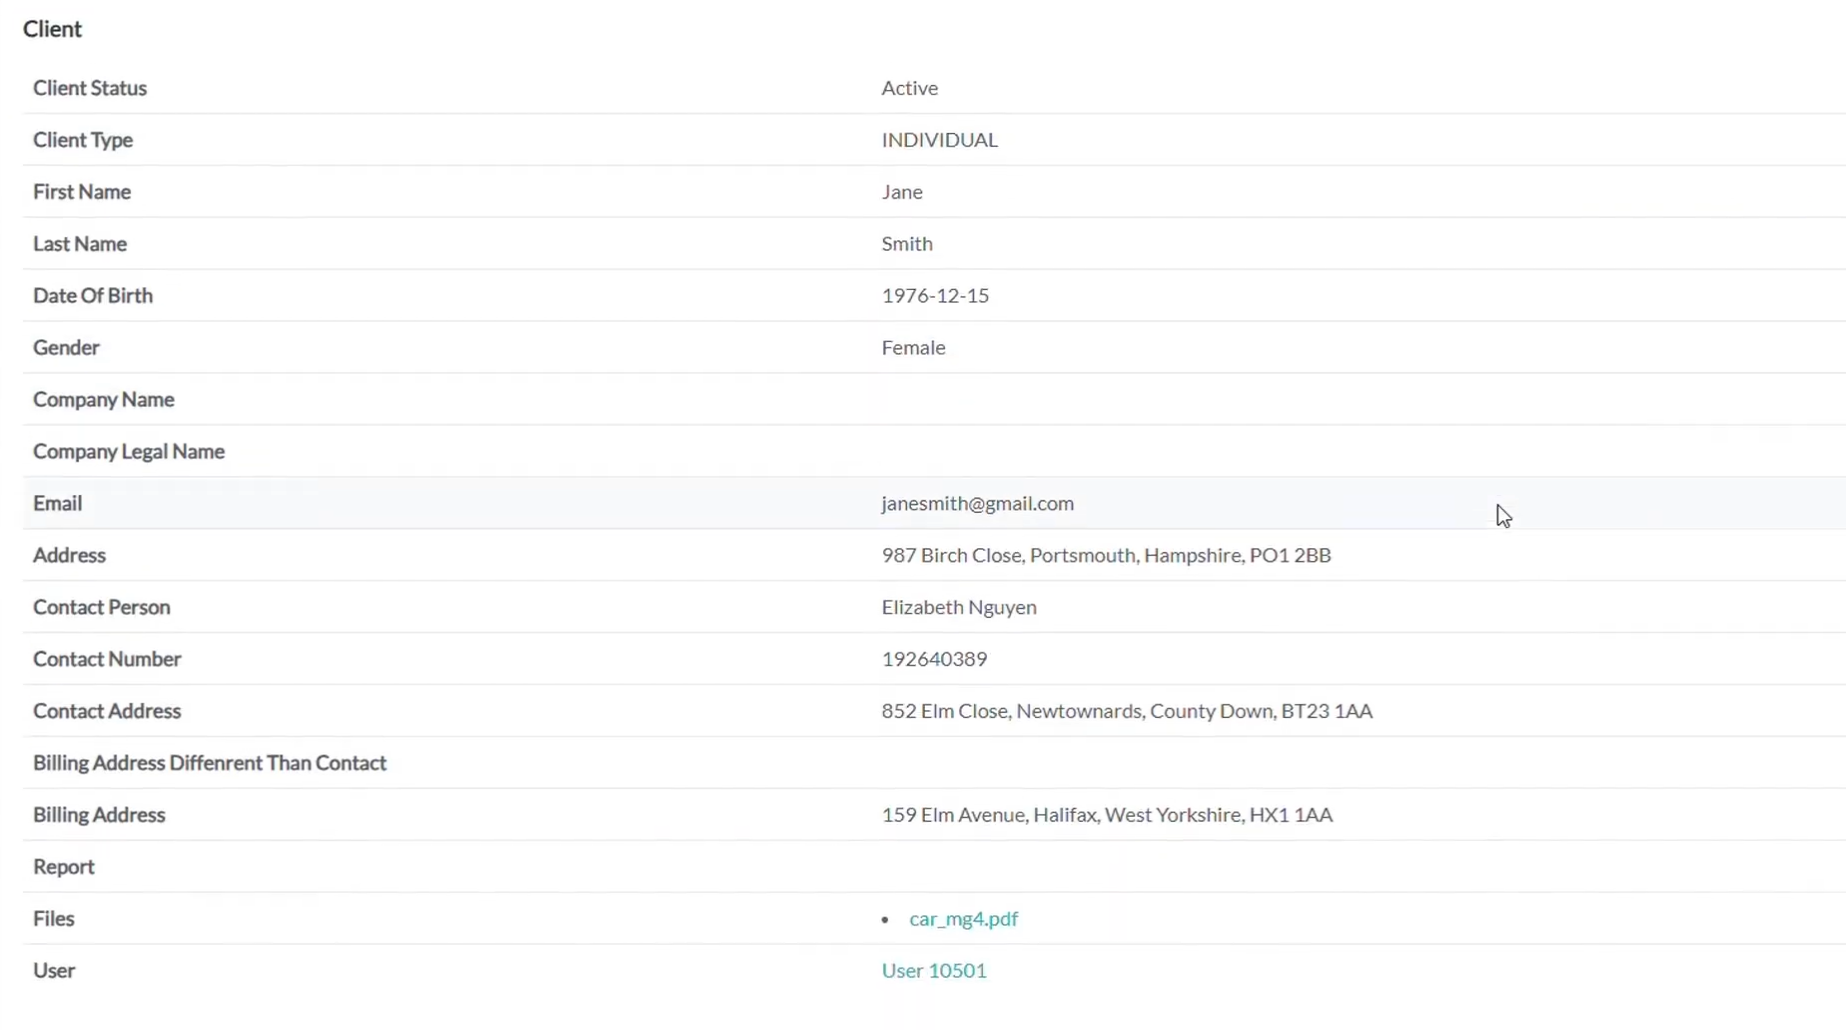
And assign a user Jane Smith the role of Client. In this way, she will gain access to her Client portal.

Step 6: Consolidate Components
Once widgets and roles are configured, bring everything together into a unified Client Portal screen within the Openkoda CMS.


Double-check that custom privileges are correctly restricting access to only the designated areas.
Step 7: Test the Client Portal
Finally, log in as a client to test the insurance customer portal.
You should now see all the components working together seamlessly:
- Customer data and personal details
- Insurance documents and attachments
- Policy management features
- Claims processing features with updated statuses
- Notes and upcoming payments
With everything consolidated into one interface, you’ve successfully built a modern insurance portal that improves operational efficiency, lowers operational costs, safeguards sensitive data, and ensures customer satisfaction.
Insurance Web Portal Development With Openkoda
As we wrap up this guide, it’s worth looking at why Openkoda is such a powerful choice for insurance portal development.
Designed with the insurance industry in mind, Openkoda combines prebuilt components with a flexible, open-source core.
This means insurers can get a working prototype up and running in a fraction of the usual time, while still having full control to customize and scale the solution.
What sets Openkoda apart is its balance between speed and flexibility. Out-of-the-box, it comes with ready-to-use modules for claims, policies, and customer dashboards, which can be extended to fit specific business processes. Its open architecture ensures there’s no vendor lock-in, giving insurers ownership of both the code and the data.
On top of that, Openkoda includes advanced features like role-based access for sensitive data, automated policy renewals, and AI-powered reporting.
These tools not only make it easier to deliver operational efficiency insurance portals but also help insurers increase operational efficiency, reduce repetitive work, and improve the customer experience.
Explore how Openkoda features can streamline your operations and provide the ideal solution for insurance businesses seeking innovative software and book a personal demo with us.